14Connecting
2
Connecting
Connecting to Your TV
Make one of the following connections, depending on the capabilities of your existing equipment.
yy Antenna connection to your TV and this unit (page 14)
yy HDMI connection (page 15)
yy Component Video connection (page 16) yy Scart connection (page 16)
,,Note
yy Depending on your TV and other equipment you wish to connect, there are various ways you could connect the unit. Use only one of the connections described in this manual.
yy Please refer to the manuals of your TV, Stereo System or other devices as necessary to make the best connections.
yy Make sure the player is connected directly to the TV. Tune the TV to the correct video input channel.
yy Do not connect the player’s AUDIO OUT jack to the phono in jack (record player) of your audio system.
yy Do not connect your player via your VCR. The image could be distorted by the copy protection system.
Antenna connection to your TV and this unit
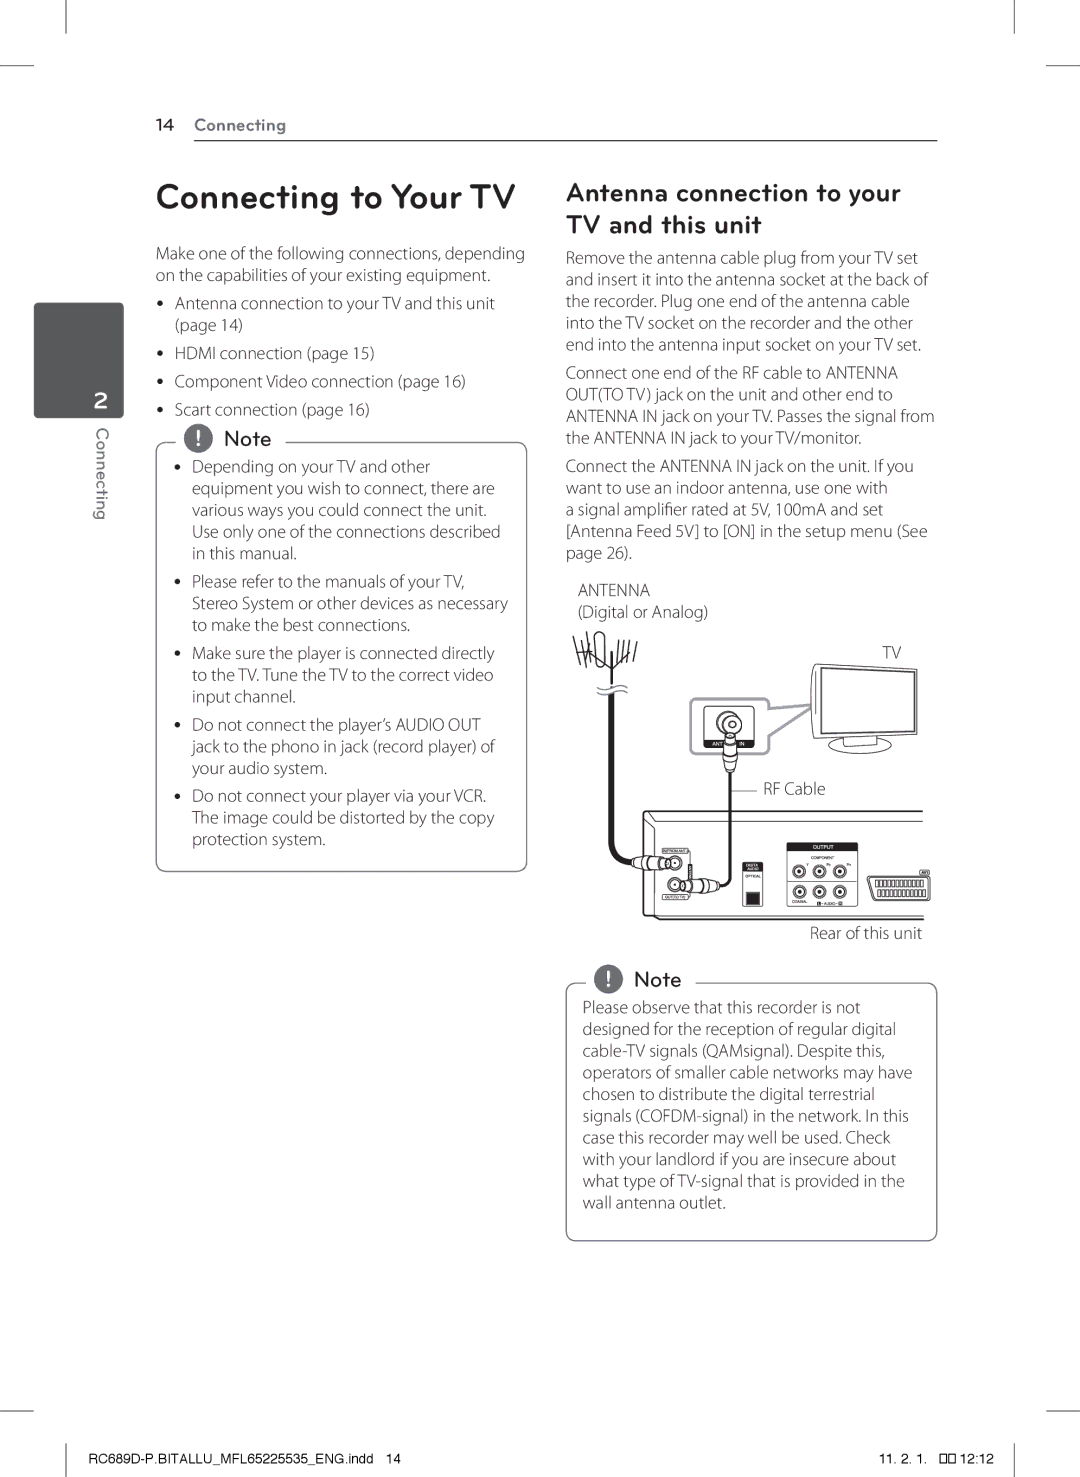
Remove the antenna cable plug from your TV set and insert it into the antenna socket at the back of the recorder. Plug one end of the antenna cable into the TV socket on the recorder and the other end into the antenna input socket on your TV set.
Connect one end of the RF cable to ANTENNA OUT(TO TV) jack on the unit and other end to ANTENNA IN jack on your TV. Passes the signal from the ANTENNA IN jack to your TV/monitor.
Connect the ANTENNA IN jack on the unit. If you want to use an indoor antenna, use one with
a signal amplifier rated at 5V, 100mA and set [Antenna Feed 5V] to [ON] in the setup menu (See page 26).
ANTENNA (Digital or Analog)
TV
RF Cable
Rear of this unit
,,Note
Please observe that this recorder is not designed for the reception of regular digital
11. 2. 1. |
��12:12
