INSTALLATION
Only install the winecooler/freezer in a stable kitch- en cabinet that has been properly aligned.
- Mount and fix the handles, depending on your model and choice.
Unpacking
Unpack the installation kit and check with the pro- vided parts list if all parts are included.
The part numbers given in the parts list are identical to the numbers in the respective figures.
For installation you will need the following tools:
Included:
- Star Key Torx® 15
- Star Key Torx® 20
- Star Key Torx® 25
- Socket Wrench 8 mm
-
Not in package:
- Phillips (star) screwdriver - Level
- Ruler
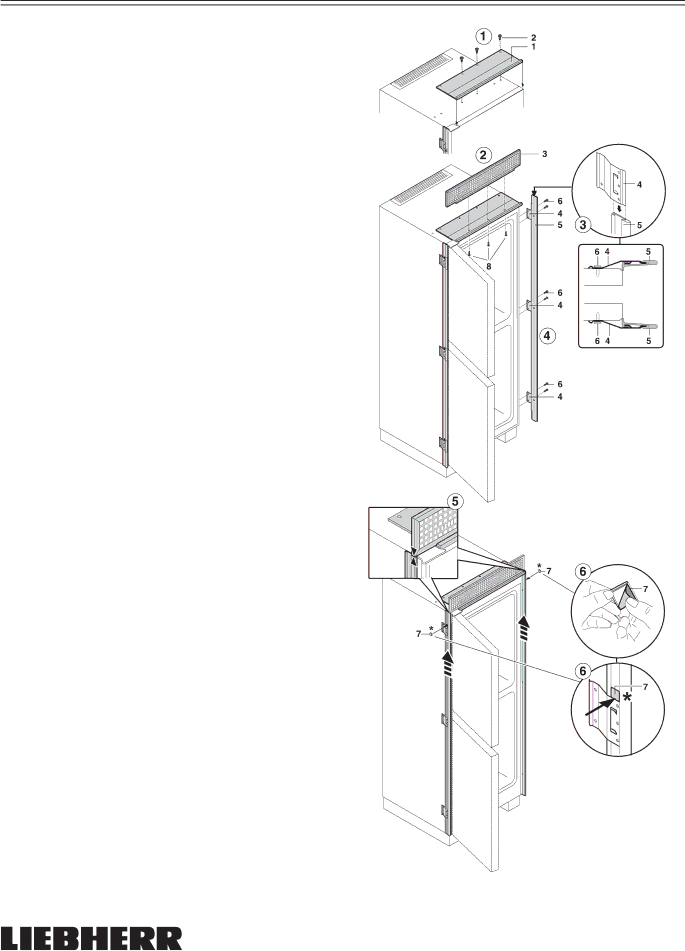
Figure 16: Installation with Ventilation Grille Set:
1.Screw the installation frame at the top (1) onto the appliance with screws (2).
2. Place the ventilation grille (3) on this, align it in the center and secure at the front from under- neath.
3. Slide brackets (4) onto the side installation frames (5) from above and below.
4. Using the frame (5), screw the brackets onto the side wall*.
5. Slide the side installation frames (5) upwards until they are in contact with the underside of the ventilation grille.
6. Secure the side frames with the adhesive sec- tion (7) to prevent them from sliding down. Remove the protective film and affix the adhe- sive sections over the upper brackets on the handle and hinge sides.
* Depending on model and options
LBR034
Figure 16
A delight in freshness
18 | WFI1051 / EWTN 2956 |
