INSTALLATION | ||
|
|
|
ALUMINUM WIRE PREPARATIONS
![]() WARNING
WARNING
ELECTRIC SHOCK can kill.
• Turn the input power OFF at the dis- connect switch before working on this equipment.
• Do not touch electrically hot parts.
Welding with aluminum filler wires requires extra care. Aluminum wire is softer and not as stiff as steel wires, it is important to keep aluminum wire free of dirt and scratches. Limit gun length to 10 Ft.(3.0 m) for best results and use a spool cover if feeding from a spool.
To prevent scratching of the aluminum wire, remove the ball bearings from the ball housing as follows.
(For Codes 11075, 11076, 11077) Tools required: (See Figure A.12a)
•Snap Ring Pliers
•9/64" Hex key wrench
1.Turn off power at the welding power source.
2.Remove the snap ring holding the ball bushing assembly to the back of the wire feeder. Remove the ball bushing assembly.
FIGURE A.12a
(For Codes 11209, 11210, 11211 and above)
Tools required: (See Figure A.12b)
•9/64" Hex key wrench
1.Turn off power at the welding power source.
2.Remove the snap ring holding the ball bushing assembly to the back of the wire feeder. Remove the ball bushing assembly.
FIGURE A.12b
"O" RING
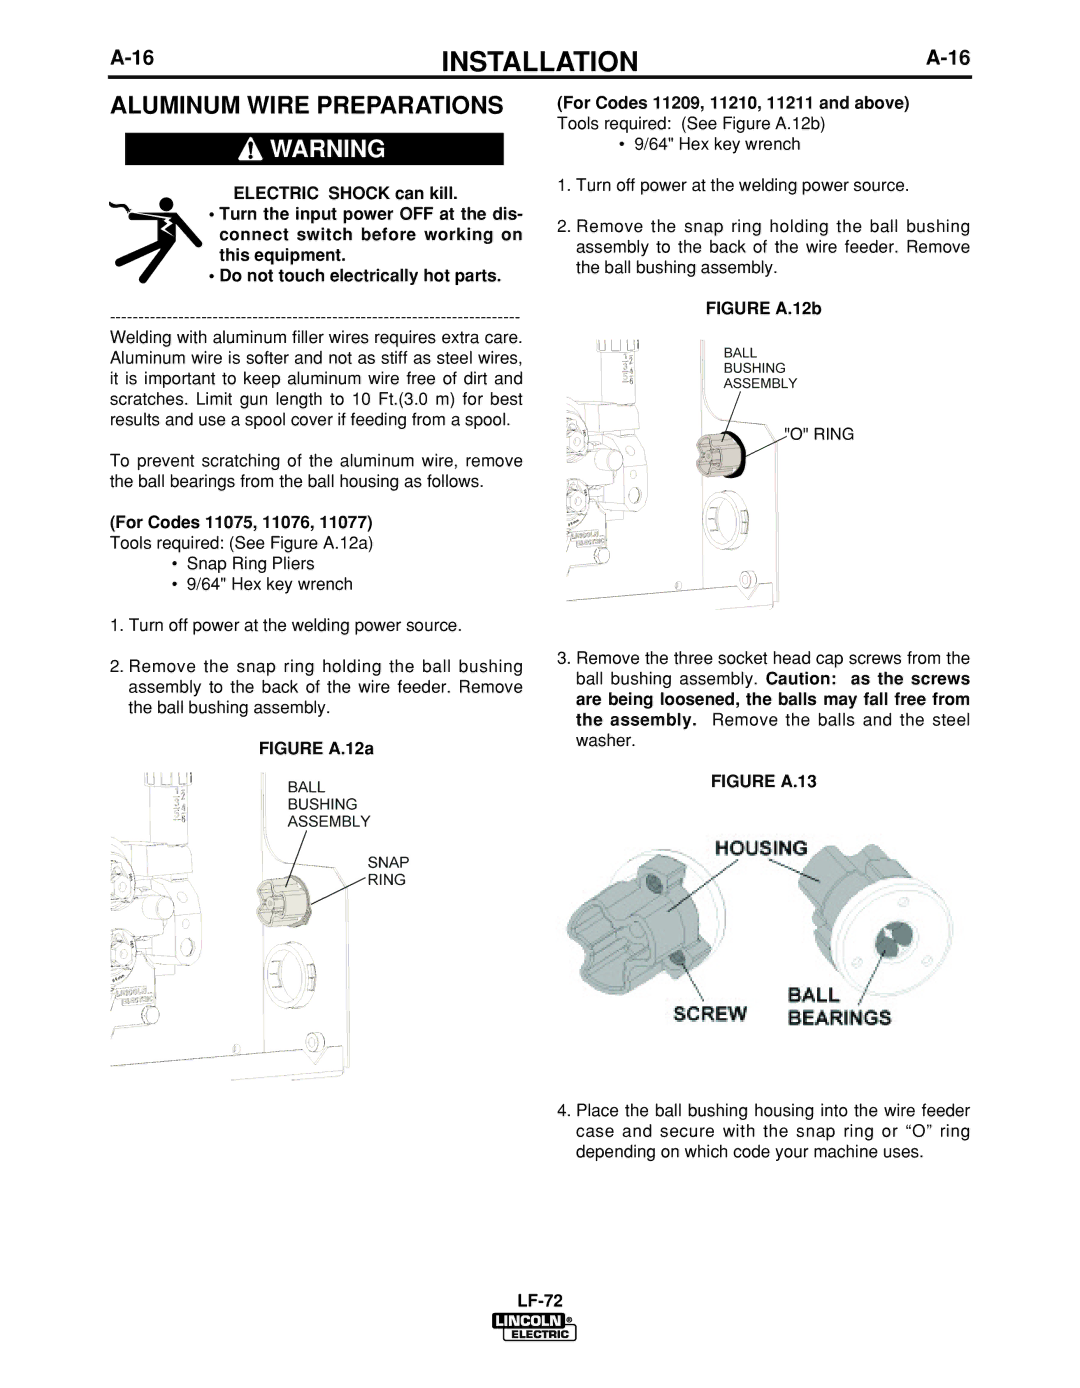
3.Remove the three socket head cap screws from the ball bushing assembly. Caution: as the screws are being loosened, the balls may fall free from the assembly. Remove the balls and the steel washer.
FIGURE A.13
4.Place the ball bushing housing into the wire feeder case and secure with the snap ring or “O” ring depending on which code your machine uses.