3.2 Installation
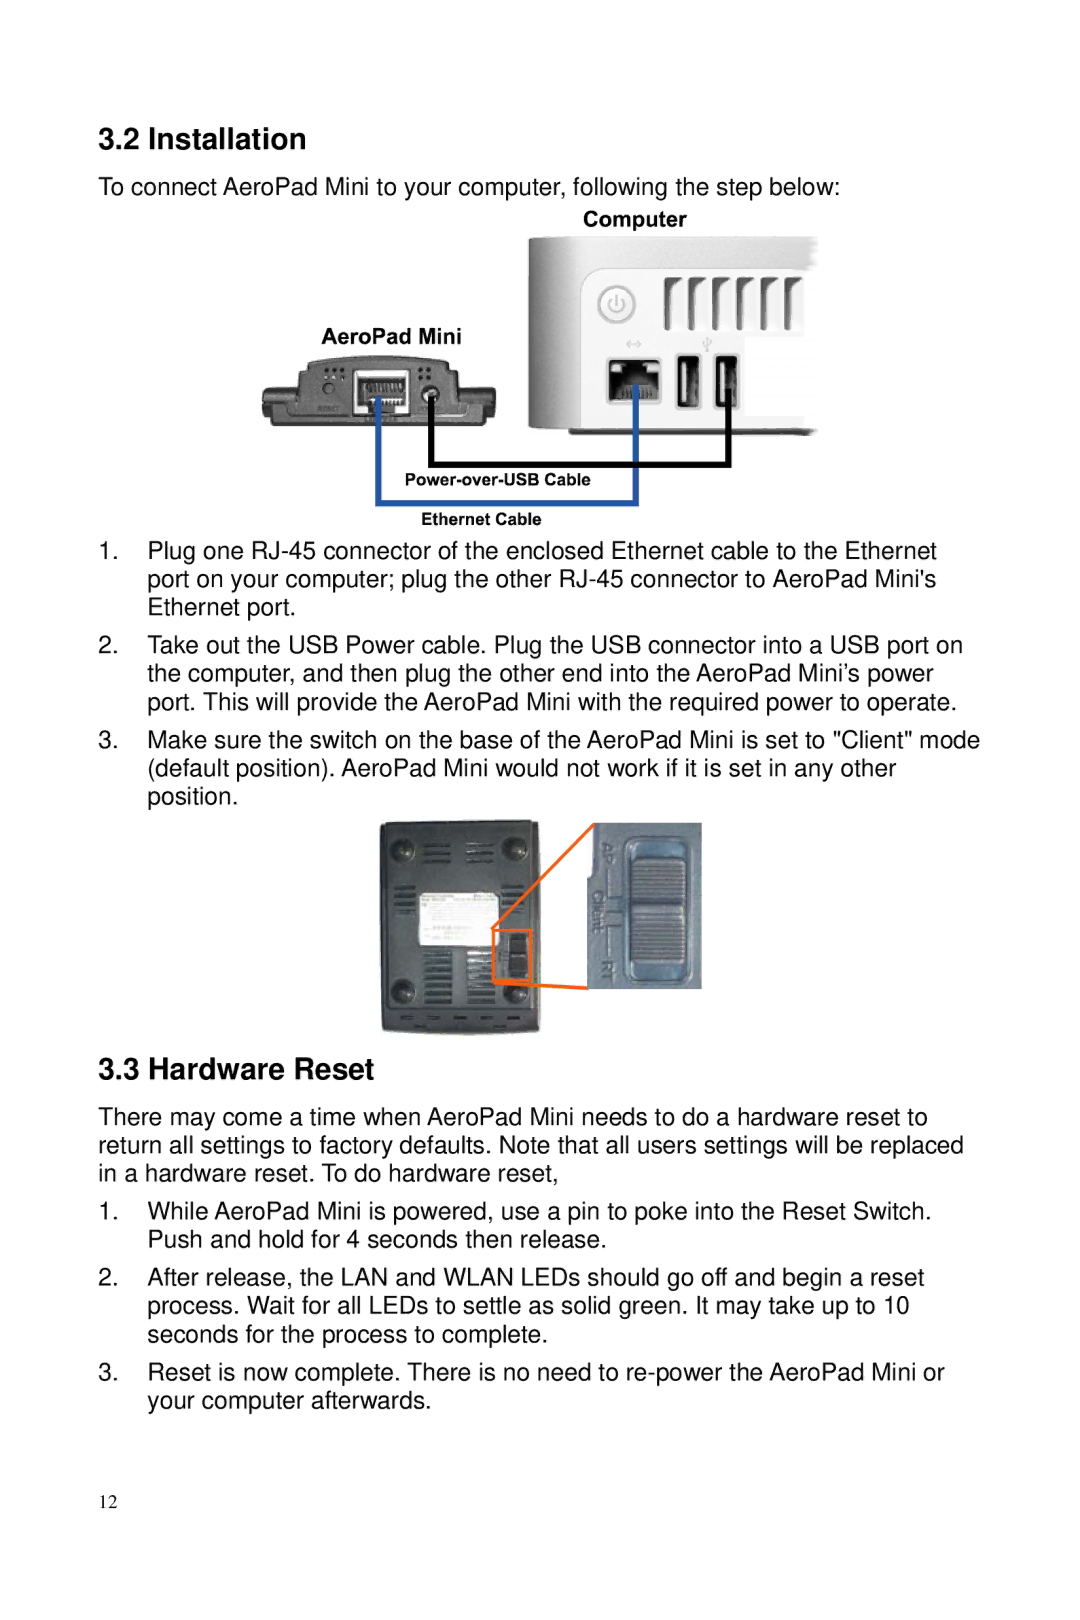
To connect AeroPad Mini to your computer, following the step below:
1.Plug one
2.Take out the USB Power cable. Plug the USB connector into a USB port on the computer, and then plug the other end into the AeroPad Mini’s power port. This will provide the AeroPad Mini with the required power to operate.
3.Make sure the switch on the base of the AeroPad Mini is set to "Client" mode (default position). AeroPad Mini would not work if it is set in any other position.
3.3 Hardware Reset
There may come a time when AeroPad Mini needs to do a hardware reset to return all settings to factory defaults. Note that all users settings will be replaced in a hardware reset. To do hardware reset,
1.While AeroPad Mini is powered, use a pin to poke into the Reset Switch. Push and hold for 4 seconds then release.
2.After release, the LAN and WLAN LEDs should go off and begin a reset process. Wait for all LEDs to settle as solid green. It may take up to 10 seconds for the process to complete.
3.Reset is now complete. There is no need to
12