Manual (Wired)
In the following cases, select “Manual”(wired) to set each setting as necessary.
-If a network connection could not be established when the setting was “Auto”(wired).
-When instructed by your Internet service provider to make specific settings in accordance with your network environment.
1.Use [Í/ Æ] to select “Network Setup” in the home menu, then press [OK].
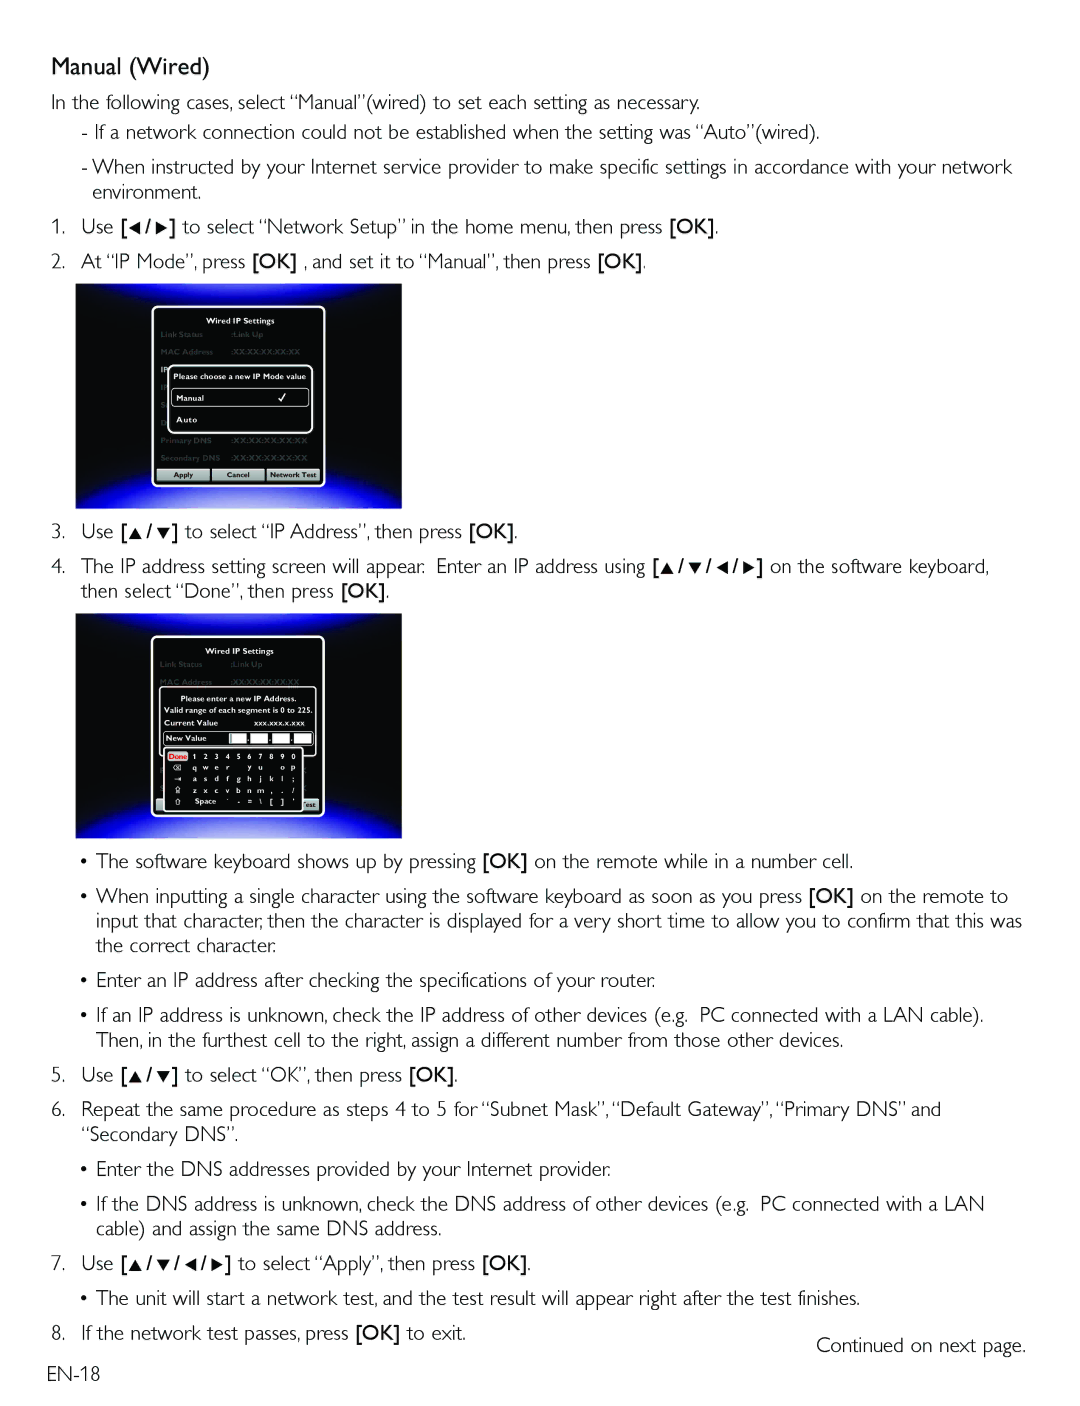
2.At “IP Mode”, press [OK] , and set it to “Manual”, then press [OK].
Wired IP Settings
Link Status | :Link Up |
|
|
MAC Address | :XX:XX:XX:XX:XX | ||
IP Mode | :Manual |
|
|
Please choose a new IP Mode value | |||
IP Address | :XX:XX:XX:XX:XX | ||
Manual | :XX:XX:XX:XX:XX | ||
Subnet Mask | |||
| . | . | . |
Auto | :XX:XX:XX:XX:XX | ||
Default Gateway | |||
Primary DNS | :XX:XX:XX:XX:XX | ||
Secondary DNS | :XX:XX:XX:XX:XX | ||
Apply | Cancel | Network Test | |
3.Use [Î/ ï] to select “IP Address”, then press [OK].
4.The IP address setting screen will appear. Enter an IP address using [Î/ ï/ Í/ Æ] on the software keyboard, then select “Done”, then press [OK].
Wired IP Settings
Link Status | :Link Up |
MAC Address | :XX:XX:XX:XX:XX |
IP ModePlease enter a:Manualnew IP Address.
Valid range of each segment is 0 to 225.
IP Address |
|
|
| :XX:XX:XX:XX:XX | ||||||||
Current Value |
|
|
| xxx.xxx.x.xxx | ||||||||
Subnet Mask |
|
|
| :XX:XX:XX:XX:XX | . |
|
| |||||
New Value |
|
|
| . |
| . |
|
|
| |||
Default Gateway | 4 | :XX:XX:XX:XX:XX | ||||||||||
Done | 1 | 2 | 3 | 5 | 6 | 7 | 8 | 9 | 0 |
| ||
| q | w | e | r |
| y | u |
| o | p | ||
Primary DNS |
|
| :XX:XX:XX:XX:XX | |||||||||
| a | s | d | f | g | h | j | k | l | ; |
| |
Secondary DNS | v | :XX:XX:XX:XX:XX | ||||||||||
| z | x | c | b | n | m | , | . | / |
| ||
Apply | Space | ` | - | = | \ | [ | ] | ' |
| |||
|
|
| Cancel |
| Network Test | |||||||
•The software keyboard shows up by pressing [OK] on the remote while in a number cell.
•When inputting a single character using the software keyboard as soon as you press [OK] on the remote to input that character, then the character is displayed for a very short time to allow you to confirm that this was the correct character.
•Enter an IP address after checking the specifications of your router.
•If an IP address is unknown, check the IP address of other devices (e.g. PC connected with a LAN cable). Then, in the furthest cell to the right, assign a different number from those other devices.
5.Use [Î/ ï] to select “OK”, then press [OK].
6.Repeat the same procedure as steps 4 to 5 for “Subnet Mask”, “Default Gateway”, “Primary DNS” and “Secondary DNS”.
•Enter the DNS addresses provided by your Internet provider.
•If the DNS address is unknown, check the DNS address of other devices (e.g. PC connected with a LAN cable) and assign the same DNS address.
7.Use [Î/ ï/ Í/ Æ] to select “Apply”, then press [OK].
•The unit will start a network test, and the test result will appear right after the test finishes.
8. If the network test passes, press [OK] to exit. | Continued on next page. |
| |
|
