P 8 / 13
[3] -6. Disassembling/ Assembling of Gear Case Section (cont.)
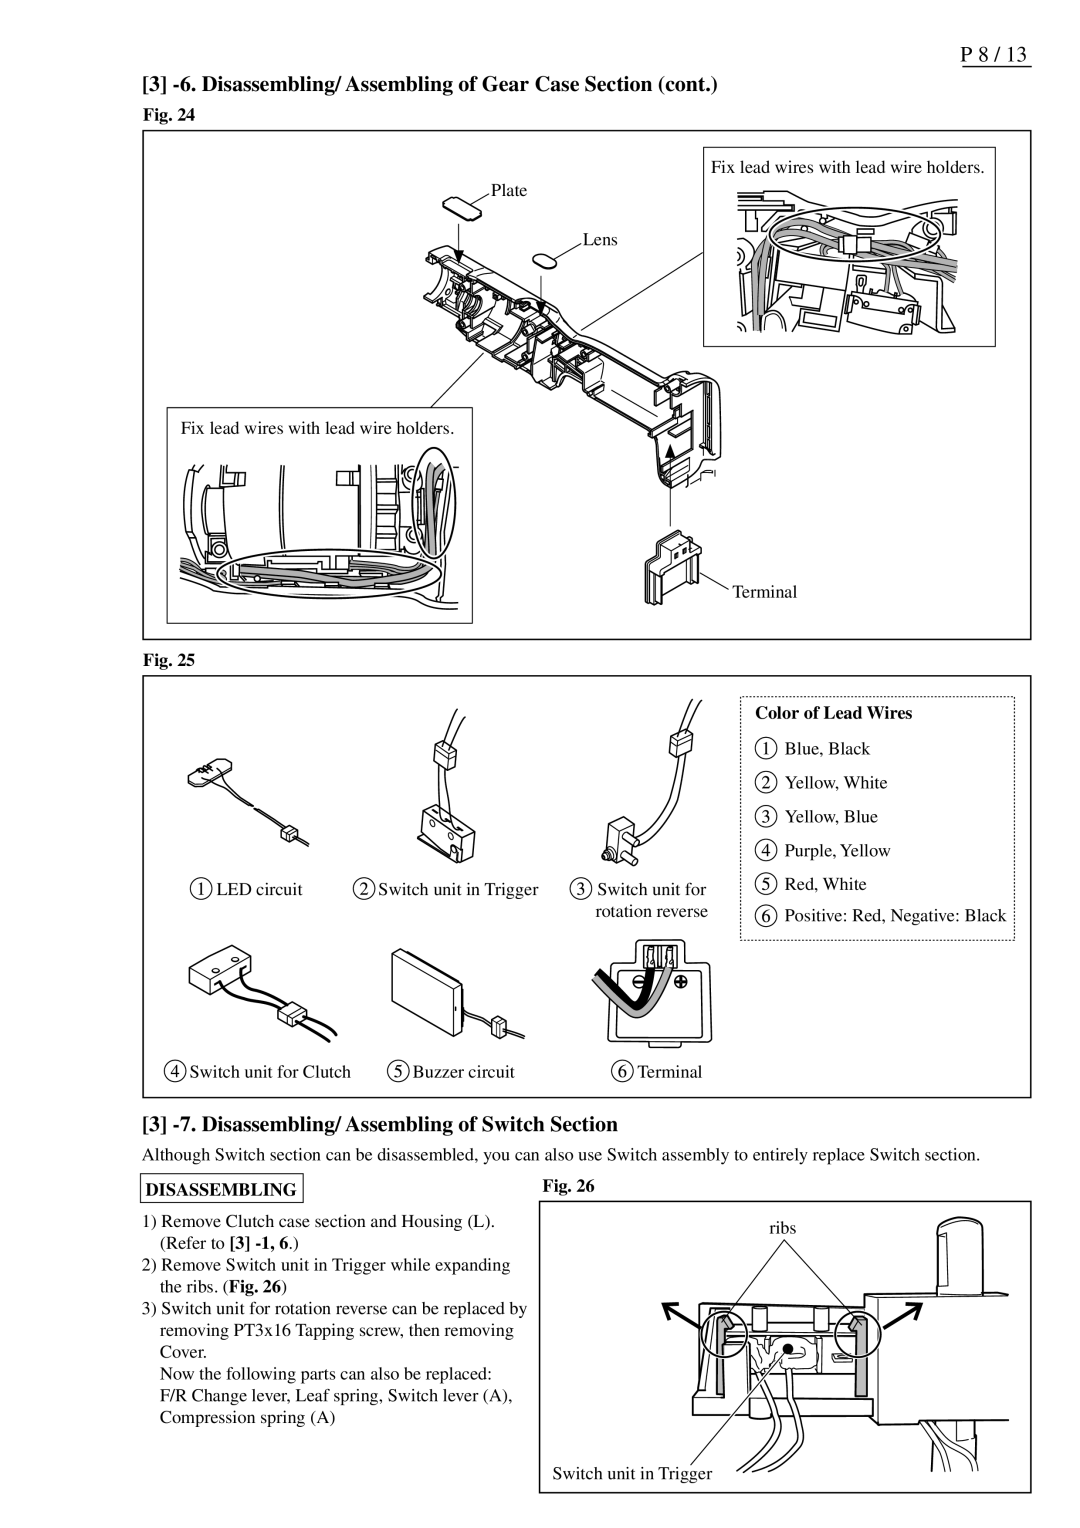
Fig. 24
Plate
Lens
Fix lead wires with lead wire holders.
Fix lead wires with lead wire holders.
Terminal
Fig. 25
|
|
| Color of Lead Wires |
|
|
| Blue, Black |
|
|
| Yellow, White |
|
|
| Yellow, Blue |
|
|
| Purple, Yellow |
LED circuit | Switch unit in Trigger | Switch unit for | Red, White |
| |||
|
| rotation reverse | Positive: Red, Negative: Black |
Switch unit for Clutch | Buzzer circuit | Terminal |
[3] -7. Disassembling/ Assembling of Switch Section
Although Switch section can be disassembled, you can also use Switch assembly to entirely replace Switch section.
DISASSEMBLING
1)Remove Clutch case section and Housing (L). (Refer to [3]
2)Remove Switch unit in Trigger while expanding the ribs. (Fig. 26)
3)Switch unit for rotation reverse can be replaced by removing PT3x16 Tapping screw, then removing Cover.
Now the following parts can also be replaced: F/R Change lever, Leaf spring, Switch lever (A), Compression spring (A)
Fig. 26
ribs
Switch unit in Trigger