P 16/ 25
 Repair
[3]DISASSEMBLY/ASSEMBLY
[3]-8. Carburetor
DISASSEMBLING, CLEANING
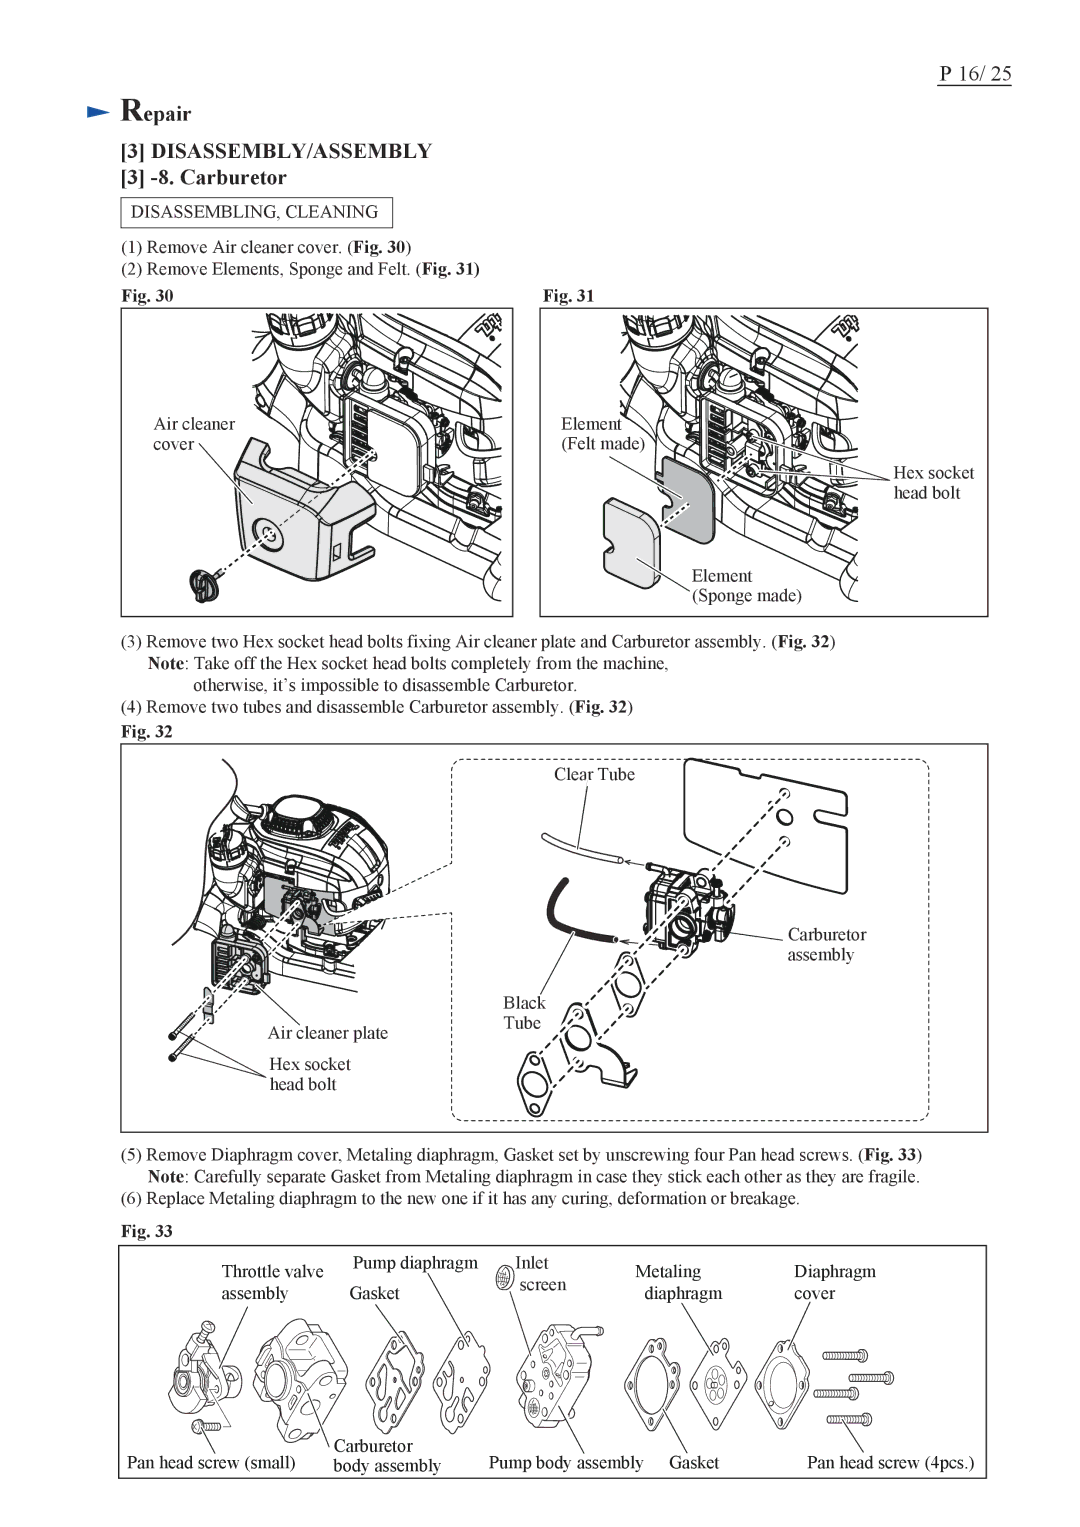
(1)Remove Air cleaner cover. (Fig. 30)
(2)Remove Elements, Sponge and Felt. (Fig. 31)
Fig. 30
Air cleaner |
cover |
Fig. 31
Element |
(Felt made) |
Hex socket |
head bolt |
Element |
(Sponge made) |
(3)Remove two Hex socket head bolts fixing Air cleaner plate and Carburetor assembly. (Fig. 32) Note: Take off the Hex socket head bolts completely from the machine,
otherwise, it’s impossible to disassemble Carburetor.
(4)Remove two tubes and disassemble Carburetor assembly. (Fig. 32)
Fig. 32
| Clear Tube |
| Carburetor |
| assembly |
| Black |
Air cleaner plate | Tube |
| |
Hex socket |
|
head bolt |
|
(5)Remove Diaphragm cover, Metaling diaphragm, Gasket set by unscrewing four Pan head screws. (Fig. 33) Note: Carefully separate Gasket from Metaling diaphragm in case they stick each other as they are fragile.
(6)Replace Metaling diaphragm to the new one if it has any curing, deformation or breakage.
Fig. 33
Throttle valve | Pump diaphragm | Inlet | Metaling | Diaphragm | |
| screen | ||||
assembly | Gasket | diaphragm | cover | ||
|
Pan head screw (small) | Carburetor | Pump body assembly Gasket | Pan head screw (4pcs.) |
body assembly |