P 17/ 25
 Repair
[3]DISASSEMBLY/ASSEMBLY
[3]-8. Carburetor (cont.)
DISASSEMBLING, CLEANING
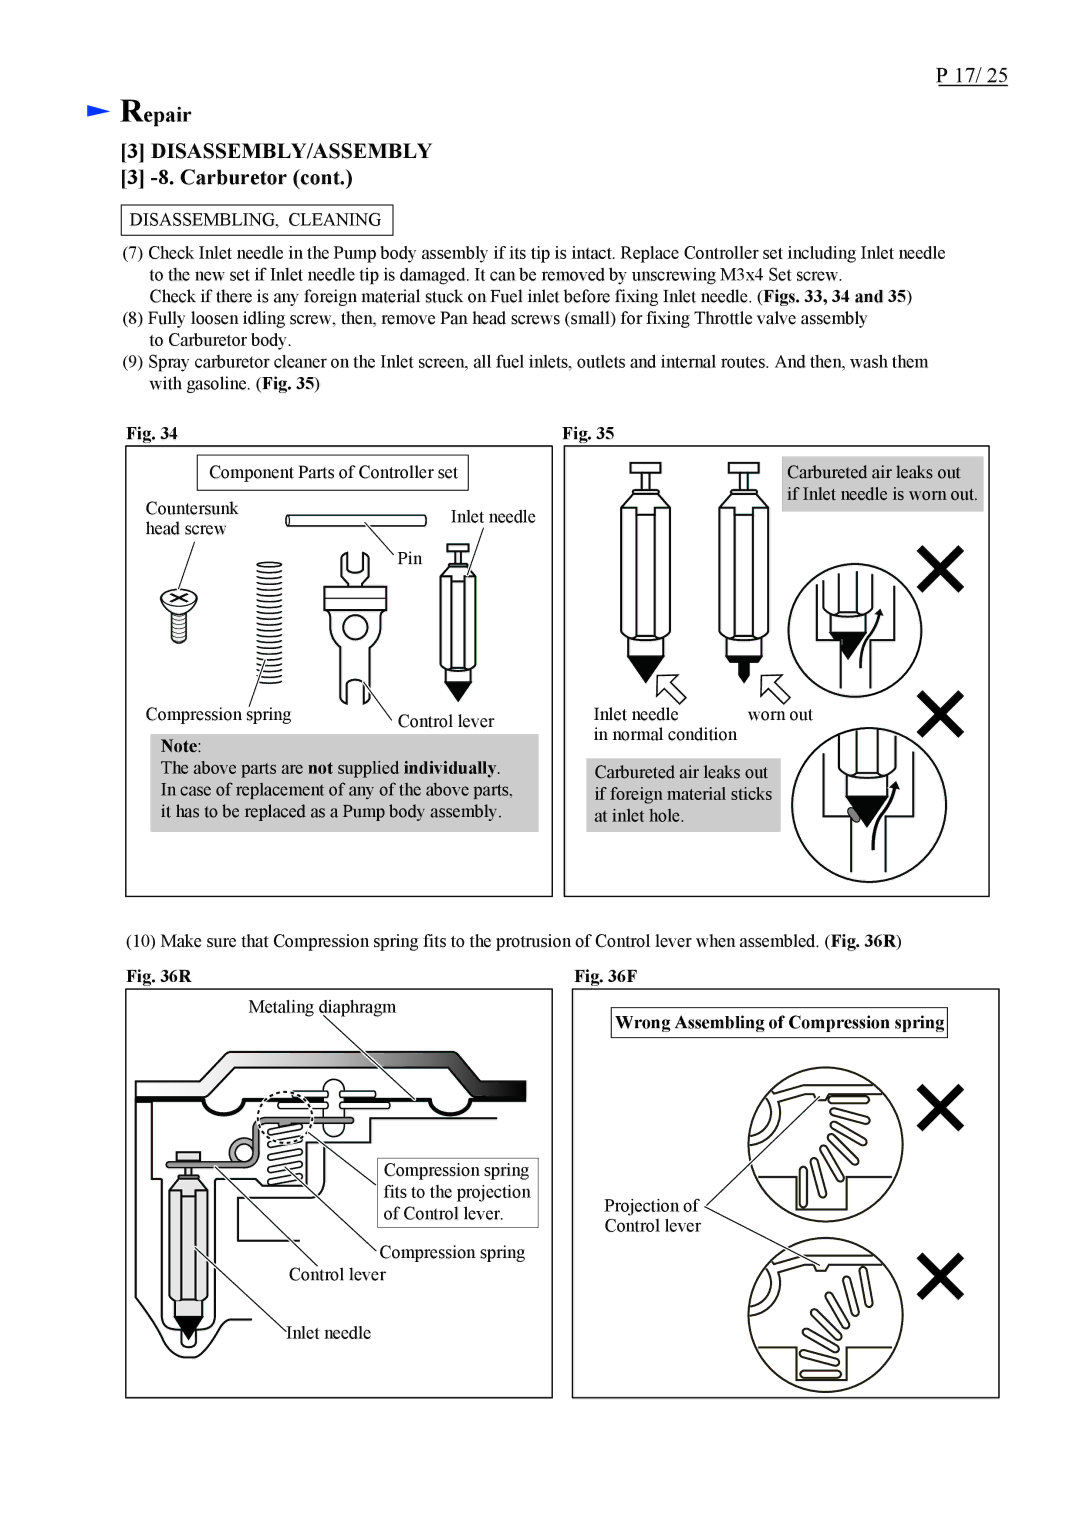
(7)Check Inlet needle in the Pump body assembly if its tip is intact. Replace Controller set including Inlet needle to the new set if Inlet needle tip is damaged. It can be removed by unscrewing M3x4 Set screw.
Check if there is any foreign material stuck on Fuel inlet before fixing Inlet needle. (Figs. 33, 34 and 35)
(8)Fully loosen idling screw, then, remove Pan head screws (small) for fixing Throttle valve assembly to Carburetor body.
(9)Spray carburetor cleaner on the Inlet screen, all fuel inlets, outlets and internal routes. And then, wash them with gasoline. (Fig. 35)
Fig. 34
Component Parts of Controller set
Countersunk | Inlet needle | |
head screw | ||
| ||
| Pin |
Compression spring | Control lever |
|
Note:
The above parts are not supplied individually. In case of replacement of any of the above parts, it has to be replaced as a Pump body assembly.
Fig. 35
Carbureted air leaks out if Inlet needle is worn out.
Inlet needle | worn out |
in normal condition |
|
Carbureted air leaks out if foreign material sticks at inlet hole.
(10) Make sure that Compression spring fits to the protrusion of Control lever when assembled. (Fig. 36R)
Fig. 36R
Metaling diaphragm
Compression spring fits to the projection of Control lever.
Compression spring
Control lever
Inlet needle
Fig. 36F
Wrong Assembling of Compression spring |
Projection of |
Control lever |