PAGE 10
INTRODUCTION

 Identification
 of
of Controls
 (Cont’d)


REMOTE CONTROL
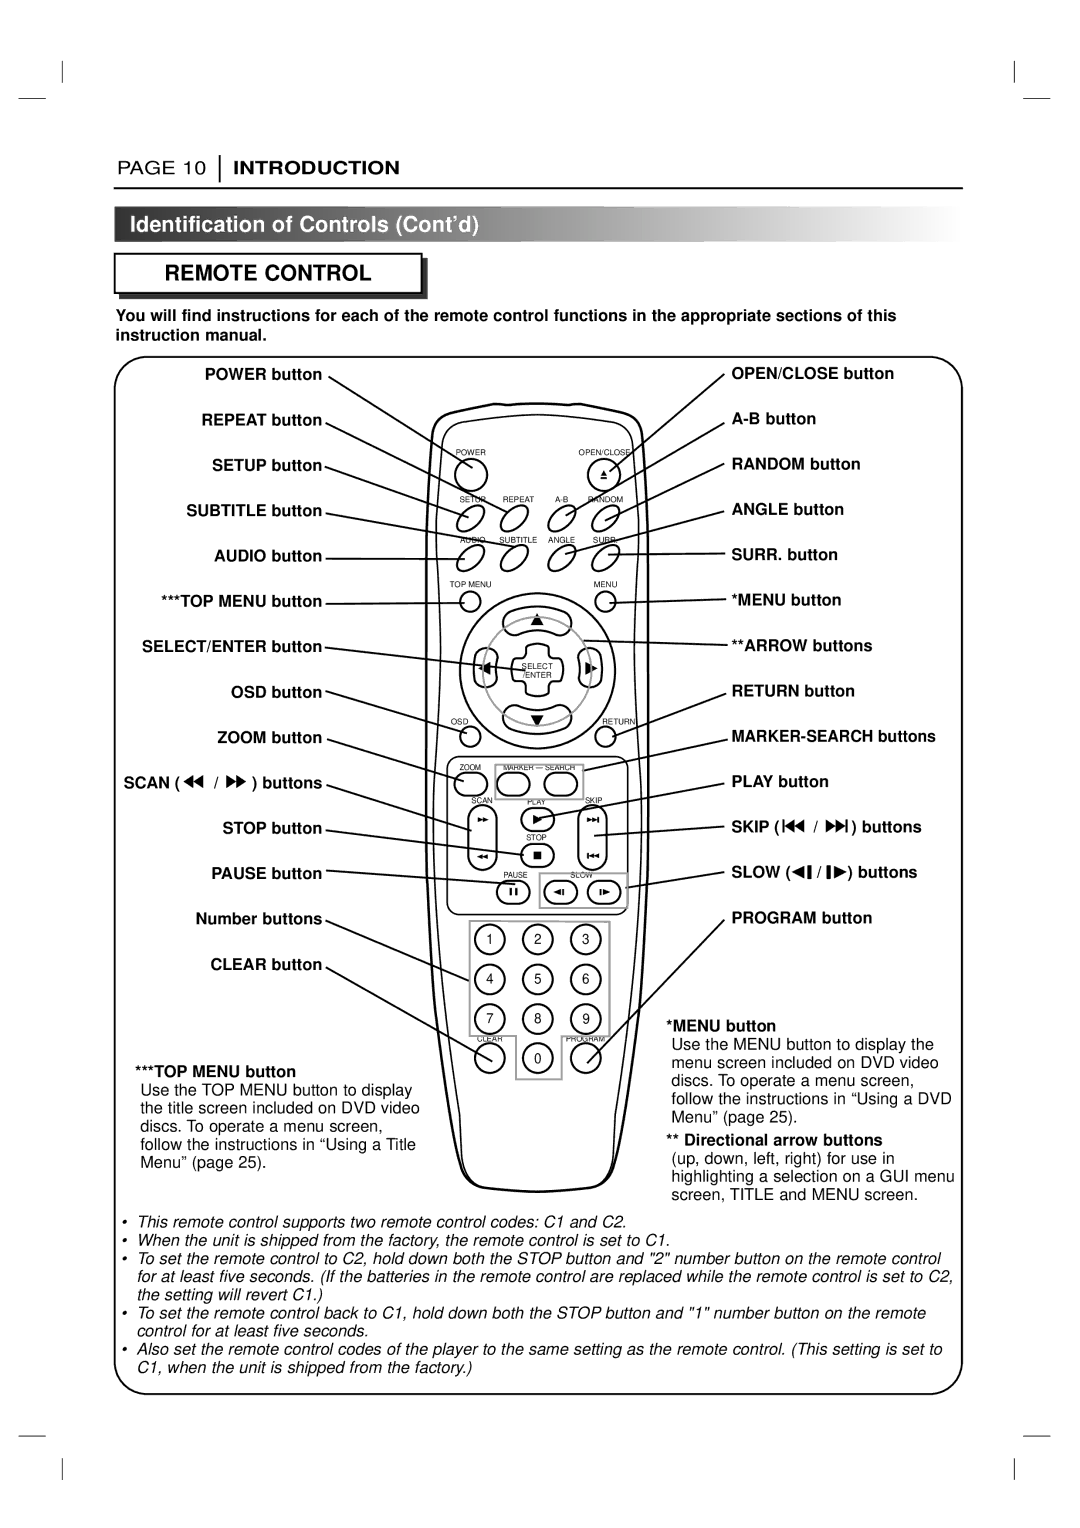
You will find instructions for each of the remote control functions in the appropriate sections of this instruction manual.
POWER button
REPEAT button
SETUP button
SUBTITLE button
AUDIO button
***TOP MENU button
SELECT/ENTER button
OSD button
ZOOM button
SCAN ( ![]()
![]() /
/ ![]()
![]() ) buttons
) buttons
POWER | OPEN/CLOSE |
SETUP REPEAT
AUDIO SUBTITLE ANGLE SURR.
TOP MENU | MENU |
SELECT /ENTER
OSD |
| RETURN |
ZOOM | MARKER — SEARCH |
|
SCAN | PLAY | SKIP |
STOP button
PAUSE button
Number buttons
CLEAR button
***TOP MENU button
Use the TOP MENU button to display the title screen included on DVD video discs. To operate a menu screen, follow the instructions in “Using a Title Menu” (page 25).
STOP
PAUSESLOW
1 2 3
4 5 6
7 8 9
CLEARPROGRAM
0
SKIP ( ![]()
![]()
![]() /
/ ![]()
![]()
![]() ) buttons
) buttons
![]() SLOW (FV / VG) buttons
SLOW (FV / VG) buttons
PROGRAM button
*MENU button
Use the MENU button to display the menu screen included on DVD video discs. To operate a menu screen, follow the instructions in “Using a DVD Menu” (page 25).
**Directional arrow buttons
(up, down, left, right) for use in highlighting a selection on a GUI menu screen, TITLE and MENU screen.
•This remote control supports two remote control codes: C1 and C2.
•When the unit is shipped from the factory, the remote control is set to C1.
•To set the remote control to C2, hold down both the STOP button and "2" number button on the remote control for at least five seconds. (If the batteries in the remote control are replaced while the remote control is set to C2, the setting will revert C1.)
•To set the remote control back to C1, hold down both the STOP button and "1" number button on the remote control for at least five seconds.
•Also set the remote control codes of the player to the same setting as the remote control. (This setting is set to C1, when the unit is shipped from the factory.)
