SVENSKA

NEDERLANDS

ITALIANO

DEUTSCH

ESPAÑOL

FRANÇAIS

ENGLISH

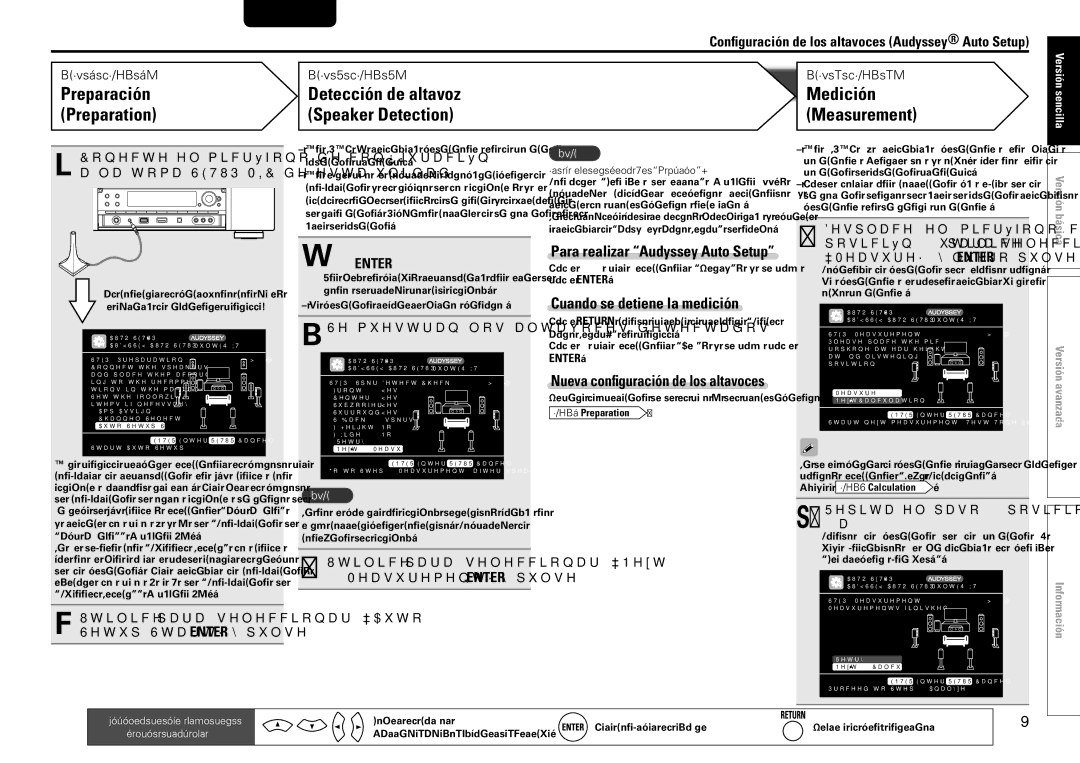
Configuración de los altavoces (Audyssey® Auto Setup)

PASO 1 (STEP 1)

Preparación

(Preparation)

PASO 2 (STEP 2)

PASO 3 (STEP 3)

Detección de altavoz

Medición

(Speaker Detection)

(Measurement)


Versión sencilla

4 Conecte el micrófono de configuración a la toma SETUP MIC de esta unidad.

Al conectar el micrófono con base, se abrirá la siguiente pantalla:

AUTO SETUP


AUDYSSEY AUTO SETUP

MultEQ XT

STEP1 Preparation

[1/6]

Connect the speakers


and place them accord-


ing to the recommenda-


tions in the manual.


Set the following


items if necessary.


Amp Assign


Channel Select


Auto Setup Start


ENTER Enter


RETURN Cancel

Start Auto Setup


Esta pantalla permite seleccionar el método para configurar la reproducción en 7.1 canales con altavoces surround traseros. Para ver el método de configuración de otros altavoces distinto del sistema de 7.1 canales, seleccione “Amp Assign”

y realice los pasos 3 y 4 de “Configuración de

“Amp Assign”” (vpágina 54).

Si se definen con “Channel Select” los canales que no se van a usar se puede acortar el tiempo de la medición. Para realizar la configuración, ejecute los pasos 5 a 9 de “Configuración de “Channel Select”” (vpágina 54).

5 Utilice ui para seleccionar “Auto

Setup Start” y pulse ENTER.

En STEP 2 realizará mediciones en la posición de audición principal.

En este paso se comprueba automáticamente la configuración y el tamaño de los altavoces, y se calcula el nivel de canal, la distancia y la frecuencia de transición. También corrige la distorsión en el área de audición.

6 Seleccionar “Measure”, y después pulse ENTER.

Una vez en marcha, reproducirá una serie de tonos de prueba por cada altavoz.

• La medición requiere varios minutos.

7 Se muestran los altavoces detectados.

AUTO SETUP


AUDYSSEY AUTO SETUP

MultEQ XT

STEP2 Spkr Detect Check

[2/6]

Front

Yes


Center

Yes


Subwoofer

Yes


Surround

Yes


S.Back

2spkrs


F.Height

No


F.Wide

No


Retry

Next Measurement

ENTER Enter RETURN Cancel

Go to Step 3 (Measurement) after speaker check

NOTA

Si no se muestra un altavoz detectado, quizás no esté correctamente conectado. Compruebe la conexión del altavoz.

8 Utilice ui para seleccionar “Next

1 Measurement” y pulse ENTER.

NOTA

Si aparece el mensaje “Caution”:

Consulte “Mensajes de error” (vpágina 11), compruebe cualquier elemento relacionado y realice los procedimientos necesarios.

Si el problema queda resuelto, vuelva atrás y empiece a realizar la “Audyssey Auto Setup” de nuevo.

Para realizar “Audyssey Auto Setup”

Pulse ui para seleccionar “Retry”, y después pulse ENTER.

Cuando se detiene la medición

Pulse RETURN cuando aparezca la pregunta “Cancel

Auto Setup?” en pantalla.

Pulse o para seleccionar “Yes”, y después pulse

ENTER.

Nueva configuración de los altavoces

Repita la operación desde el paso 4 del procedimiento STEP1 Preparation .

En STEP 3 realizará mediciones en varias posiciones (entre dos y ocho) que no sean la posición de audición principal.

Puede lograr una corrección más eficaz de la distorsión dentro del área de audición realizando mediciones en distintas posiciones.

9 Desplace el micrófono con base a la posición 2, utilice uipara seleccionar “Measure”, y luego pulse ENTER.

Comienza la medición del segundo punto. Las mediciones se pueden realizar hasta en ocho posiciones.

AUTO SETUP


AUDYSSEY AUTO SETUP

MultEQ XT

STEP3 Measurement

[3/6]

Please place the mic-


rophone at ear height


at 2nd listening


position.


Measure


Next Calculation


ENTER Enter


RETURN Cancel

Start next measurement. Test Tone will start

Si desea omitir las mediciones a partir del siguiente punto, seleccione “Next 1 Calculation”.

(Vaya a STEP4 Calculation )

10Repita el paso 9, posiciones de medición

3 a 8.

Cuando la medición de la posición 6 haya finalizado, se visualizará el mensaje “Measurements finished.”.

AUTO SETUP


AUDYSSEY AUTO SETUP

MultEQ XT

STEP3 Measurement

[3/6]

Measurements finished.


Versión básica

Versión avanzada

Información

Retry

Next Calculation

ENTER Enter

RETURN Cancel

Proceed to Step 4 (Analyze)


Botones de operación del

Mover el cursor

Para confirmar el ajuste

Regresa al menú anterior

9

mando a distancia

(Arriba/Abajo/Izquierda/Derecha)


Page 13
Image 13
Marantz SR7005 manual Preparación Preparation, Detección de altavoz Medición Speaker Detection Measurement

SR7005 specifications

The Marantz SR7005 is a sophisticated AV receiver that blends high-performance audio with advanced video capabilities, making it a popular choice among home theater enthusiasts. It's designed to provide an immersive entertainment experience, whether you're enjoying movies, music, or gaming.

One of the standout features of the SR7005 is its ability to deliver 125 watts per channel across seven channels. This powerful amplification ensures that even the most demanding audio tracks are rendered with clarity and precision. The receiver supports various surround sound formats, including Dolby TrueHD and DTS-HD Master Audio, making it an ideal choice for high-definition audio playback.

The SR7005 is equipped with a comprehensive connectivity suite. It includes multiple HDMI inputs and outputs that support 3D video and 4K pass-through, allowing you to connect a variety of high-definition devices. This feature ensures that your home theater system is future-proof and capable of handling the latest advancements in video technology.

Another significant aspect of the Marantz SR7005 is its proprietary audio technologies. It incorporates Marantz’s own HDAM (Hyper Dynamic Amplification Module) technology, which optimally processes audio signals to ensure an enriched audio experience. This technology minimizes distortion and maximizes clarity, providing a more engaging soundstage.

The receiver features Audyssey MultEQ XT, an advanced room calibration technology that analyzes your room's acoustics and adjusts the audio output to suit the environment. This results in a more balanced sound across all listening positions, offering an exceptional audio experience regardless of where you sit.

For users who prioritize streaming and wireless capabilities, the SR7005 includes built-in Ethernet connectivity and optional Wi-Fi. This allows for easy access to online music services, as well as the ability to stream from devices on your home network. Additionally, it supports Apple’s AirPlay, enabling seamless integration with iOS devices.

With its sleek design, intuitive interface, and robust performance, the Marantz SR7005 stands out as a versatile and powerful AV receiver. Its combination of high-quality audio, advanced video processing, and comprehensive connectivity options makes it an excellent choice for anyone looking to enhance their home theater setup. Whether you're watching movies, listening to music, or playing video games, the Marantz SR7005 provides a rich, immersive experience that brings your entertainment to life.