ENGLISH

WORKING WITH MODES

RC3200A starts up in Use mode. In this mode you operate your devices. For customizing the RC3200A (adjusting the settings, learning buttons or recording macros) you have to switch to the appropriate mode.

Note

When switching between modes you will always return to the last active screen.

The RC3200A can be put into 4 different modes. These modes are: Use mode: For operating your devices. See “Operating Devices”.

Setup mode: For changing the RC3200A system settings. See “Adjusting the Settings” for more details.

Learn mode: For learning commands from other remote controls. See “Learning Commands” for more details.

Macro mode: For recording macros. You can assign multiple commands to one single button. See “Recording Macros” for more details.

Note

Learning commands and recording macros is only possible per device. This means that you first have to select a specific device to perform these actions.

1.On the HOME screen tap the soft button of the device you want to customize.

The first page of the selected device appears.

2.Press and hold the Mode button for 3 seconds. The Mode screen appears.

Note

You have to press and hold the Mode button for 3 seconds to prevent accidental changes.

3. Select the desired mode from the Mode screen.

Note

When you switch to another mode from the HOME screen, you cannot choose the Learn mode and Macro mode. To switch to these modes you first have to go to the specific device you want to customize.

ADJUSTING THE SETTINGS

The RC3200A settings can be adjusted in the Setup mode.

1. Press and hold the Mode button for 3 seconds. The Mode screen appears.

2. Tap Setup in the Mode screen. The first Setup page appears.

The RC3200A settings consist of 3 setup pages with several settings per page.

Use the Page Up and Page Down buttons to navigate to the appropriate setup page.

FIRST SETUP PAGE

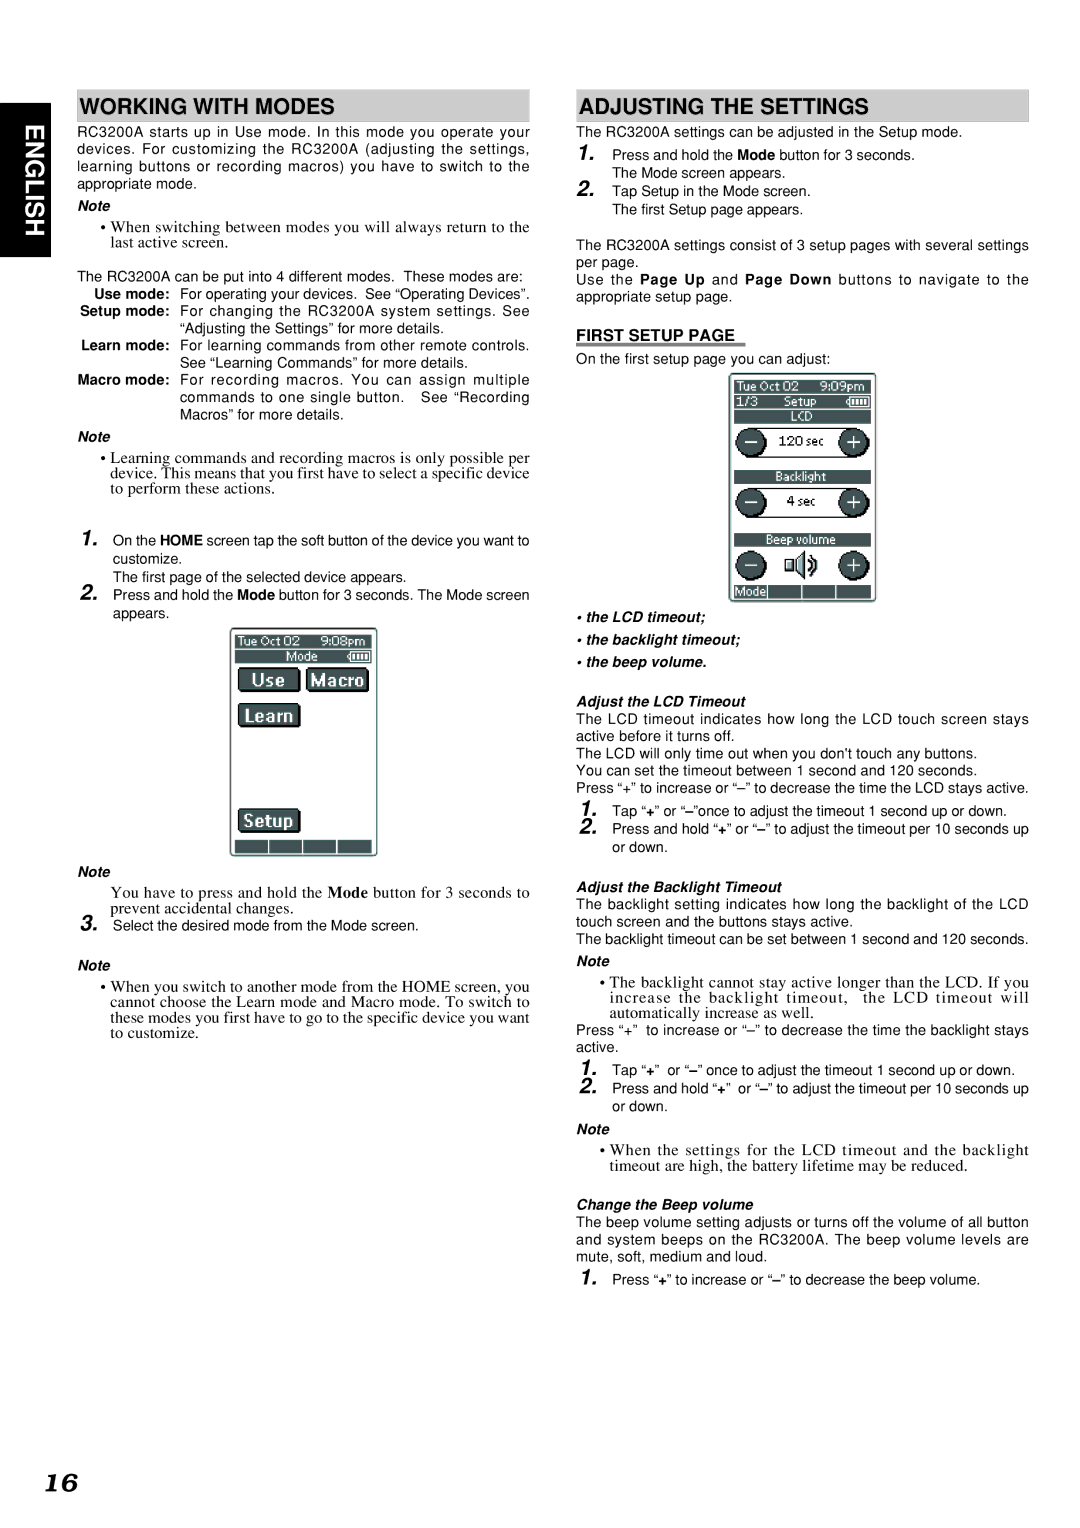
On the first setup page you can adjust:

the LCD timeout;

the backlight timeout;

the beep volume.

Adjust the LCD Timeout

The LCD timeout indicates how long the LCD touch screen stays active before it turns off.

The LCD will only time out when you don't touch any buttons. You can set the timeout between 1 second and 120 seconds.

Press “+” to increase or “–” to decrease the time the LCD stays active.

1. Tap “+” or ”once to adjust the timeout 1 second up or down.

2. Press and hold “+” or to adjust the timeout per 10 seconds up or down.

Adjust the Backlight Timeout

The backlight setting indicates how long the backlight of the LCD touch screen and the buttons stays active.

The backlight timeout can be set between 1 second and 120 seconds.

Note

The backlight cannot stay active longer than the LCD. If you increase the backlight timeout, the LCD timeout will automatically increase as well.

Press “+” to increase or “–” to decrease the time the backlight stays active.

1. Tap “+” or once to adjust the timeout 1 second up or down.

2. Press and hold “+” or to adjust the timeout per 10 seconds up or down.

Note

When the settings for the LCD timeout and the backlight timeout are high, the battery lifetime may be reduced.

Change the Beep volume

The beep volume setting adjusts or turns off the volume of all button and system beeps on the RC3200A. The beep volume levels are mute, soft, medium and loud.

1. Press “+” to increase or to decrease the beep volume.

16

Page 20
Image 20
Marantz SR9300 manual Working with Modes, Adjusting the Settings, First Setup, Adjust the Backlight Timeout

SR9300 specifications

The Marantz SR9300 is a high-performance audio/video receiver that has garnered a reputation for delivering exceptional sound quality and enhanced functionality. This receiver is part of the esteemed Marantz lineup, a brand that has been synonymous with premium audio equipment for decades. The SR9300 integrates advanced technologies and robust features that make it a favorite among audiophiles and home theater enthusiasts alike.

One of the standout features of the SR9300 is its multi-channel amplification capability. With a power output of 110 watts per channel across seven channels, it ensures that every sound detail is reproduced with clarity and precision, filling even the largest rooms with rich, immersive audio. This model supports a wide range of surround sound formats, including Dolby Digital EX and DTS ES, providing an enveloping sound experience that brings movies and music to life.

The SR9300 also incorporates Marantz’s proprietary technology, such as the HDAM (Hyper Dynamic Amplifier Module), which enhances the receiver's signal processing capabilities. This results in superior sound quality that minimizes distortion and noise, allowing the listener to appreciate the finer details of their favorite tracks. The unit is also equipped with a high-quality digital processor that supports advanced audio formats and ensures a seamless transition between stereo and surround sound.

In terms of video capabilities, the SR9300 offers multiple HDMI inputs and outputs, allowing for easy integration with various devices, including Blu-ray players and gaming consoles. It supports 1080p video pass-through, ensuring the highest video quality when connected to HD displays. The receiver also features upscaling technology, which enhances lower-resolution video sources to near-HD quality, providing a rich visual experience.

User-friendliness is another hallmark of the Marantz SR9300. The intuitive on-screen setup makes installation straightforward, while the included remote control provides convenient access to all features and settings. Additionally, the unit is compatible with various home automation systems, making it a flexible option for smart home integration.

Overall, the Marantz SR9300 stands out with its combination of powerful performance, versatile connectivity options, and superior sound quality, making it an excellent choice for anyone looking to elevate their home audio-visual experience. Whether you’re enjoying a blockbuster film or listening to your favorite album, the SR9300 delivers an unparalleled auditory experience that is sure to impress.