You will need to set the dip switches for both right and left channel. Note: Only one dip switch per dip switch cluster should be on at a time.
5If available, use test equipment to optimize the sub- woofer response.
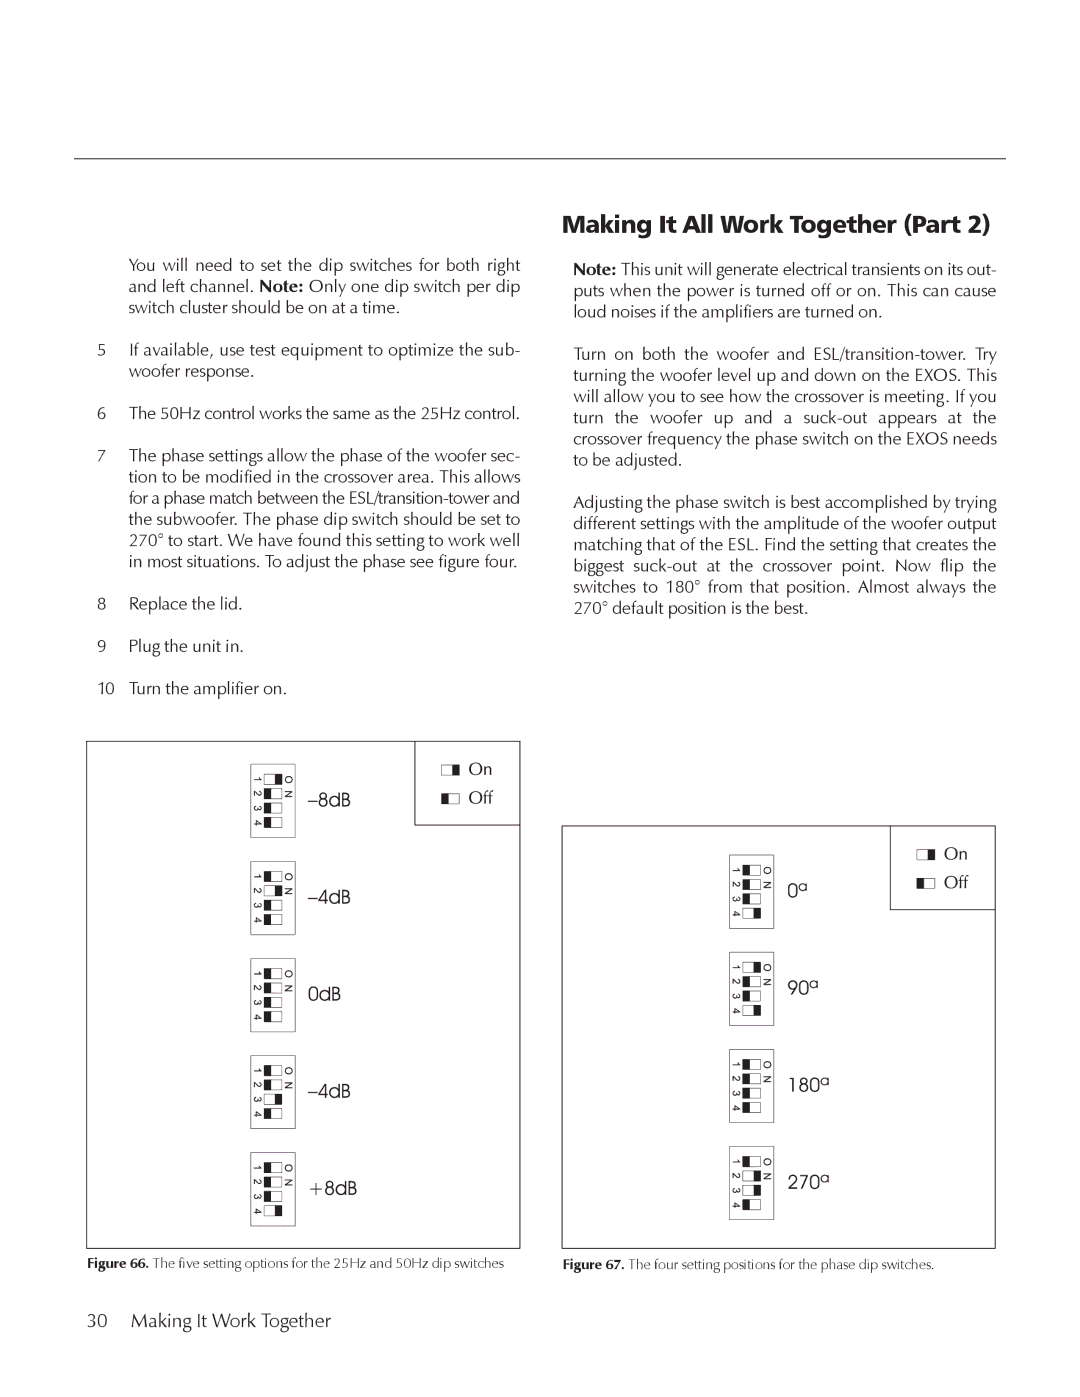
6The 50Hz control works the same as the 25Hz control.
7The phase settings allow the phase of the woofer sec- tion to be modified in the crossover area. This allows for a phase match between the
8Replace the lid.
9Plug the unit in.
10Turn the amplifier on.
Making It All Work Together (Part 2)
Note: This unit will generate electrical transients on its out- puts when the power is turned off or on. This can cause loud noises if the amplifiers are turned on.
Turn on both the woofer and
Adjusting the phase switch is best accomplished by trying different settings with the amplitude of the woofer output matching that of the ESL. Find the setting that creates the biggest
Figure 66. The five setting options for the 25Hz and 50Hz dip switches | Figure 67. The four setting positions for the phase dip switches. |