Figure 11
Figure 12
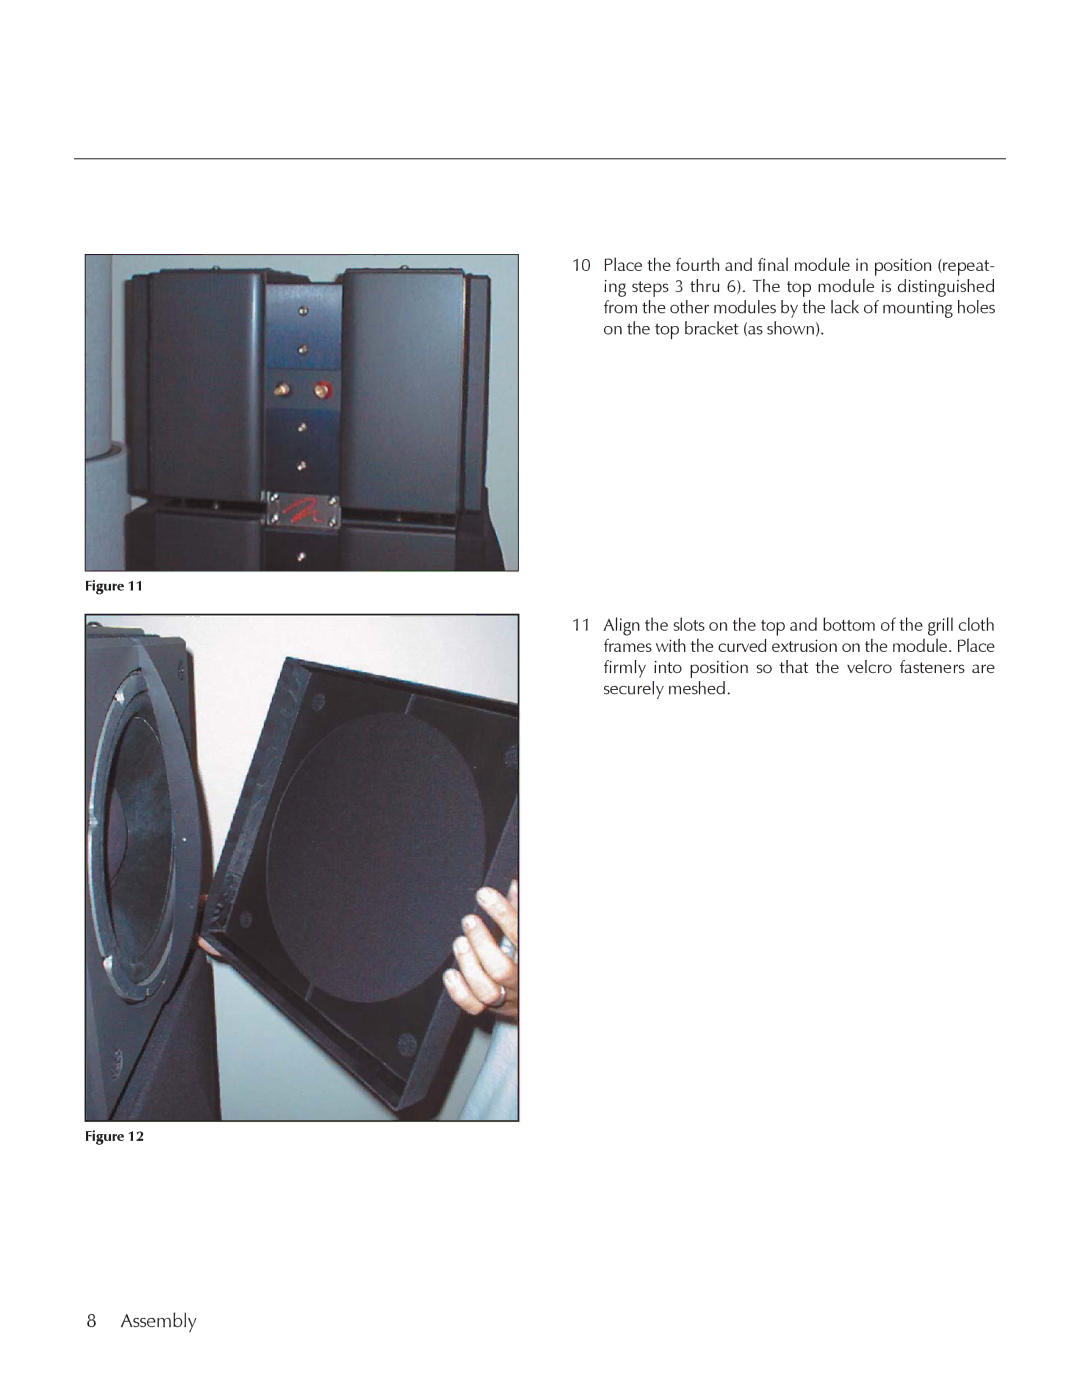
10Place the fourth and final module in position (repeat- ing steps 3 thru 6). The top module is distinguished from the other modules by the lack of mounting holes on the top bracket (as shown).
11Align the slots on the top and bottom of the grill cloth frames with the curved extrusion on the module. Place firmly into position so that the velcro fasteners are securely meshed.