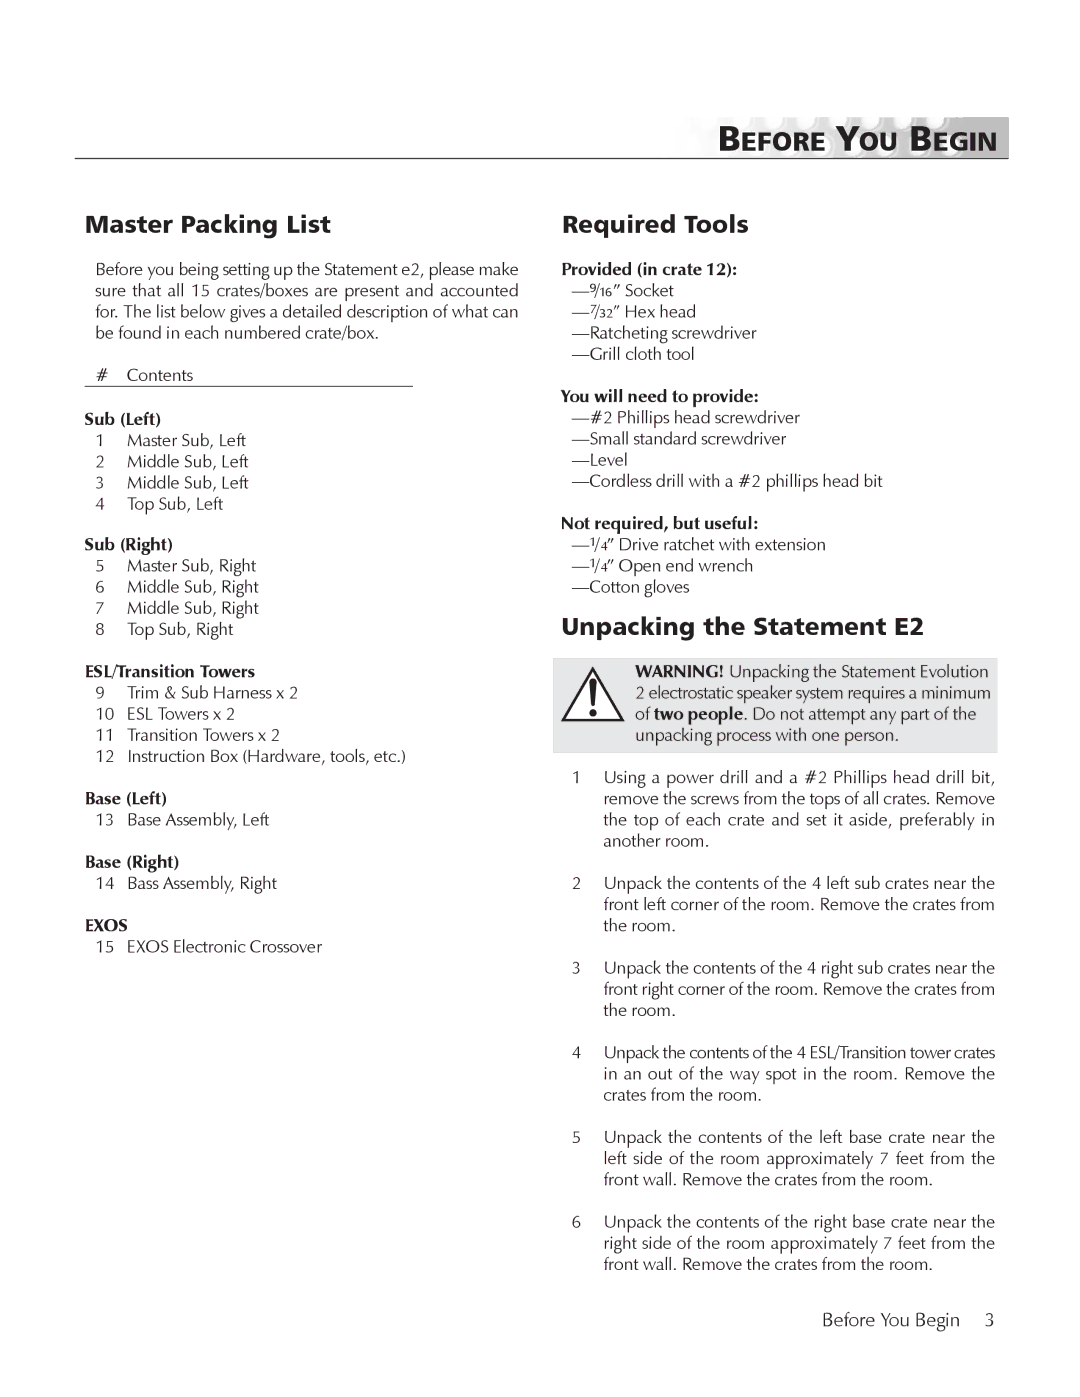
BEFORE YOU BEGIN
Master Packing List
Before you being setting up the Statement e2, please make sure that all 15 crates/boxes are present and accounted for. The list below gives a detailed description of what can be found in each numbered crate/box.
#Contents
Sub (Left)
1Master Sub, Left
2Middle Sub, Left
3Middle Sub, Left
4Top Sub, Left
Sub (Right)
5Master Sub, Right
6Middle Sub, Right
7Middle Sub, Right
8Top Sub, Right
ESL/Transition Towers
9Trim & Sub Harness x 2
10ESL Towers x 2
11Transition Towers x 2
12Instruction Box (Hardware, tools, etc.)
Base (Left)
13 Base Assembly, Left
Base (Right)
14 Bass Assembly, Right
EXOS
15 EXOS Electronic Crossover
Required Tools
Provided (in crate 12):
You will need to provide:
Not required, but useful:
Unpacking the Statement E2
WARNING! Unpacking the Statement Evolution 2 electrostatic speaker system requires a minimum of two people. Do not attempt any part of the unpacking process with one person.
1Using a power drill and a #2 Phillips head drill bit, remove the screws from the tops of all crates. Remove the top of each crate and set it aside, preferably in another room.
2Unpack the contents of the 4 left sub crates near the front left corner of the room. Remove the crates from the room.
3Unpack the contents of the 4 right sub crates near the front right corner of the room. Remove the crates from the room.
4Unpack the contents of the 4 ESL/Transition tower crates in an out of the way spot in the room. Remove the crates from the room.
5Unpack the contents of the left base crate near the left side of the room approximately 7 feet from the front wall. Remove the crates from the room.
6Unpack the contents of the right base crate near the right side of the room approximately 7 feet from the front wall. Remove the crates from the room.
Before You Begin 3
