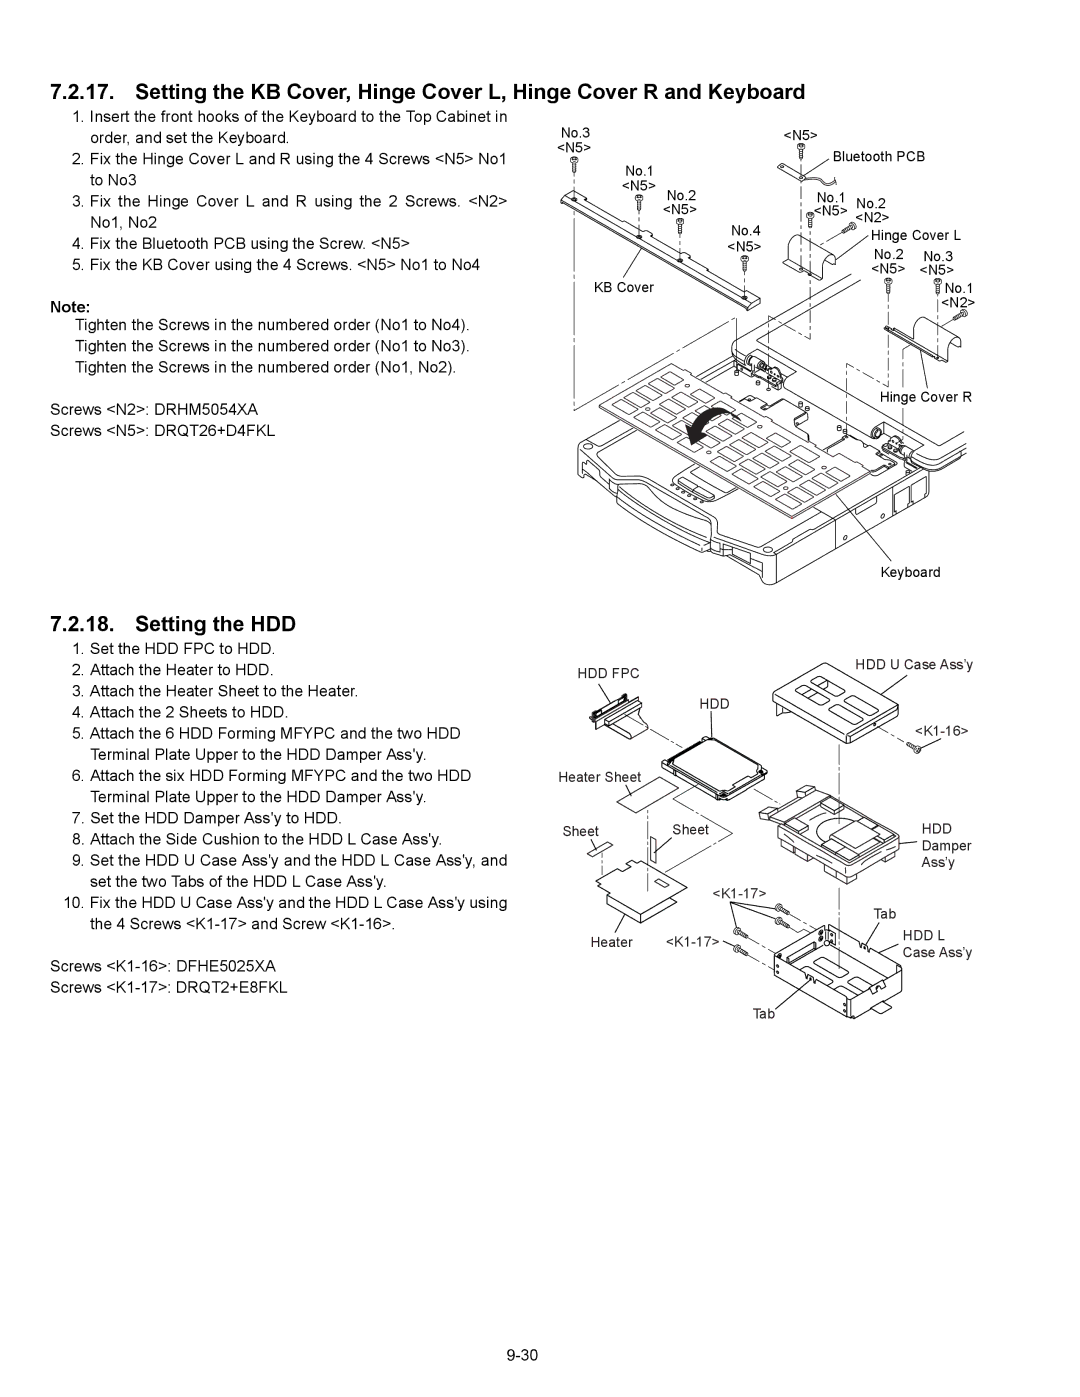
7.2.17. Setting the KB Cover, Hinge Cover L, Hinge Cover R and Keyboard
1.Insert the front hooks of the Keyboard to the Top Cabinet in order, and set the Keyboard.
2.Fix the Hinge Cover L and R using the 4 Screws <N5> No1 to No3
3.Fix the Hinge Cover L and R using the 2 Screws. <N2> No1, No2
4.Fix the Bluetooth PCB using the Screw. <N5>
5.Fix the KB Cover using the 4 Screws. <N5> No1 to No4
Note:
Tighten the Screws in the numbered order (No1 to No4). Tighten the Screws in the numbered order (No1 to No3). Tighten the Screws in the numbered order (No1, No2).
Screws <N2>: DRHM5054XA
Screws <N5>: DRQT26+D4FKL
No.3 | <N5> |
|
| |
<N5> | Bluetooth PCB | |||
No.1 | ||||
|
|
| ||
<N5> No.2 | No.1 | No.2 |
| |
<N5> | <N5> | <N2> |
| |
No.4 |
|
| ||
| Hinge Cover L | |||
<N5> |
| No.2 | No.3 | |
KB Cover |
| <N5> | <N5> | |
|
| No.1 | ||
|
|
| <N2> | |
Hinge Cover R
Keyboard
7.2.18. Setting the HDD
1.Set the HDD FPC to HDD.
2.Attach the Heater to HDD.
3.Attach the Heater Sheet to the Heater.
4.Attach the 2 Sheets to HDD.
5.Attach the 6 HDD Forming MFYPC and the two HDD Terminal Plate Upper to the HDD Damper Ass'y.
6.Attach the six HDD Forming MFYPC and the two HDD Terminal Plate Upper to the HDD Damper Ass'y.
7.Set the HDD Damper Ass'y to HDD.
8.Attach the Side Cushion to the HDD L Case Ass'y.
9.Set the HDD U Case Ass'y and the HDD L Case Ass'y, and set the two Tabs of the HDD L Case Ass'y.
10.Fix the HDD U Case Ass'y and the HDD L Case Ass'y using the 4 Screws
Screws
Screws
HDD FPC
HDD
Heater Sheet
Sheet Sheet
Heater ![]()
Tab
HDD U Case Ass’y
HDD
Damper
Ass’y
Tab
HDD L
Case Ass’y