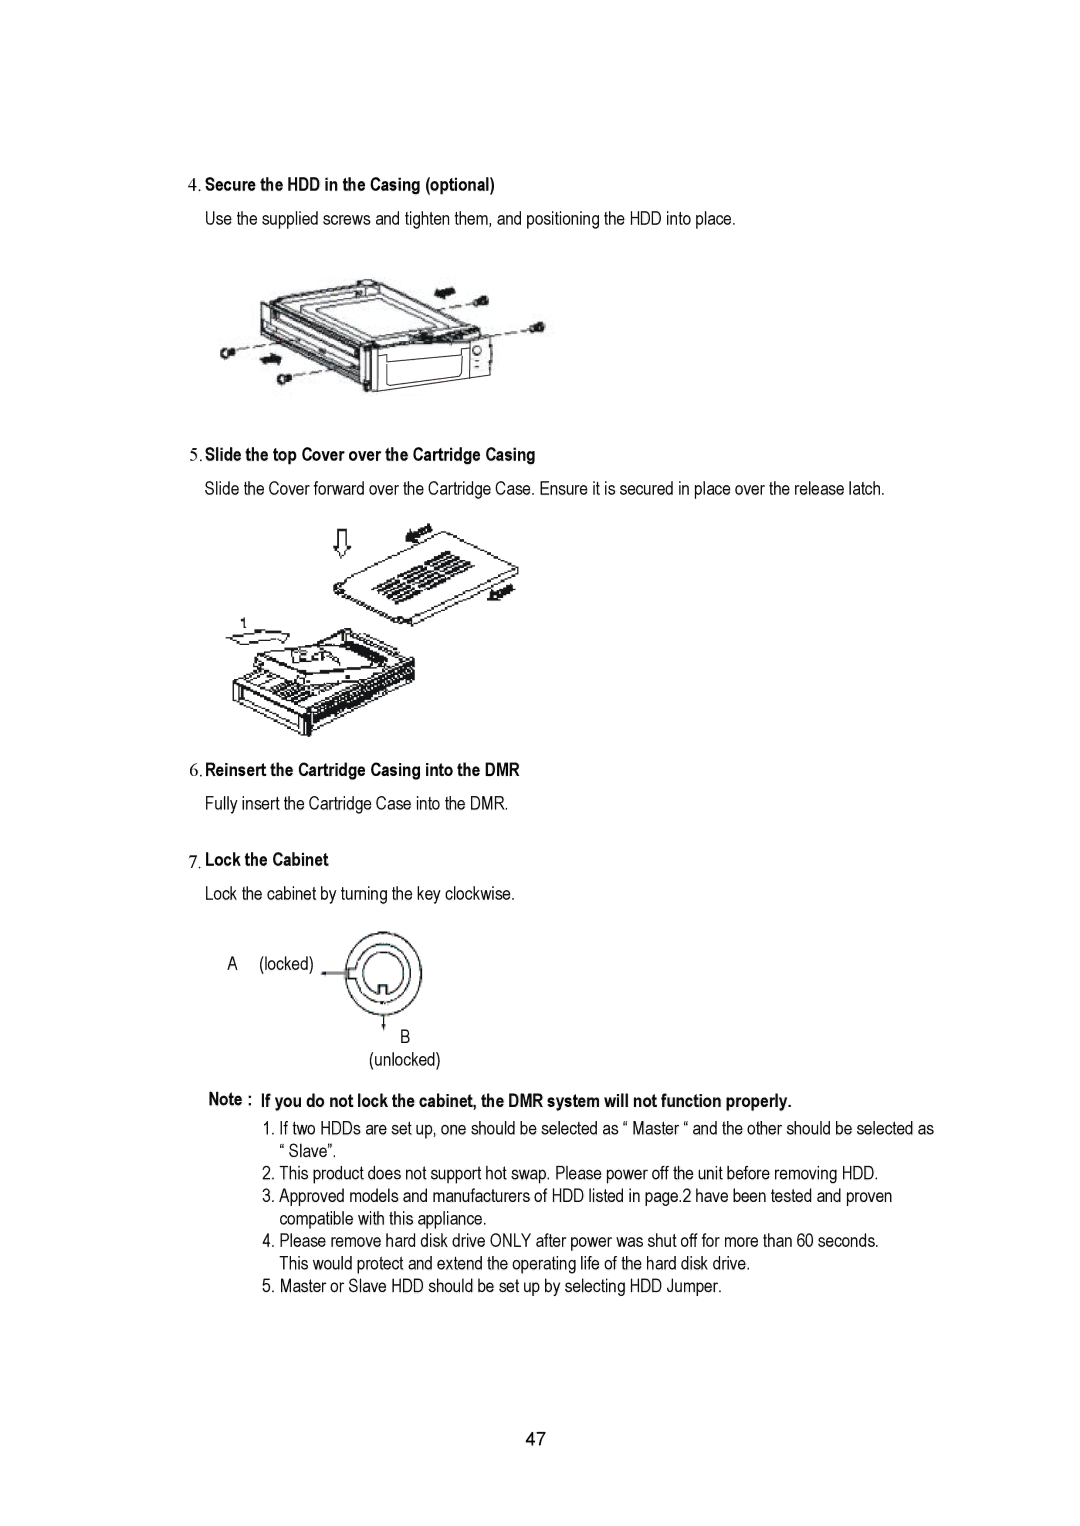
4.Secure the HDD in the Casing (optional)
Use the supplied screws and tighten them, and positioning the HDD into place.
5.Slide the top Cover over the Cartridge Casing
Slide the Cover forward over the Cartridge Case. Ensure it is secured in place over the release latch.
6.Reinsert the Cartridge Casing into the DMR Fully insert the Cartridge Case into the DMR.
7.Lock the Cabinet
Lock the cabinet by turning the key clockwise.
A (locked)
B
(unlocked)
Note : If you do not lock the cabinet, the DMR system will not function properly.
1.If two HDDs are set up, one should be selected as “ Master “ and the other should be selected as “ Slave”.
2.This product does not support hot swap. Please power off the unit before removing HDD.
3.Approved models and manufacturers of HDD listed in page.2 have been tested and proven compatible with this appliance.
4.Please remove hard disk drive ONLY after power was shut off for more than 60 seconds. This would protect and extend the operating life of the hard disk drive.
5.Master or Slave HDD should be set up by selecting HDD Jumper.
47
