6.Understand the plastic cover is held in place by (2) unmovable tabs on the left (think of this as the hinge side of a door) that will break if you try to move them, and a movable tab on the right (think of it as the door latch) that can be pulled forward. See Fig 5:
© 2007 Stephen Beck
Fig. 5
7.Remove the clear plastic door by gently prying the right side loose, and swinging it out. Pull the door to the right releasing the tabs on the left from their holes.
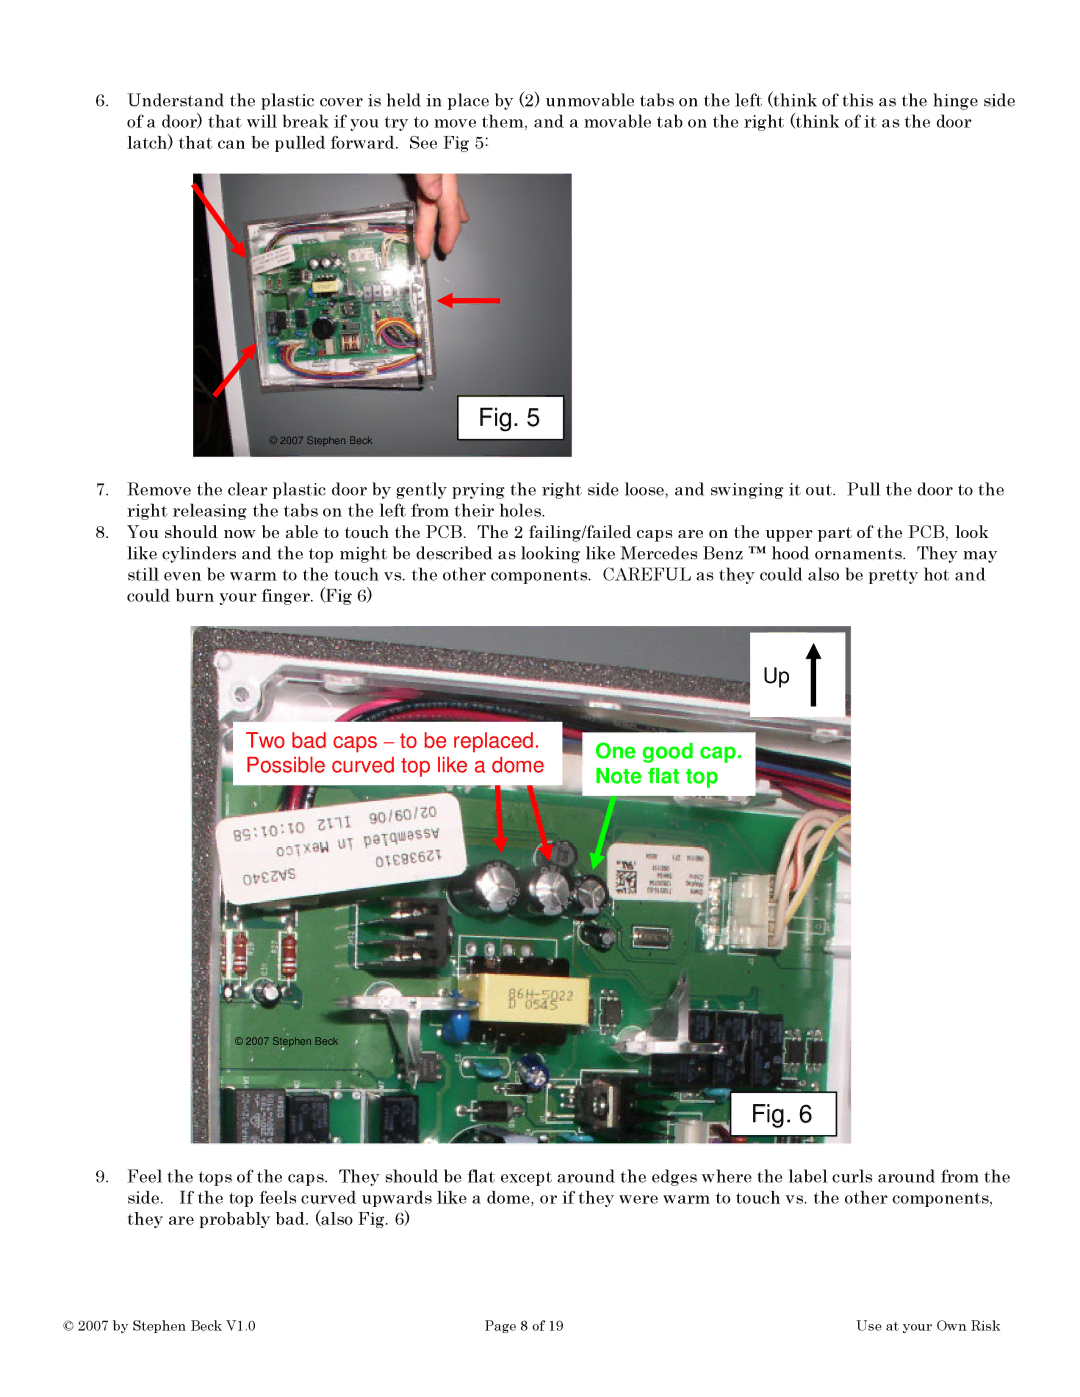
8.You should now be able to touch the PCB. The 2 failing/failed caps are on the upper part of the PCB, look like cylinders and the top might be described as looking like Mercedes Benz ™ hood ornaments. They may still even be warm to the touch vs. the other components. CAREFUL as they could also be pretty hot and could burn your finger. (Fig 6)
Up
Two bad caps – to be replaced. |
|
|
| One good cap. | |
Possible curved top like a dome |
| |
| Note flat top | |
|
| |
|
|
|
© 2007 Stephen Beck
Fig. 6
9.Feel the tops of the caps. They should be flat except around the edges where the label curls around from the side. If the top feels curved upwards like a dome, or if they were warm to touch vs. the other components, they are probably bad. (also Fig. 6)
© 2007 by Stephen Beck V1.0 | Page 8 of 19 | Use at your Own Risk |
