MICROBOARDS TECHNOLOGY, LLC | GX AUTO PRINTER |
Setting Printer Alignment
Alignment
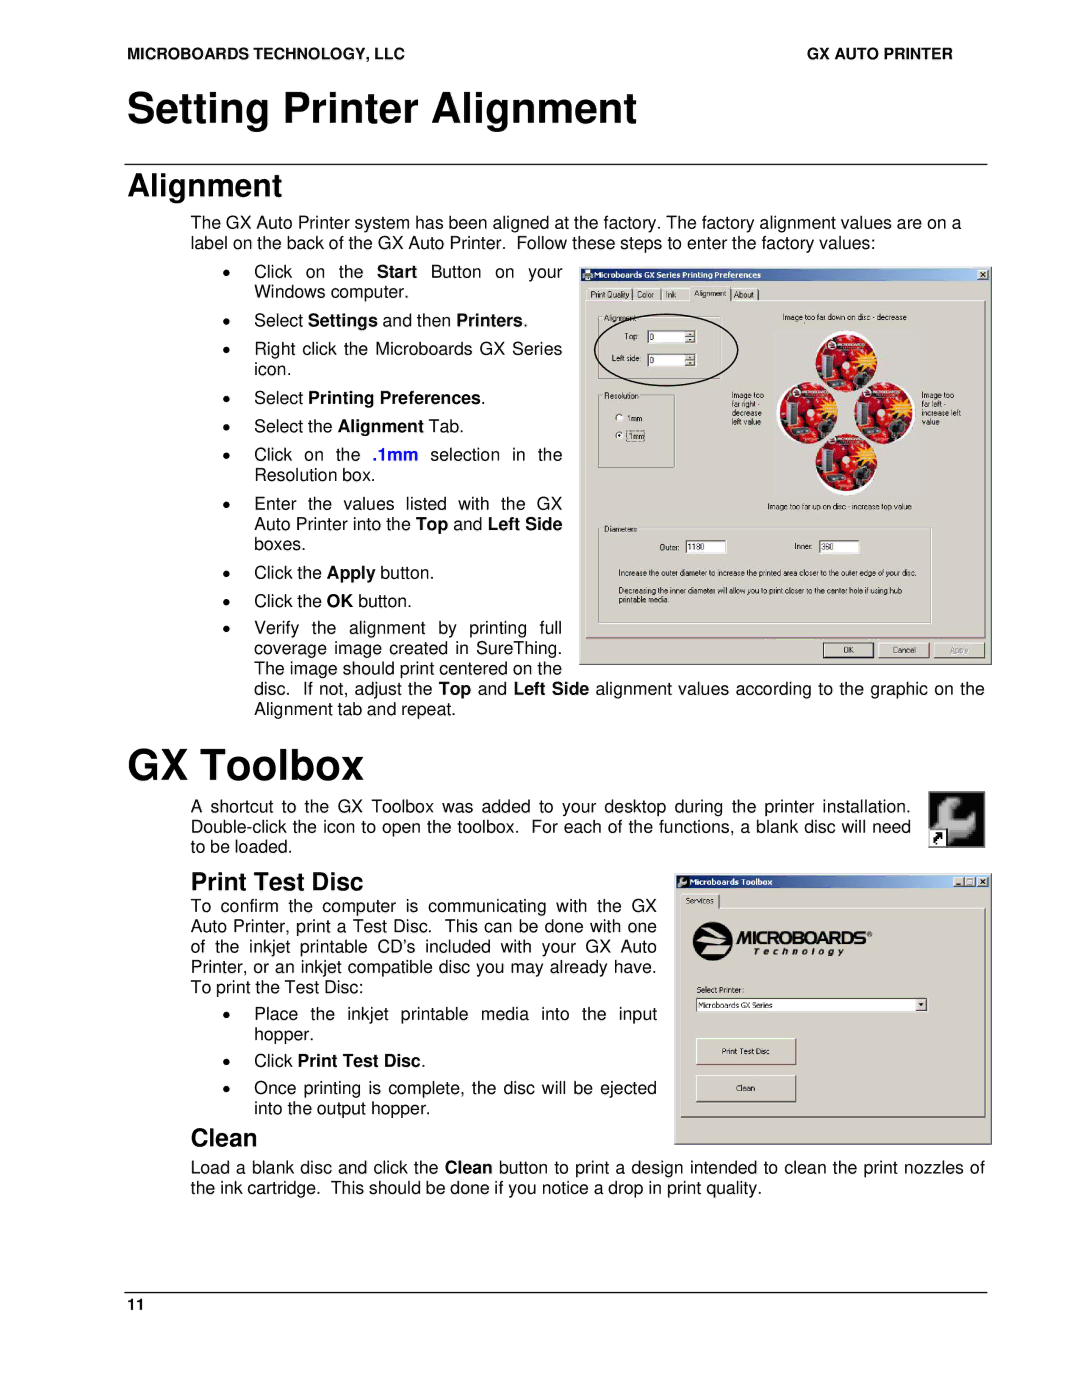
The GX Auto Printer system has been aligned at the factory. The factory alignment values are on a label on the back of the GX Auto Printer. Follow these steps to enter the factory values:
•Click on the Start Button on your Windows computer.
•Select Settings and then Printers.
•Right click the Microboards GX Series icon.
•Select Printing Preferences.
•Select the Alignment Tab.
•Click on the .1mm selection in the Resolution box.
•Enter the values listed with the GX Auto Printer into the Top and Left Side boxes.
•Click the Apply button.
•Click the OK button.
•Verify the alignment by printing full coverage image created in SureThing. The image should print centered on the
disc. If not, adjust the Top and Left Side alignment values according to the graphic on the Alignment tab and repeat.
GX Toolbox
A shortcut to the GX Toolbox was added to your desktop during the printer installation.
Print Test Disc
To confirm the computer is communicating with the GX Auto Printer, print a Test Disc. This can be done with one of the inkjet printable CD’s included with your GX Auto Printer, or an inkjet compatible disc you may already have. To print the Test Disc:
•Place the inkjet printable media into the input hopper.
•Click Print Test Disc.
•Once printing is complete, the disc will be ejected into the output hopper.
Clean
Load a blank disc and click the Clean button to print a design intended to clean the print nozzles of the ink cartridge. This should be done if you notice a drop in print quality.
11