Manual Software Re-Installation
This section will only apply to a manual
There are 3 methods of reinstalling SureThing should the need arise:
A.(Recommended) Insert the Microboards GX Auto Printer Installation CD into the CD/DVD ROM drive on your computer and select the Repair option when the installer starts. Click the SureThing Disc Labeler button to reinstall SureThing.
Follow these steps once the SureThing installer launches:
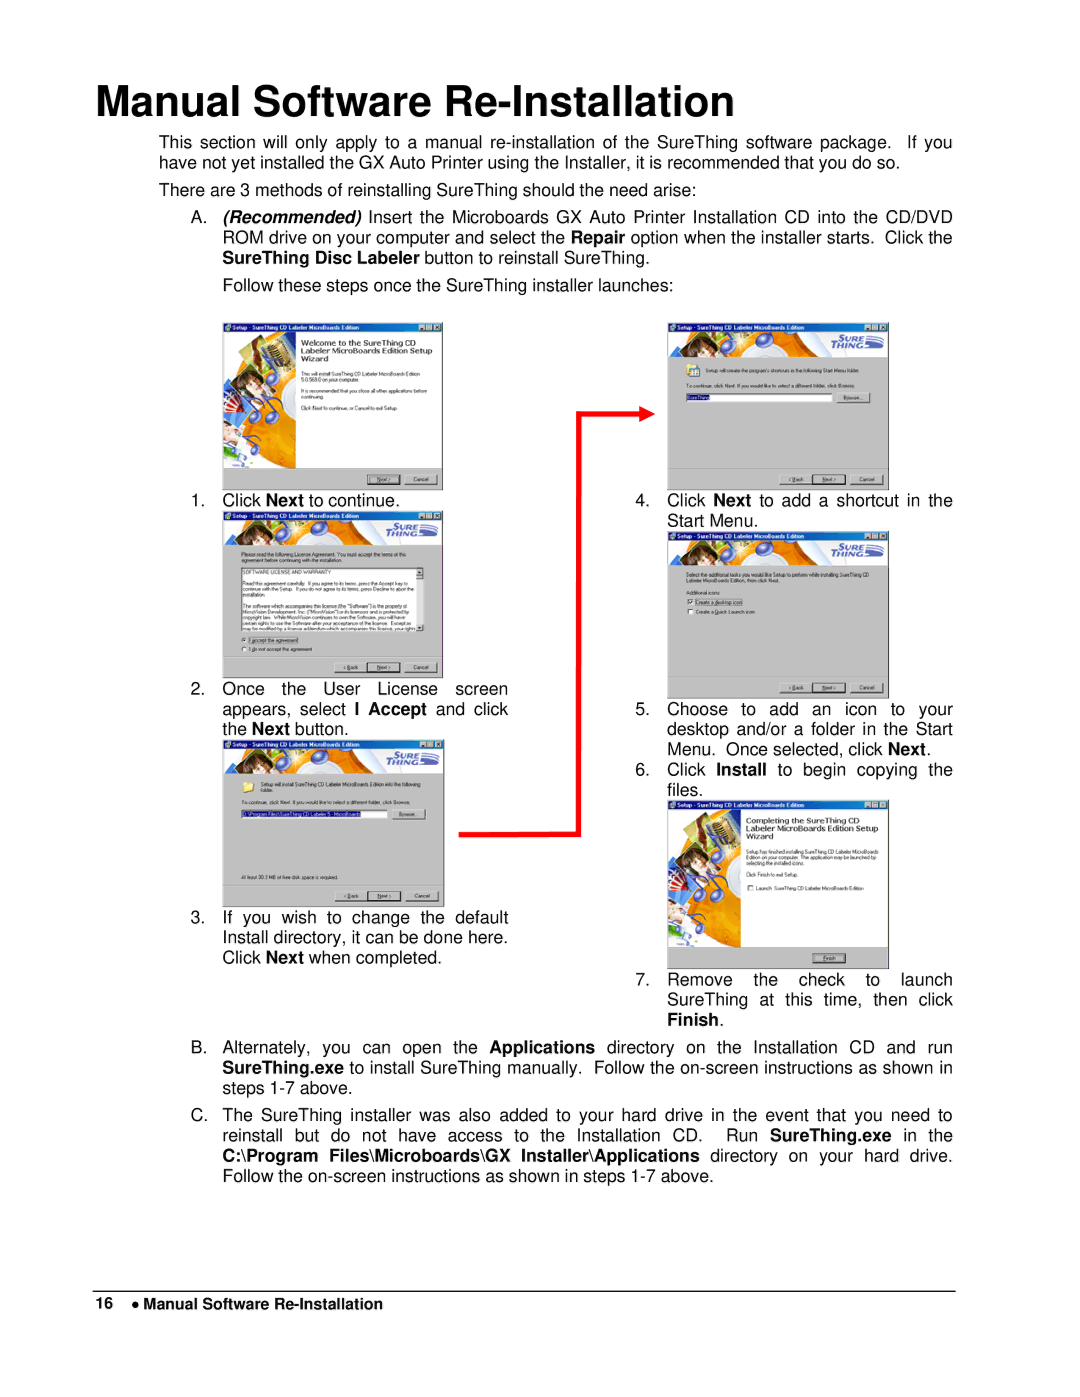
1. Click Next to continue.
2.Once the User License screen appears, select I Accept and click the Next button.
3.If you wish to change the default Install directory, it can be done here. Click Next when completed.
4.Click Next to add a shortcut in the Start Menu.
5.Choose to add an icon to your desktop and/or a folder in the Start Menu. Once selected, click Next.
6.Click Install to begin copying the files.
7.Remove the check to launch SureThing at this time, then click Finish.
B.Alternately, you can open the Applications directory on the Installation CD and run SureThing.exe to install SureThing manually. Follow the
C.The SureThing installer was also added to your hard drive in the event that you need to reinstall but do not have access to the Installation CD. Run SureThing.exe in the C:\Program Files\Microboards\GX Installer\Applications directory on your hard drive. Follow the
16 • Manual Software