SECTION 4 – OPERATOR CONTROLS
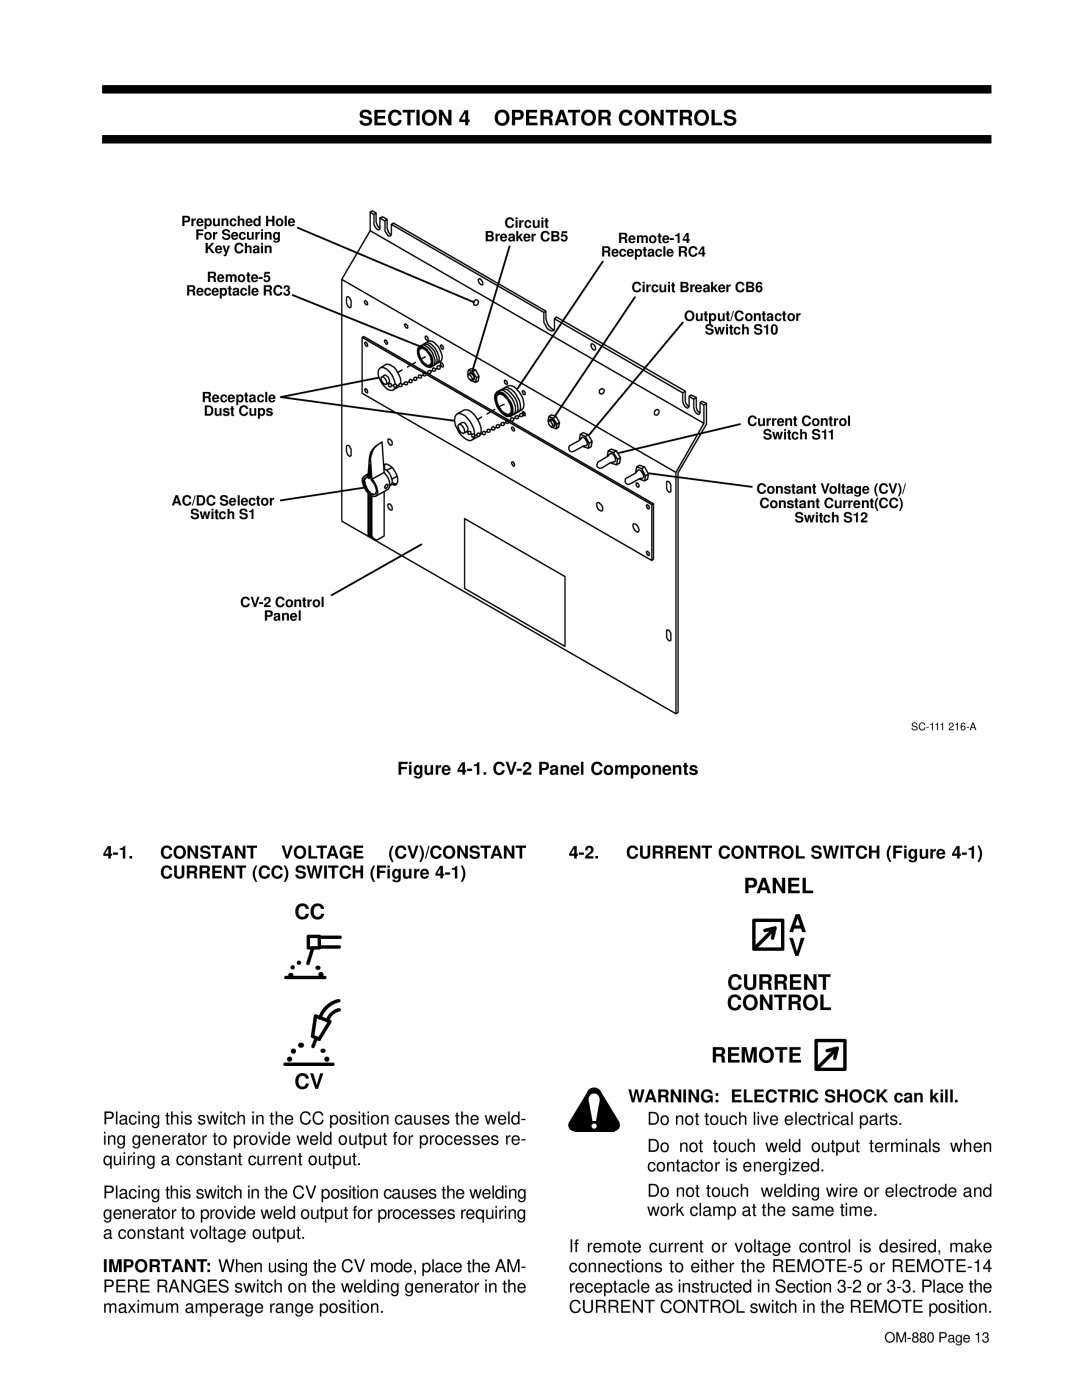
Prepunched Hole | Circuit |
|
For Securing | Breaker CB5 | |
Key Chain |
| Receptacle RC4 |
| Circuit Breaker CB6 | |
Receptacle RC3 |
| |
|
| Output/Contactor |
|
| Switch S10 |
Receptacle |
|
|
Dust Cups |
| Current Control |
|
| |
|
| Switch S11 |
AC/DC Selector |
| Constant Voltage (CV)/ |
| Constant Current(CC) | |
Switch S1 |
| Switch S12 |
Panel
Figure 4-1. CV-2 Panel Components
|
|
CURRENT (CC) SWITCH (Figure | PANEL |
|
CC
CV
Placing this switch in the CC position causes the weld- ing generator to provide weld output for processes re- quiring a constant current output.
Placing this switch in the CV position causes the welding generator to provide weld output for processes requiring a constant voltage output.
IMPORTANT: When using the CV mode, place the AM- PERE RANGES switch on the welding generator in the maximum amperage range position.
A
V
CURRENT
CONTROL
REMOTE
WARNING: ELECTRIC SHOCK can kill.
• Do not touch live electrical parts.
•Do not touch weld output terminals when contactor is energized.
•Do not touch welding wire or electrode and work clamp at the same time.
If remote current or voltage control is desired, make connections to either the