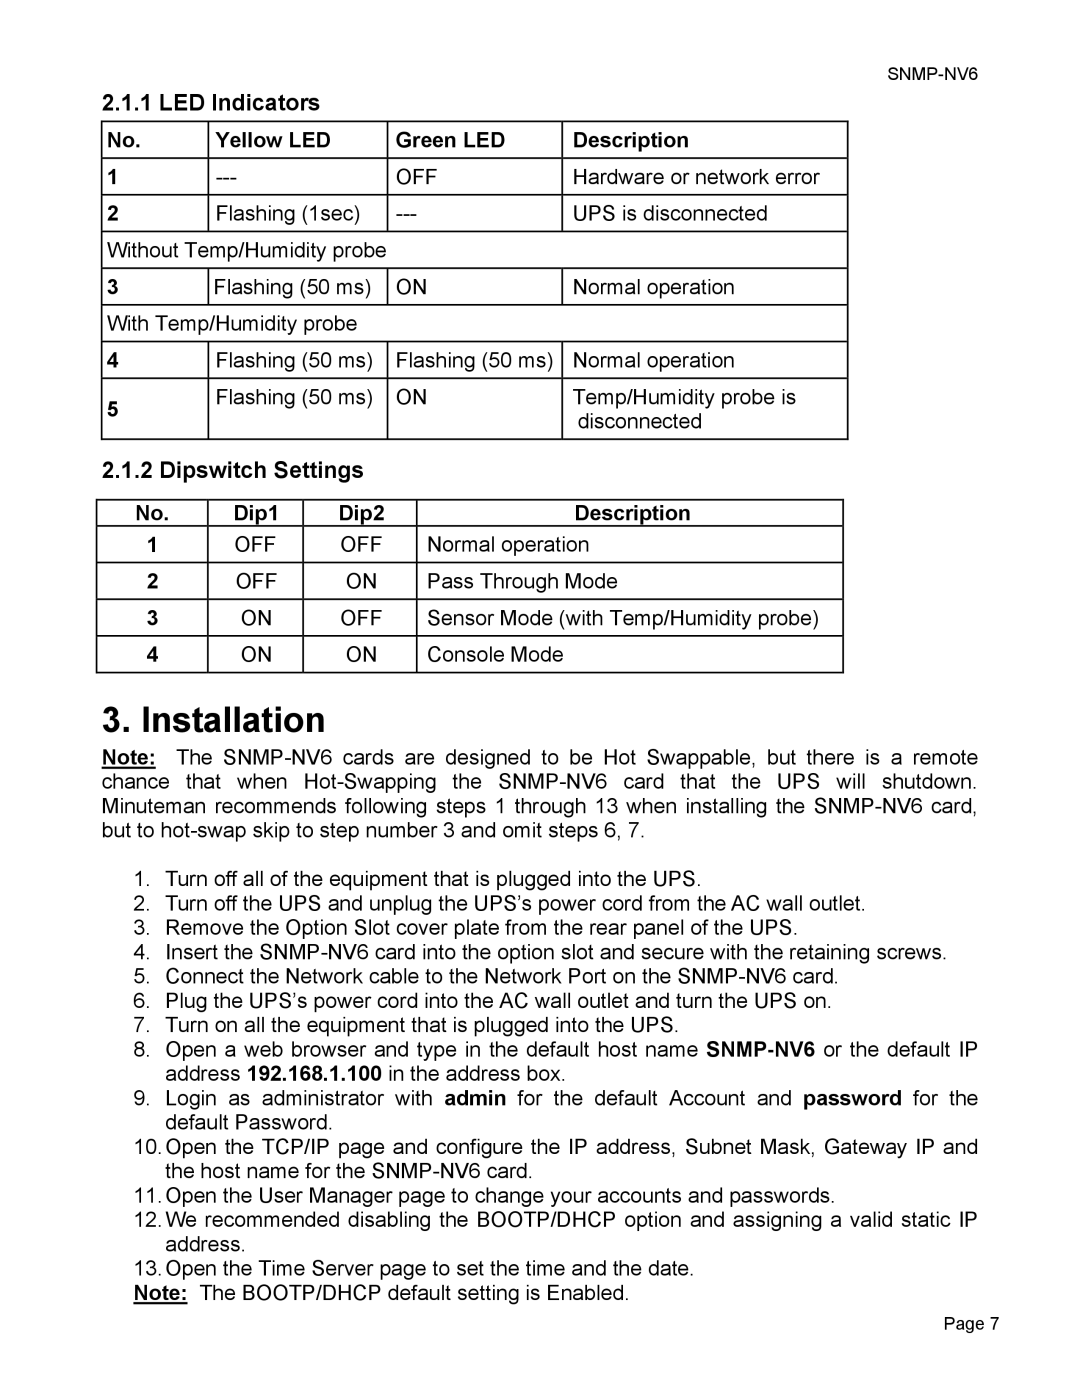
2.1.1 LED Indicators
No. | Yellow LED | Green LED | Description |
|
|
|
|
1 | OFF | Hardware or network error | |
|
|
|
|
2 | Flashing (1sec) | UPS is disconnected | |
Without Temp/Humidity probe |
|
| |
|
|
|
|
3 | Flashing (50 ms) | ON | Normal operation |
|
|
|
|
With Temp/Humidity probe |
|
| |
|
|
|
|
4 | Flashing (50 ms) | Flashing (50 ms) | Normal operation |
5 | Flashing (50 ms) | ON | Temp/Humidity probe is |
|
| disconnected | |
|
|
| |
2.1.2 Dipswitch Settings
No. | Dip1 | Dip2 | Description |
1 | OFF | OFF | Normal operation |
|
|
|
|
2 | OFF | ON | Pass Through Mode |
3 | ON | OFF | Sensor Mode (with Temp/Humidity probe) |
4 | ON | ON | Console Mode |
|
|
|
|
3. Installation
Note: The
1.Turn off all of the equipment that is plugged into the UPS.
2.Turn off the UPS and unplug the UPS’s power cord from the AC wall outlet.
3.Remove the Option Slot cover plate from the rear panel of the UPS.
4.Insert the
5.Connect the Network cable to the Network Port on the
6.Plug the UPS’s power cord into the AC wall outlet and turn the UPS on.
7.Turn on all the equipment that is plugged into the UPS.
8.Open a web browser and type in the default host name
9.Login as administrator with admin for the default Account and password for the default Password.
10.Open the TCP/IP page and configure the IP address, Subnet Mask, Gateway IP and the host name for the
11.Open the User Manager page to change your accounts and passwords.
12.We recommended disabling the BOOTP/DHCP option and assigning a valid static IP address.
13.Open the Time Server page to set the time and the date.
Note: The BOOTP/DHCP default setting is Enabled.
Page 7