VENT INSTALLATION
WARNING
Never use more than two (2) 45 degree elbows. When using adjustable elbows, never exceed 45 degrees.
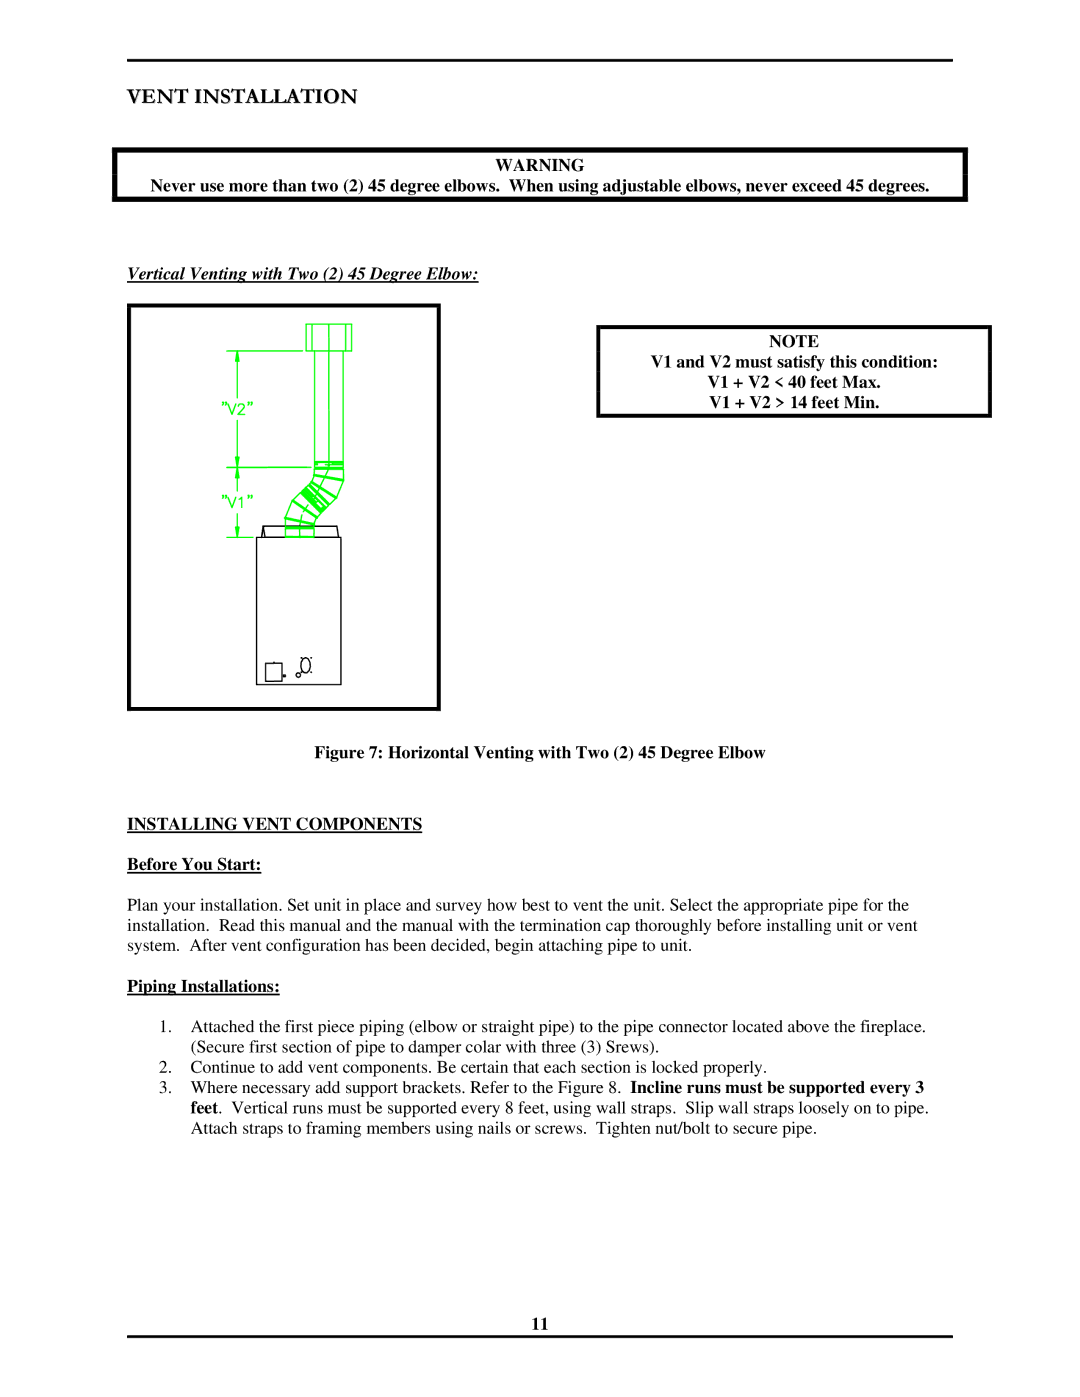
Vertical Venting with Two (2) 45 Degree Elbow:
NOTE
V1 and V2 must satisfy this condition:
V1 + V2 < 40 feet Max.
V1 + V2 > 14 feet Min.
Figure 7: Horizontal Venting with Two (2) 45 Degree Elbow
INSTALLING VENT COMPONENTS
Before You Start:
Plan your installation. Set unit in place and survey how best to vent the unit. Select the appropriate pipe for the installation. Read this manual and the manual with the termination cap thoroughly before installing unit or vent system. After vent configuration has been decided, begin attaching pipe to unit.
Piping Installations:
1.Attached the first piece piping (elbow or straight pipe) to the pipe connector located above the fireplace. (Secure first section of pipe to damper colar with three (3) Srews).
2.Continue to add vent components. Be certain that each section is locked properly.
3.Where necessary add support brackets. Refer to the Figure 8. Incline runs must be supported every 3 feet. Vertical runs must be supported every 8 feet, using wall straps. Slip wall straps loosely on to pipe. Attach straps to framing members using nails or screws. Tighten nut/bolt to secure pipe.
11
