| Software Installation |
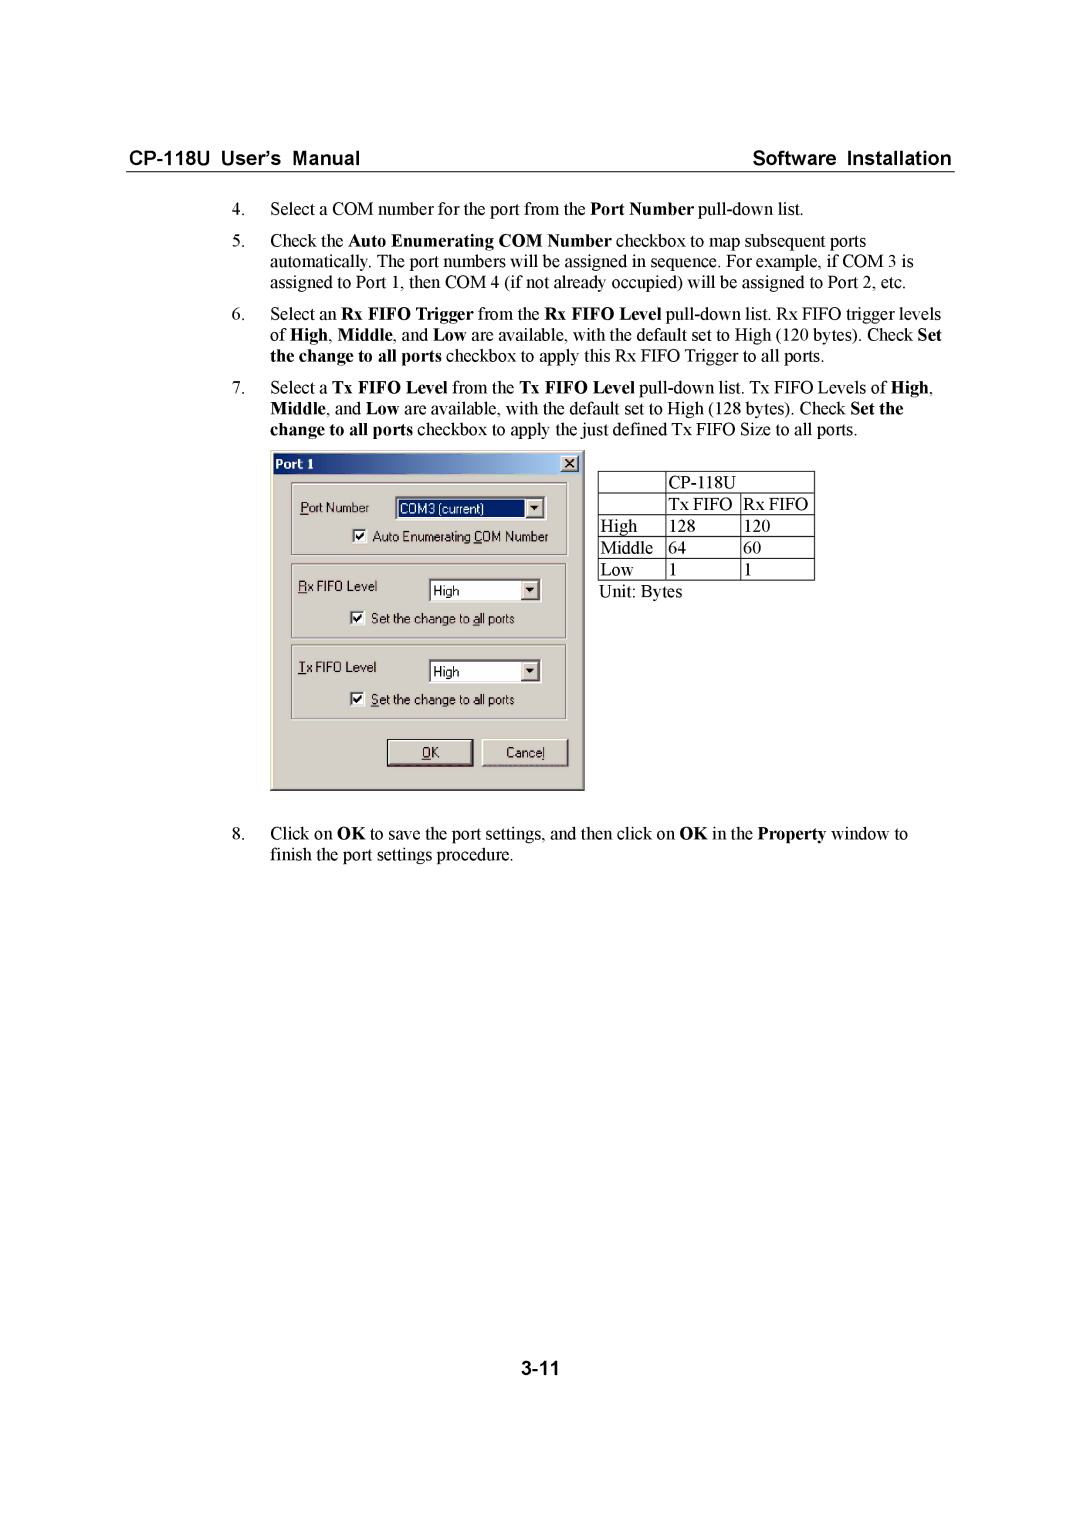
4.Select a COM number for the port from the Port Number
5.Check the Auto Enumerating COM Number checkbox to map subsequent ports automatically. The port numbers will be assigned in sequence. For example, if COM 3 is assigned to Port 1, then COM 4 (if not already occupied) will be assigned to Port 2, etc.
6.Select an Rx FIFO Trigger from the Rx FIFO Level
7.Select a Tx FIFO Level from the Tx FIFO Level
|
| |
| Tx FIFO | Rx FIFO |
High | 128 | 120 |
Middle | 64 | 60 |
Low | 1 | 1 |
Unit: Bytes
8.Click on OK to save the port settings, and then click on OK in the Property window to finish the port settings procedure.
