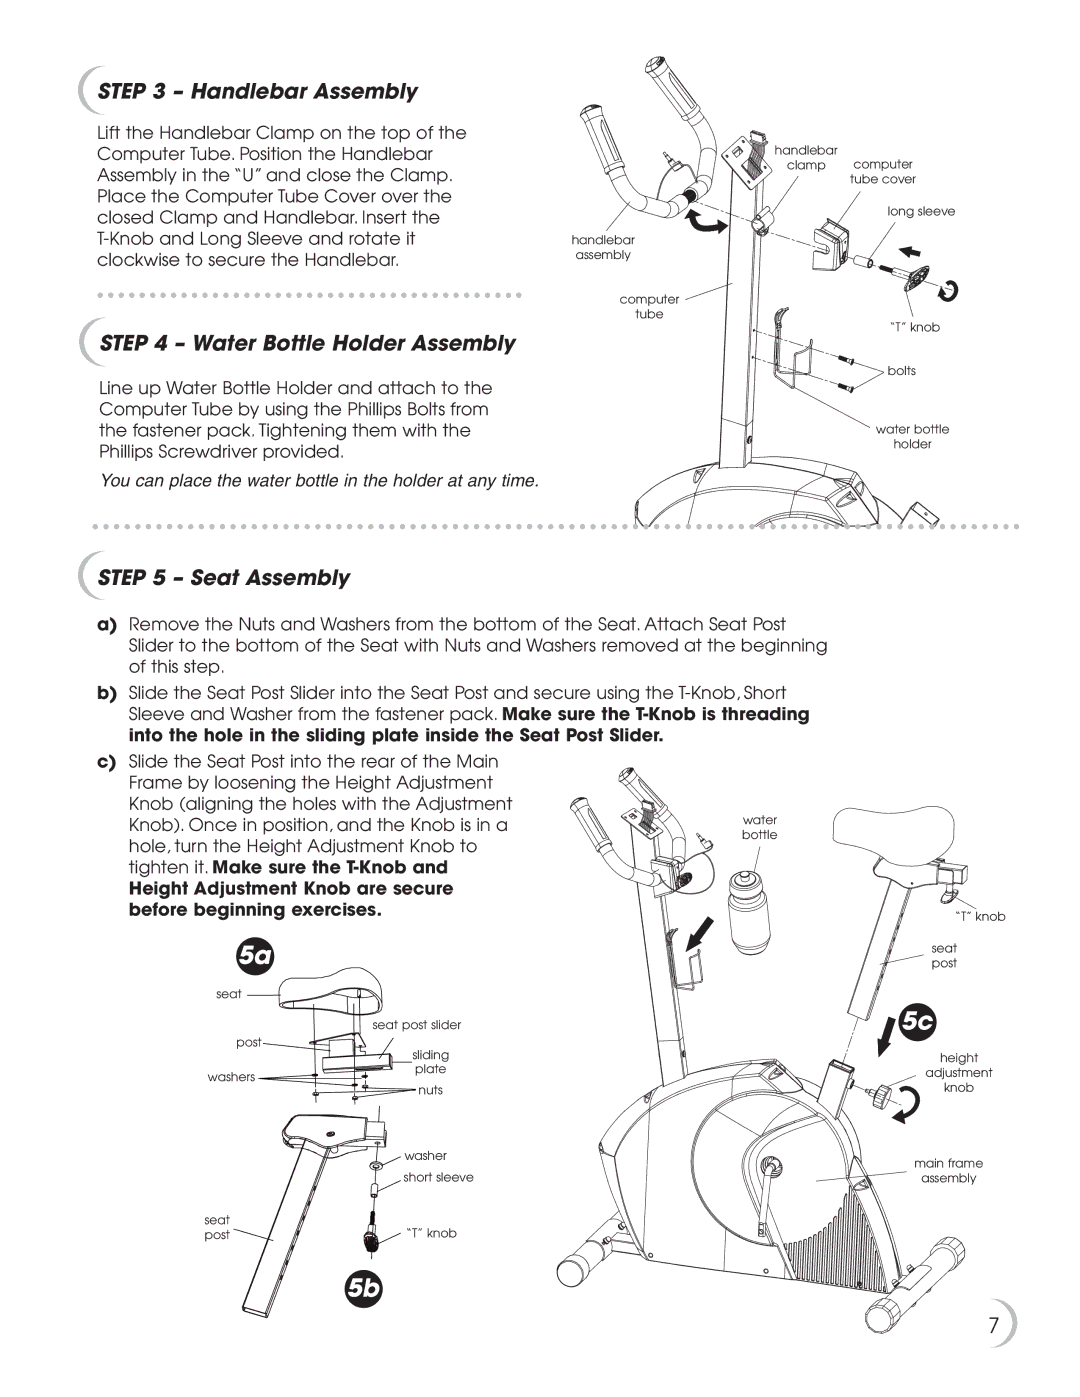
STEP 3 – Handlebar Assembly
Lift the Handlebar Clamp on the top of the Computer Tube. Position the Handlebar Assembly in the “U” and close the Clamp. Place the Computer Tube Cover over the closed Clamp and Handlebar. Insert the
STEP 4 – Water Bottle Holder Assembly
Line up Water Bottle Holder and attach to the Computer Tube by using the Phillips Bolts from the fastener pack. Tightening them with the Phillips Screwdriver provided.
You can place the water bottle in the holder at any time.
handlebar
clamp computer tube cover
long sleeve
handlebar
assembly
computer tube
“T” knob
bolts
water bottle
holder
STEP 5 – Seat Assembly
a)Remove the Nuts and Washers from the bottom of the Seat. Attach Seat Post Slider to the bottom of the Seat with Nuts and Washers removed at the beginning of this step.
b)Slide the Seat Post Slider into the Seat Post and secure using the
c)Slide the Seat Post into the rear of the Main Frame by loosening the Height Adjustment
Knob (aligning the holes with the Adjustment
Knob). Once in position, and the Knob is in a | water | |
bottle | ||
hole, turn the Height Adjustment Knob to | ||
| ||
tighten it. Make sure the |
| |
Height Adjustment Knob are secure |
| |
before beginning exercises. |
|
5a
seat
seat post slider
post
| sliding | |
washers | plate | |
nuts | ||
| ||
| washer | |
| short sleeve | |
seat | “T” knob | |
post |
5b
“T” knob
seat post
![]() 5c
5c
height
adjustment
knob
main frame
assembly
7
