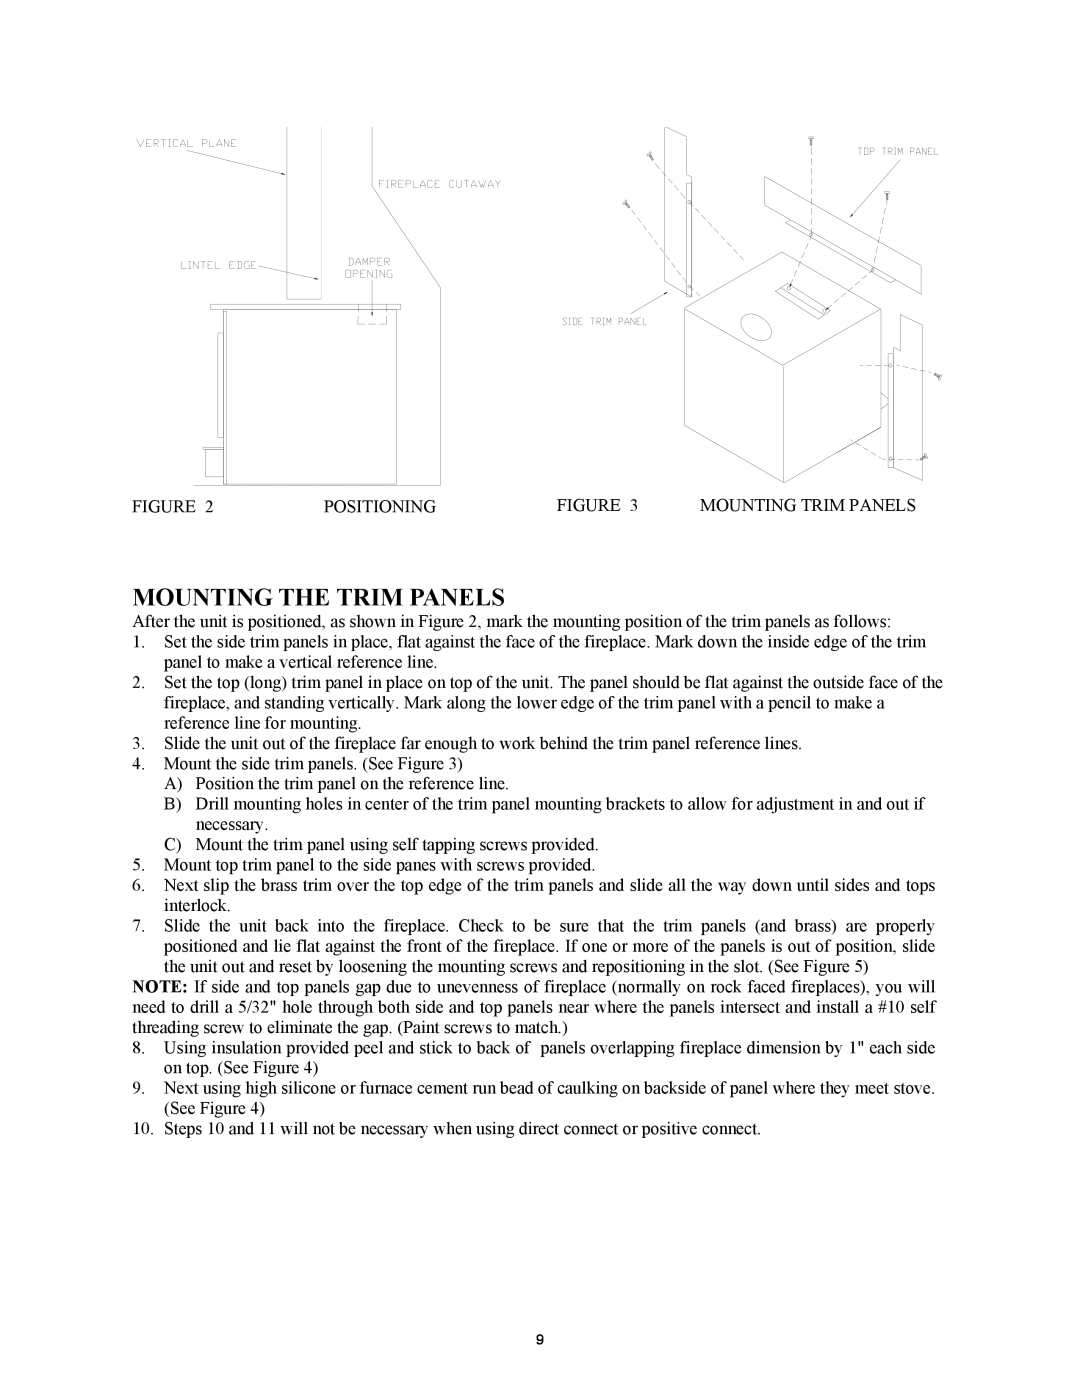
FIGURE 2 | POSITIONING | FIGURE 3 | MOUNTING TRIM PANELS |
MOUNTING THE TRIM PANELS
After the unit is positioned, as shown in Figure 2, mark the mounting position of the trim panels as follows:
1.Set the side trim panels in place, flat against the face of the fireplace. Mark down the inside edge of the trim panel to make a vertical reference line.
2.Set the top (long) trim panel in place on top of the unit. The panel should be flat against the outside face of the fireplace, and standing vertically. Mark along the lower edge of the trim panel with a pencil to make a reference line for mounting.
3.Slide the unit out of the fireplace far enough to work behind the trim panel reference lines.
4.Mount the side trim panels. (See Figure 3)
A)Position the trim panel on the reference line.
B)Drill mounting holes in center of the trim panel mounting brackets to allow for adjustment in and out if necessary.
C)Mount the trim panel using self tapping screws provided.
5.Mount top trim panel to the side panes with screws provided.
6.Next slip the brass trim over the top edge of the trim panels and slide all the way down until sides and tops interlock.
7.Slide the unit back into the fireplace. Check to be sure that the trim panels (and brass) are properly
positioned and lie flat against the front of the fireplace. If one or more of the panels is out of position, slide the unit out and reset by loosening the mounting screws and repositioning in the slot. (See Figure 5)
NOTE: If side and top panels gap due to unevenness of fireplace (normally on rock faced fireplaces), you will need to drill a 5/32" hole through both side and top panels near where the panels intersect and install a #10 self threading screw to eliminate the gap. (Paint screws to match.)
8.Using insulation provided peel and stick to back of panels overlapping fireplace dimension by 1" each side on top. (See Figure 4)
9.Next using high silicone or furnace cement run bead of caulking on backside of panel where they meet stove. (See Figure 4)
10.Steps 10 and 11 will not be necessary when using direct connect or positive connect.
9