2.Once the
(a)Maintain 1/4" rise per foot (horizontal length) from the appliance to the chimney.
(b)Each section of pipe should fit into the section below or into the opening on the stove, for drip free operation.
(c)Secure each section to each other using at least three (3) sheet metal screws or rivets.
(d)Use three (3) screws to connect pipe to New Buck Corp. Chimney Connector.
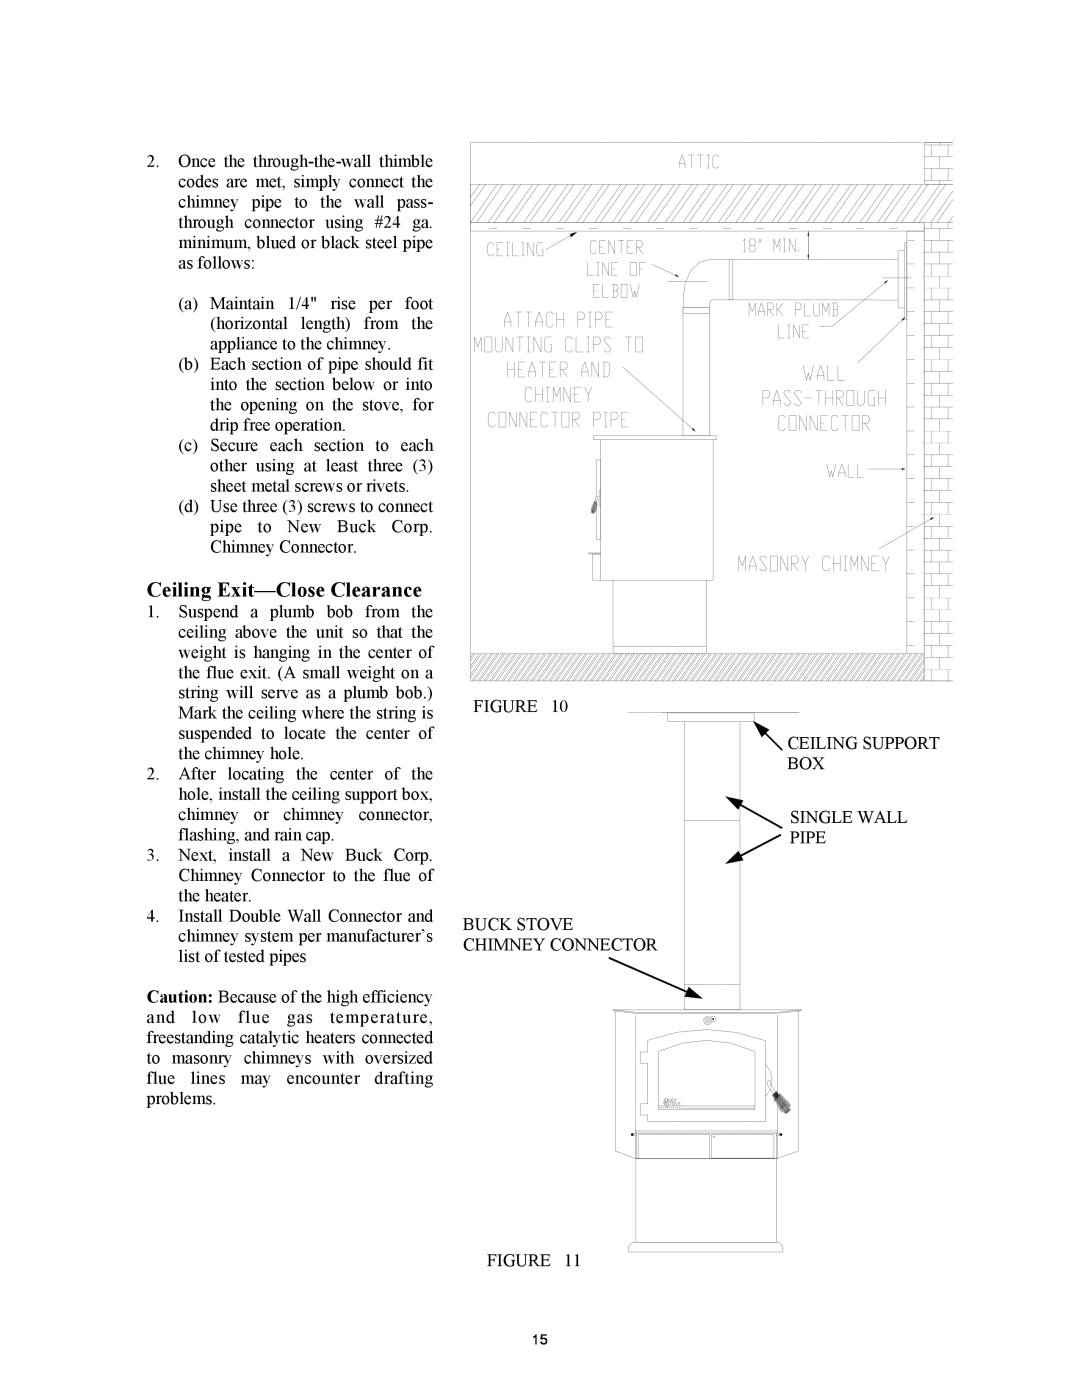
Ceiling Exit—Close Clearance
1.Suspend a plumb bob from the ceiling above the unit so that the weight is hanging in the center of the flue exit. (A small weight on a string will serve as a plumb bob.) Mark the ceiling where the string is suspended to locate the center of the chimney hole.
2.After locating the center of the hole, install the ceiling support box, chimney or chimney connector, flashing, and rain cap.
3.Next, install a New Buck Corp. Chimney Connector to the flue of the heater.
4.Install Double Wall Connector and chimney system per manufacturer’s list of tested pipes
Caution: Because of the high efficiency and low flue gas temperature, freestanding catalytic heaters connected to masonry chimneys with oversized flue lines may encounter drafting problems.
FIGURE | 10 |
CEILING SUPPORT |
BOX |
SINGLE WALL |
PIPE |
BUCK STOVE |
CHIMNEY CONNECTOR |
FIGURE 11
15