Step 3: Go for a run.
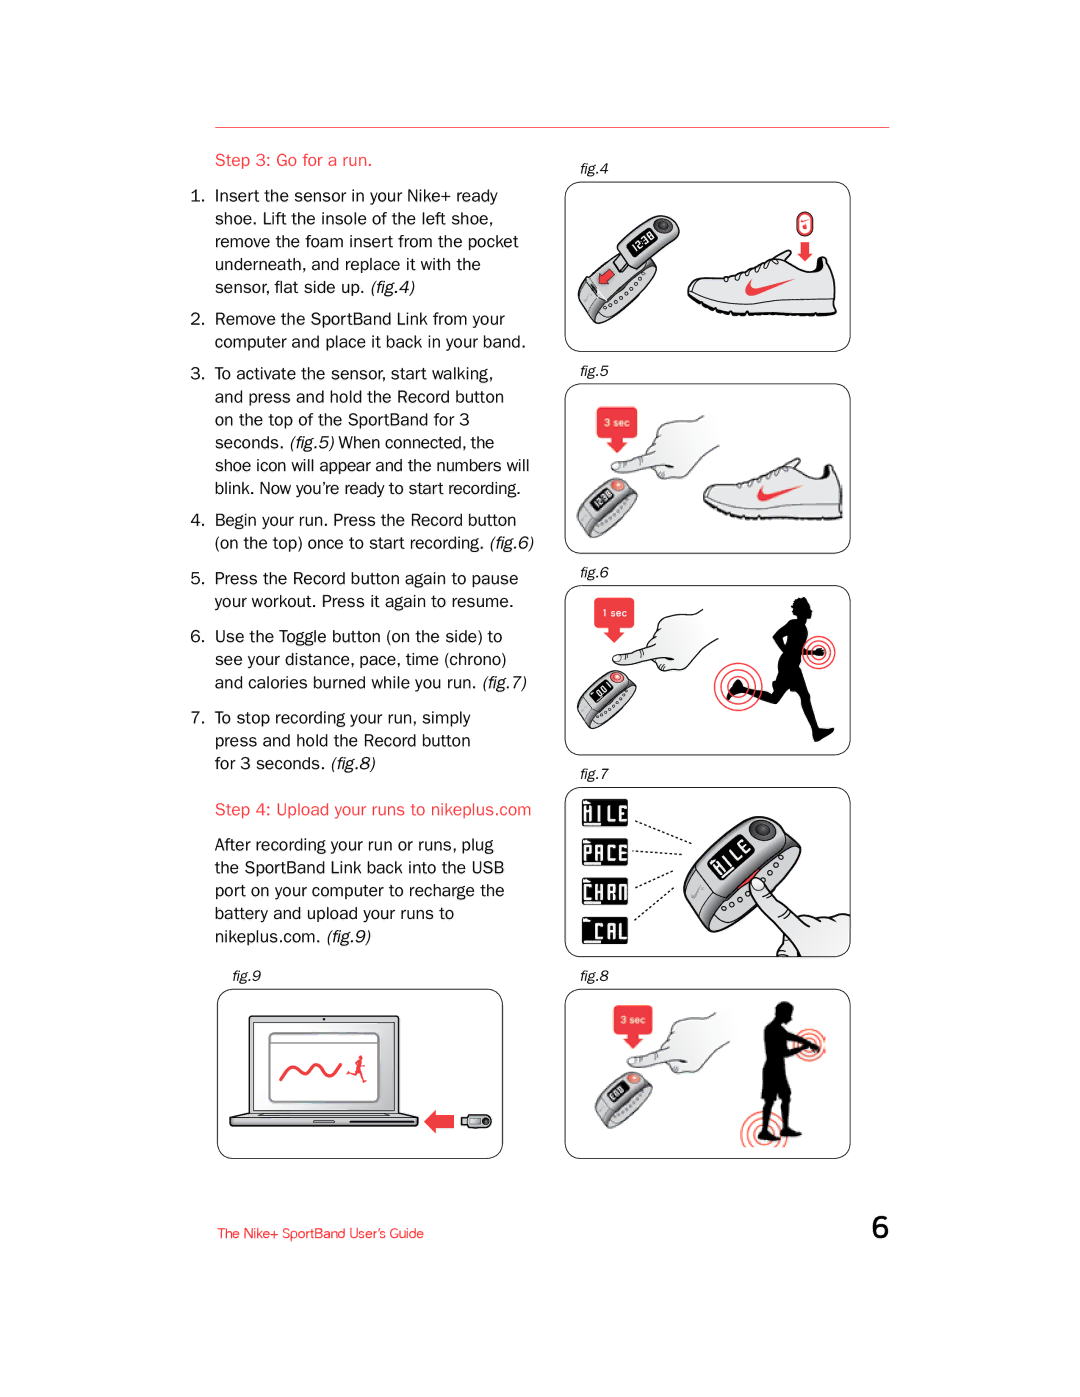
1.Insert the sensor in your Nike+ ready shoe. Lift the insole of the left shoe, remove the foam insert from the pocket underneath, and replace it with the sensor, flat side up. (fig.4)
2.Remove the SportBand Link from your computer and place it back in your band.
3.To activate the sensor, start walking, and press and hold the Record button on the top of the SportBand for 3 seconds. (fig.5) When connected, the shoe icon will appear and the numbers will blink. Now you’re ready to start recording.
4.Begin your run. Press the Record button (on the top) once to start recording. (fig.6)
5.Press the Record button again to pause your workout. Press it again to resume.
6.Use the Toggle button (on the side) to see your distance, pace, time (chrono) and calories burned while you run. (fig.7)
7.To stop recording your run, simply press and hold the Record button for 3 seconds. (fig.8)
Step 4: Upload your runs to nikeplus.com
After recording your run or runs, plug the SportBand Link back into the USB port on your computer to recharge the battery and upload your runs to nikeplus.com. (fig.9)
fig.9
The Nike+ SportBand User’s Guide
fig.4
fig.5
fig.6
1 sec
fig.7
fig.8
6