During Your Run
Recording a Run
After your Link is charged, and you’ve customized the settings, disconnect the Link from the USB port on your computer, and place it back in the SportBand.
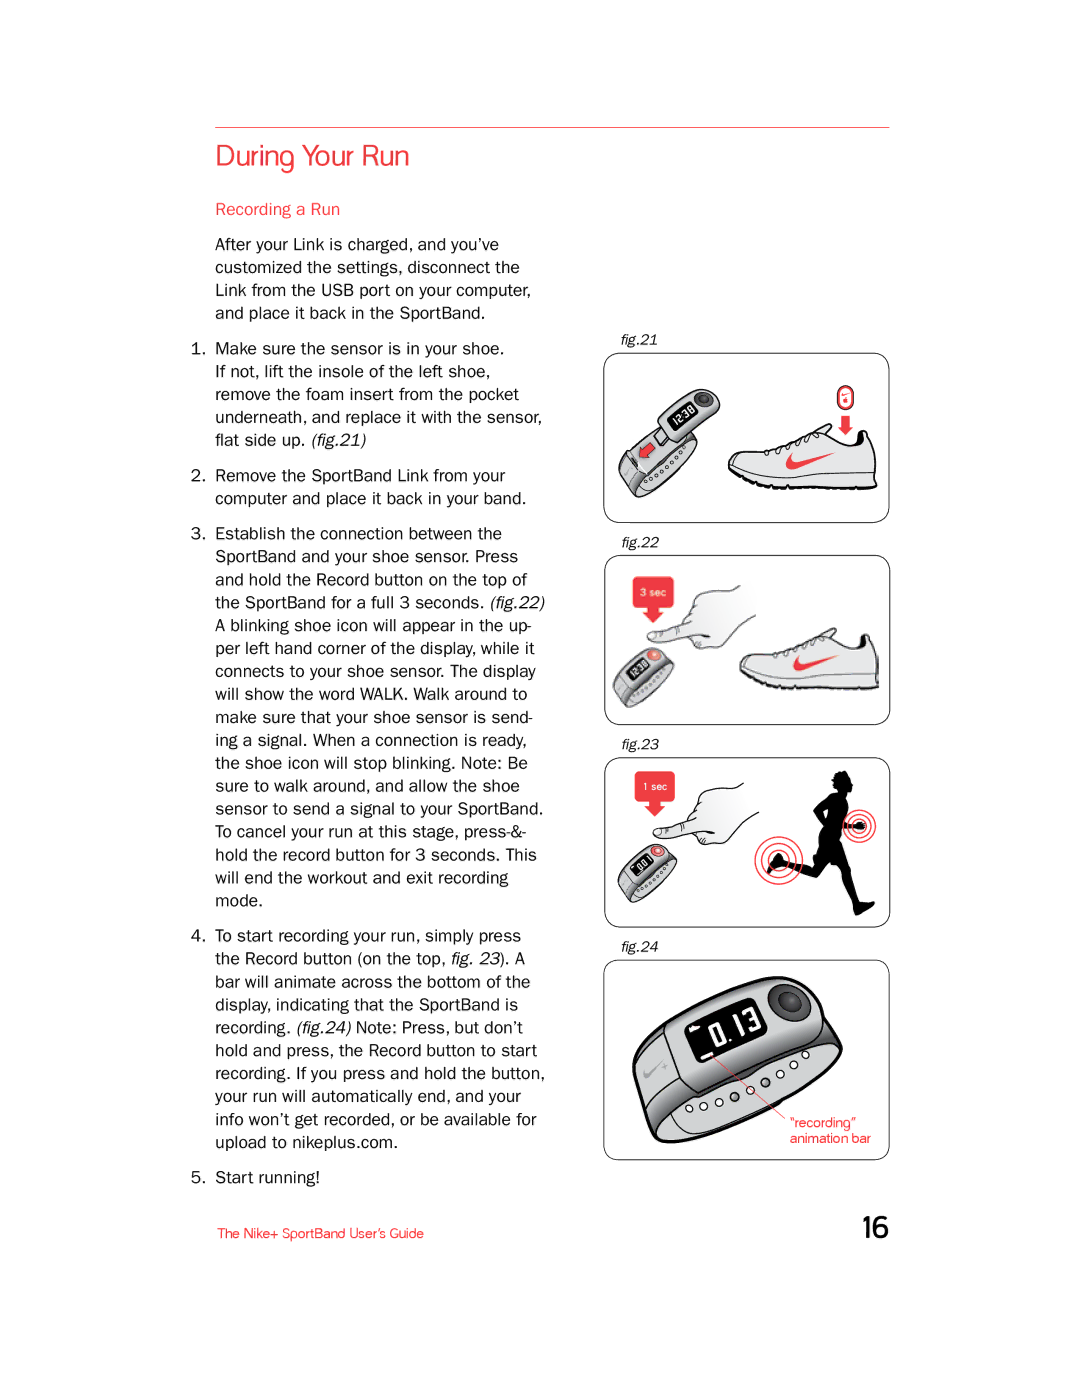
1.Make sure the sensor is in your shoe. If not, lift the insole of the left shoe, remove the foam insert from the pocket underneath, and replace it with the sensor, flat side up. (fig.21)
2.Remove the SportBand Link from your computer and place it back in your band.
3.Establish the connection between the
SportBand and your shoe sensor. Press and hold the Record button on the top of the SportBand for a full 3 seconds. (fig.22) A blinking shoe icon will appear in the up- per left hand corner of the display, while it connects to your shoe sensor. The display will show the word WALK. Walk around to make sure that your shoe sensor is send- ing a signal. When a connection is ready, the shoe icon will stop blinking. Note: Be sure to walk around, and allow the shoe sensor to send a signal to your SportBand.
To cancel your run at this stage,
4.To start recording your run, simply press the Record button (on the top, fig. 23). A bar will animate across the bottom of the display, indicating that the SportBand is recording. (fig.24) Note: Press, but don’t hold and press, the Record button to start recording. If you press and hold the button, your run will automatically end, and your info won’t get recorded, or be available for upload to nikeplus.com.
5.Start running!
fig.21
fig.22
fig.23
1 sec
fig.24
“recording” animation bar
The Nike+ SportBand User’s Guide | 16 |