Quick Start
Congratulations on purchasing your Nike+ SportBand. Read this section to get started using the Nike+ SportBand quickly.
Step 1: Download and install the Nike+ Utility.
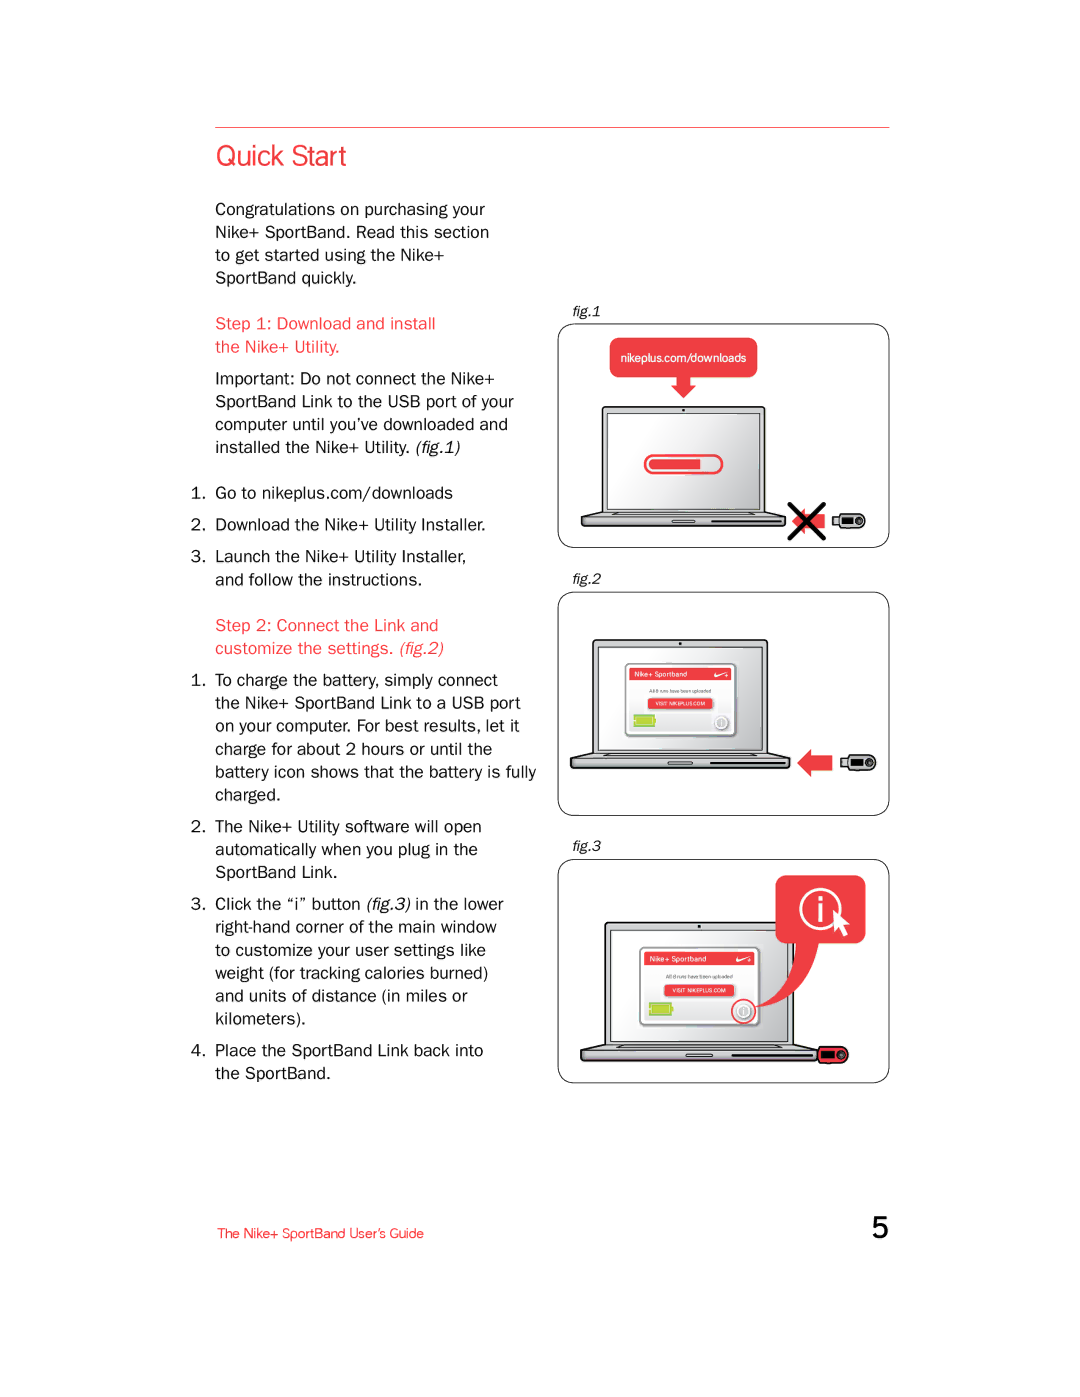
Important: Do not connect the Nike+ SportBand Link to the USB port of your computer until you’ve downloaded and installed the Nike+ Utility. (fig.1)
1.Go to nikeplus.com/downloads
2.Download the Nike+ Utility Installer.
3.Launch the Nike+ Utility Installer, and follow the instructions.
Step 2: Connect the Link and customize the settings. (fig.2)
1.To charge the battery, simply connect the Nike+ SportBand Link to a USB port on your computer. For best results, let it charge for about 2 hours or until the battery icon shows that the battery is fully charged.
2.The Nike+ Utility software will open automatically when you plug in the SportBand Link.
3.Click the “i” button (fig.3) in the lower
4.Place the SportBand Link back into the SportBand.
fig.1
nikeplus.com/downloads
fig.2
Nike+ Sportband
All 8 runs have been uploaded
VISIT NIKEPLUS.COM
i
fig.3
Nike+ Sportband
All 8 runs have been uploaded
VISIT NIKEPLUS.COM
i
The Nike+ SportBand User’s Guide | 5 |
