First time installation
General information
Once you have correctly connected the Mediamaster, you also have to perform a “First time installation.”
During this procedure, helpful information is displayed at the bot- tom of the menus.
The ok button always confirms a selection within these menus, and pressing it will take you to the next step in the installation process. However, and this is important, often more than one value has to be changed in a menu. First, perform all necessary changes then, confirm them all by pressing ok.
•You can always go back to the previous menu by pressing back.
•Use the ![]()
![]() up/down buttons to move upwards and down- wards from one line to another.
up/down buttons to move upwards and down- wards from one line to another.
•Use the ![]()
![]() left/right buttons to change settings.
left/right buttons to change settings.
•You can also use the numeric buttons on the remote control to enter numeric values.
Switching on the first time and start
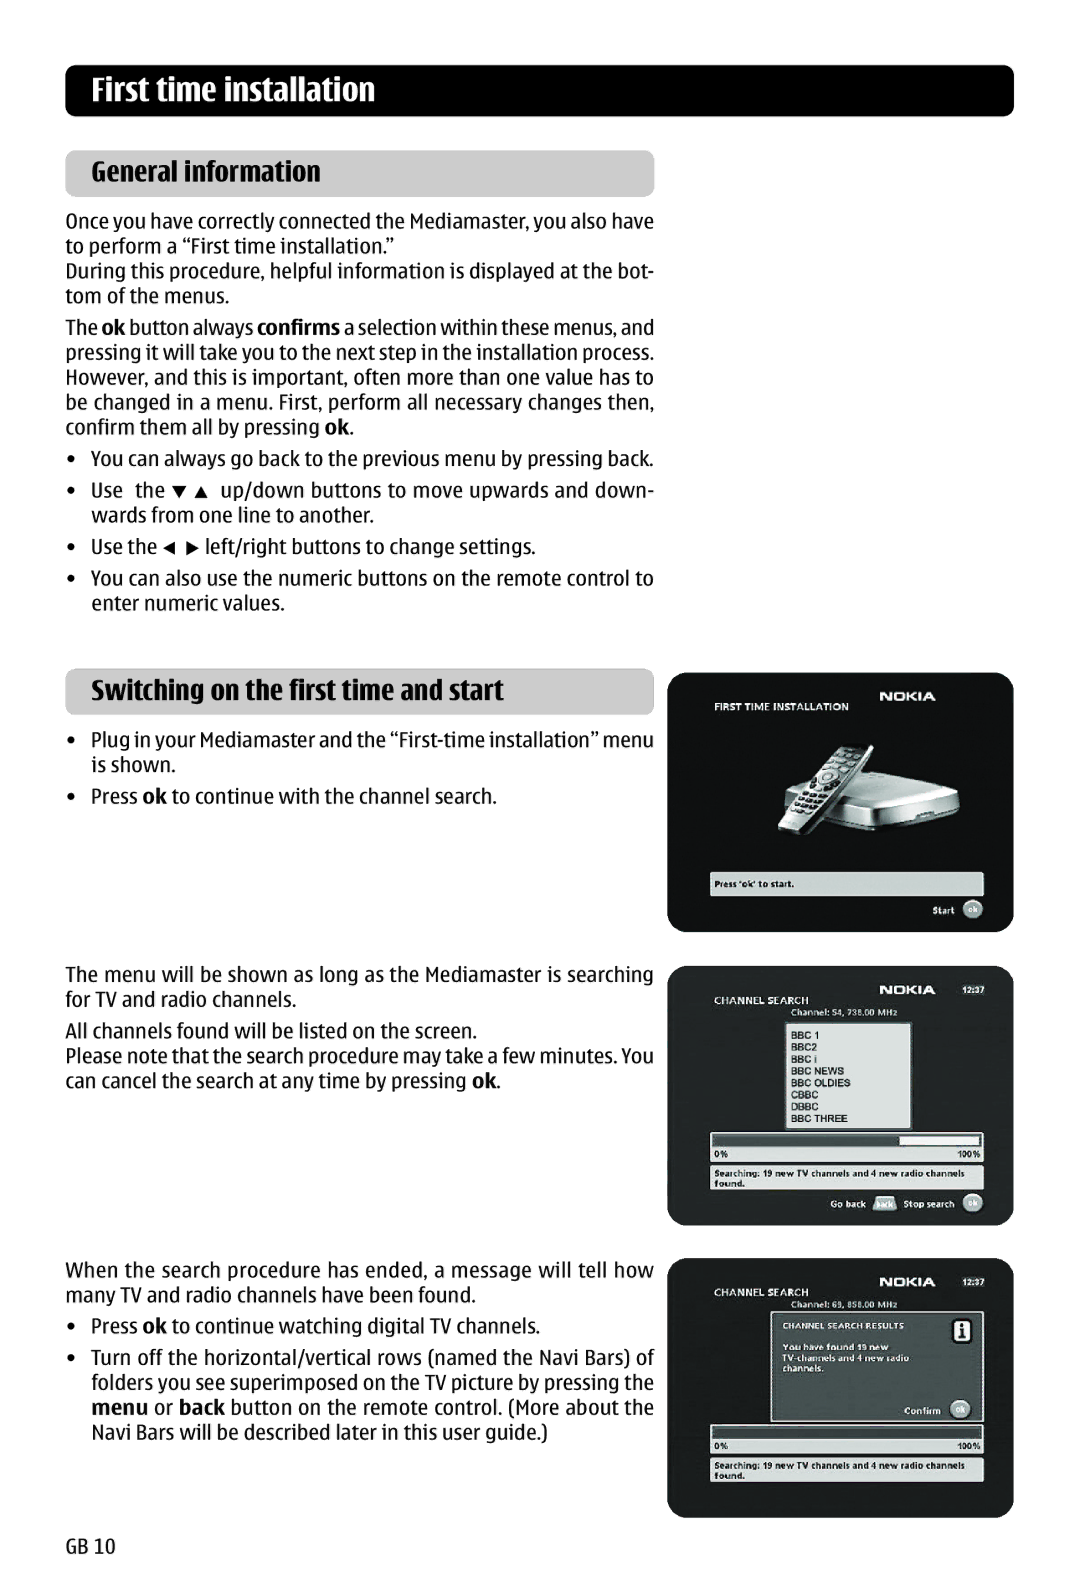
•Plug in your Mediamaster and the
•Press ok to continue with the channel search.
The menu will be shown as long as the Mediamaster is searching for TV and radio channels.
All channels found will be listed on the screen.
Please note that the search procedure may take a few minutes. You can cancel the search at any time by pressing ok.
When the search procedure has ended, a message will tell how many TV and radio channels have been found.
•Press ok to continue watching digital TV channels.
•Turn off the horizontal/vertical rows (named the Navi Bars) of folders you see superimposed on the TV picture by pressing the menu or back button on the remote control. (More about the Navi Bars will be described later in this user guide.)
GB 10