Problem
Ink smears on the paper when I print narrow columns.
Solution
This may be caused by excessive printhead travel from the centering position. Enter the Menu and set the Centering Position to MODE 1. See “Using Your Printer, Menu Mode.”
For the
Problem
I've installed a new ribbon and the printing is smeared and streaked.
Solution
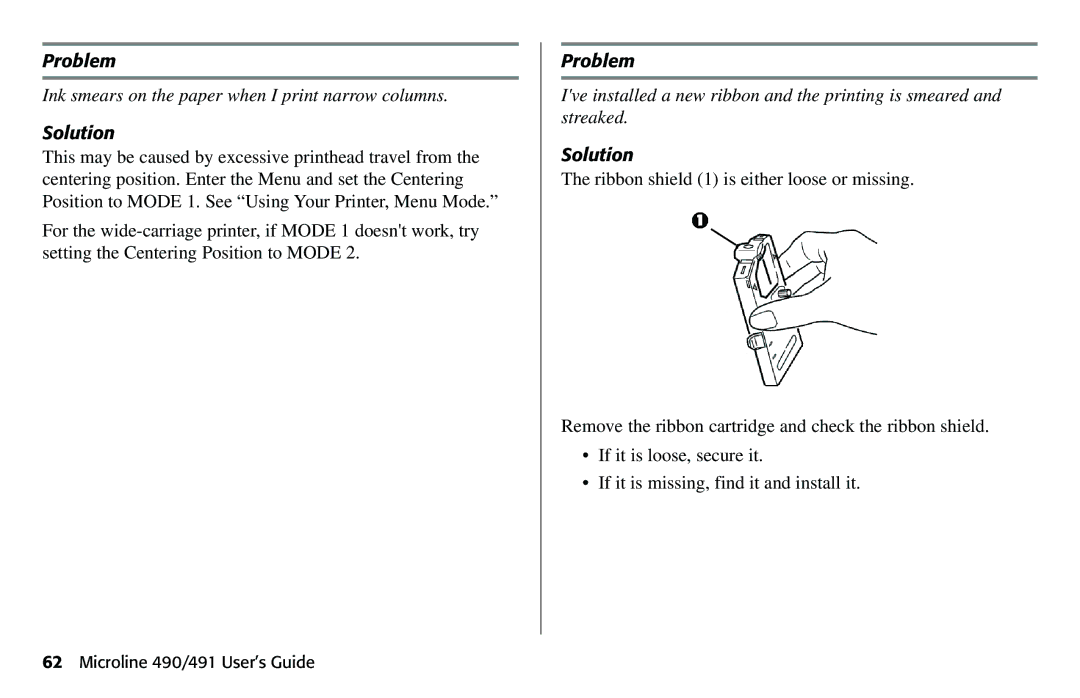
The ribbon shield (1) is either loose or missing.
Remove the ribbon cartridge and check the ribbon shield.
•If it is loose, secure it.
•If it is missing, find it and install it.