CONNECTIONS
Connection to the TV
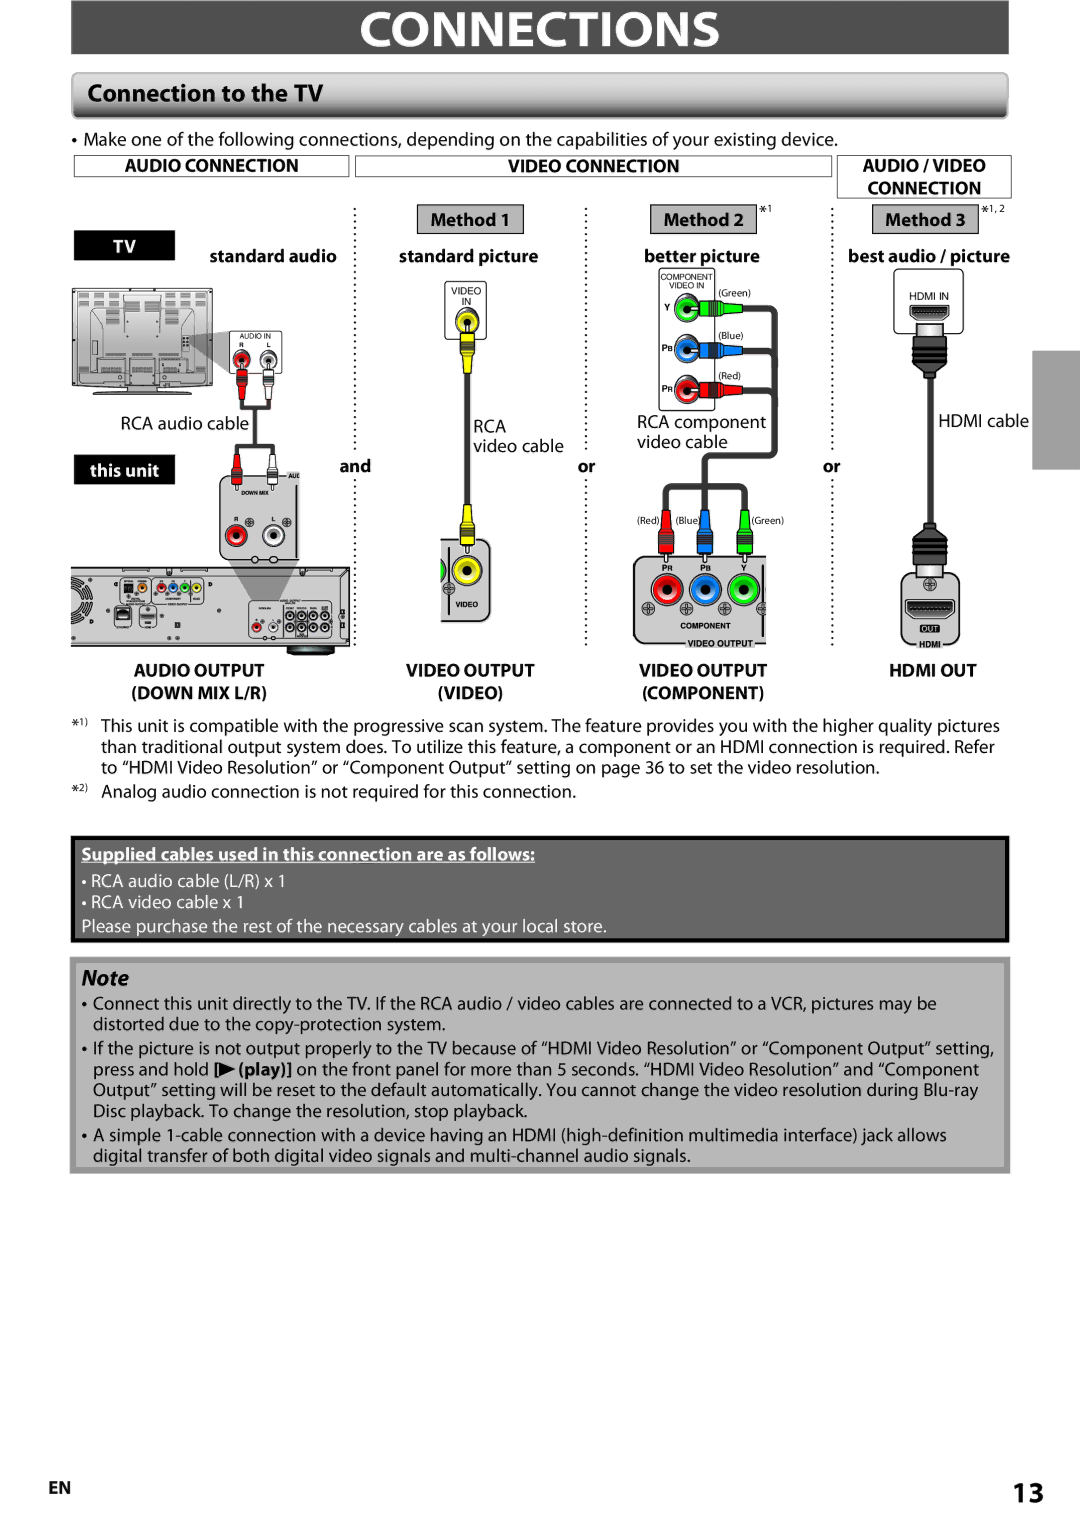
•Make one of the following connections, depending on the capabilities of your existing device.
AUDIO CONNECTION
TV | standard audio |
|
VIDEO CONNECTION
| Method 1 |
|
| Method 2 | *1 |
standard picture | better picture | ||||
AUDIO / VIDEO CONNECTION
Method 3 *1, 2
best audio / picture
|
| COMPONENT |
|
| VIDEO | VIDEO IN |
|
| (Green) | HDMI IN | |
| IN | Y | |
|
| ||
|
|
| |
AUDIO IN | (Blue) |
| |
R | L | PB |
|
|
|
| |
|
| (Red) |
|
|
| PR |
|
RCA audio cable |
| RCA | RCA component | HDMI cable | |
|
| video cable | video cable |
|
|
this unit | and | or |
|
| or |
|
|
| (Red) (Blue) | (Green) |
|
| AUDIO OUTPUT | VIDEO OUTPUT | VIDEO OUTPUT | HDMI OUT |
| (DOWN MIX L/R) | (VIDEO) | (COMPONENT) |
|
*1) | This unit is compatible with the progressive scan system. The feature provides you with the higher quality pictures | |||
| than traditional output system does. To utilize this feature, a component or an HDMI connection is required. Refer | |||
| to “HDMI Video Resolution” or “Component Output” setting on page 36 to set the video resolution. |
| ||
*2) | Analog audio connection is not required for this connection. |
|
| |
Supplied cables used in this connection are as follows:
•RCA audio cable (L/R) x 1
•RCA video cable x 1
Please purchase the rest of the necessary cables at your local store.
Note
•Connect this unit directly to the TV. If the RCA audio / video cables are connected to a VCR, pictures may be distorted due to the
•If the picture is not output properly to the TV because of “HDMI Video Resolution” or “Component Output” setting, press and hold [B(play)] on the front panel for more than 5 seconds. “HDMI Video Resolution” and “Component Output” setting will be reset to the default automatically. You cannot change the video resolution during
•A simple
EN | 13 |