Powering Up & Setting Up the DV-CP706
ON/STANDBY | 3 | To turn on the | |
the [ON/STANDBY] button (or the | |||
|
| ||
|
| remote controller’s [ON] button). | |
|
| The | |
|
| lights up, and the STANDBY indicator | |
|
| goes off. | |
| Remote controller To turn off the | ||
|
| [ON/STANDBY] button (or the remote | |
STANDBY indicator |
| controller’s [STANDBY] button). The | |
| |||
|
| ||
|
| the STANDBY indicator comes on. | |
ON
STANDBY
ENTER
Powering Up the DV-CP706
Before connecting the power cord, connect all your AV components (see page 18 to page 22).
Don’t forget to turn on your TV or projector and select the video input to which the
1 | Connect the supplied power cord |
| |
| to the |
|
|
2 | Plug the other end of the power |
| |
| cord into a suitable wall outlet. |
| The |
| and the STANDBY indicator comes on. |
| When you disconnect the power cord, |
| always disconnect it from the wall out- |
| let first, and then the |
| INLET. |
|
|
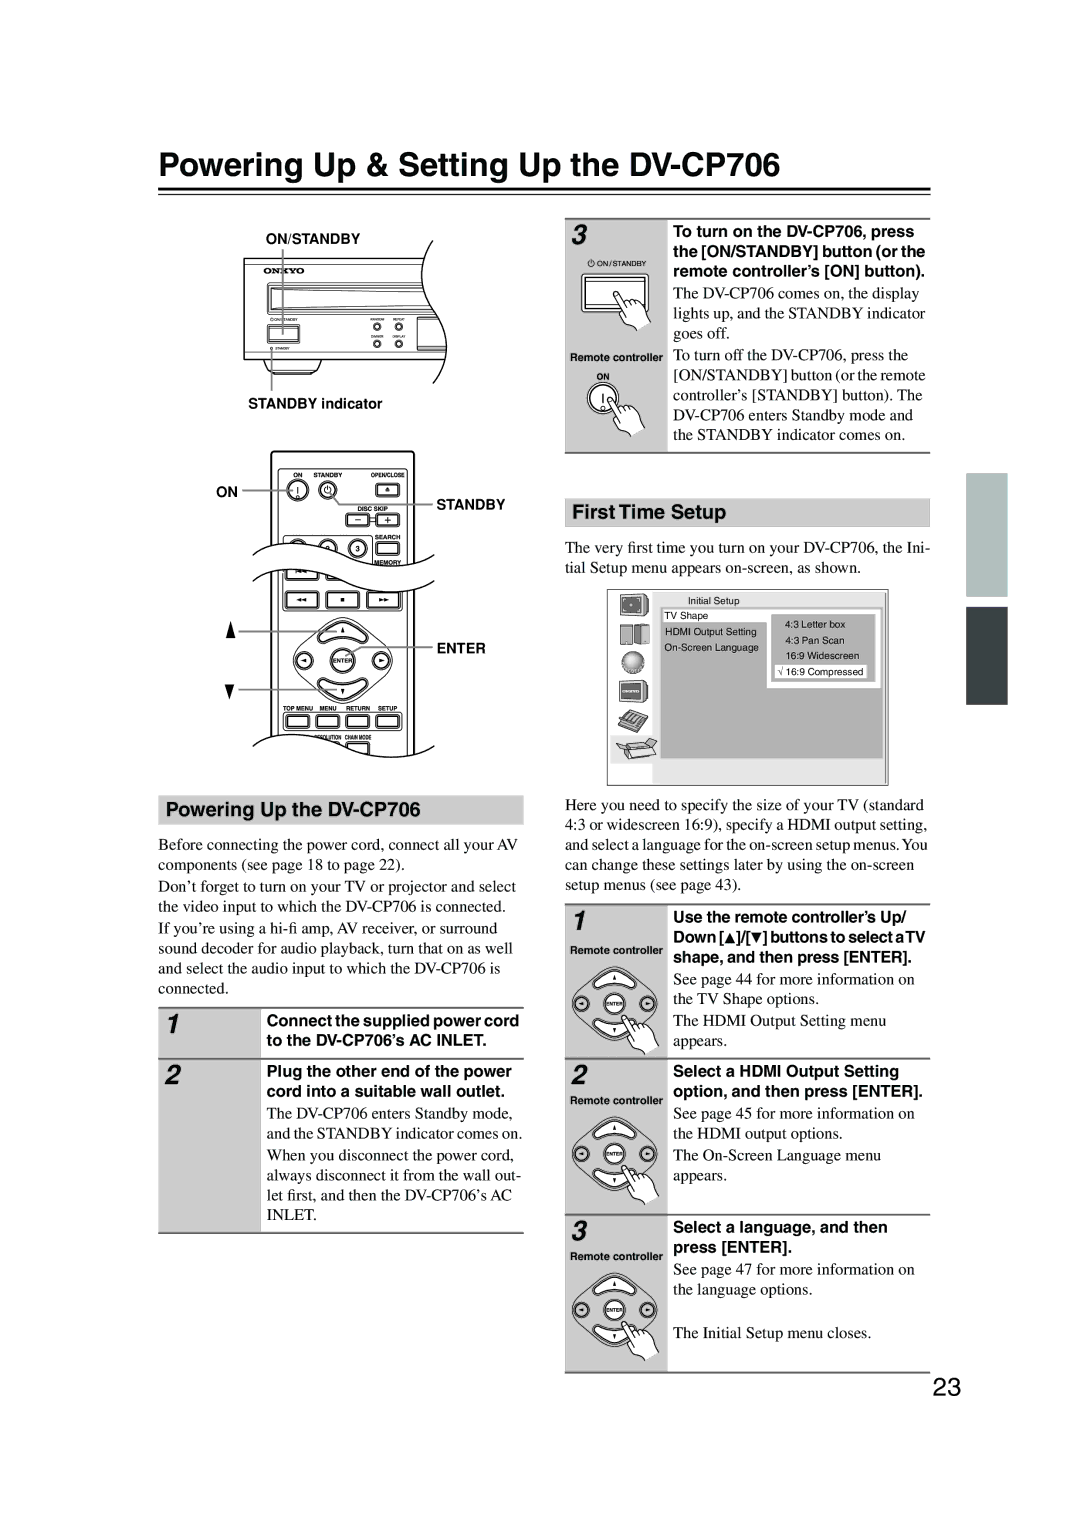
First Time Setup
The very first time you turn on your
Initial Setup
TV Shape
4:3 Letter box
HDMI Output Setting
4:3 Pan Scan
16:9 Widescreen
√ 16:9 Compressed
Here you need to specify the size of your TV (standard 4:3 or widescreen 16:9), specify a HDMI output setting, and select a language for the
1 | Use the remote controller’s Up/ | |
| ||
Remote controller | Down [ ]/[ ] buttons to select aTV | |
shape, and then press [ENTER]. | ||
| See page 44 for more information on | |
| the TV Shape options. | |
| The HDMI Output Setting menu | |
2 | appears. | |
Select a HDMI Output Setting | ||
| ||
Remote controller | option, and then press [ENTER]. | |
| See page 45 for more information on | |
| the HDMI output options. | |
| The | |
| appears. | |
3 | Select a language, and then | |
| ||
Remote controller | press [ENTER]. | |
| See page 47 for more information on | |
| the language options. |
The Initial Setup menu closes.
23