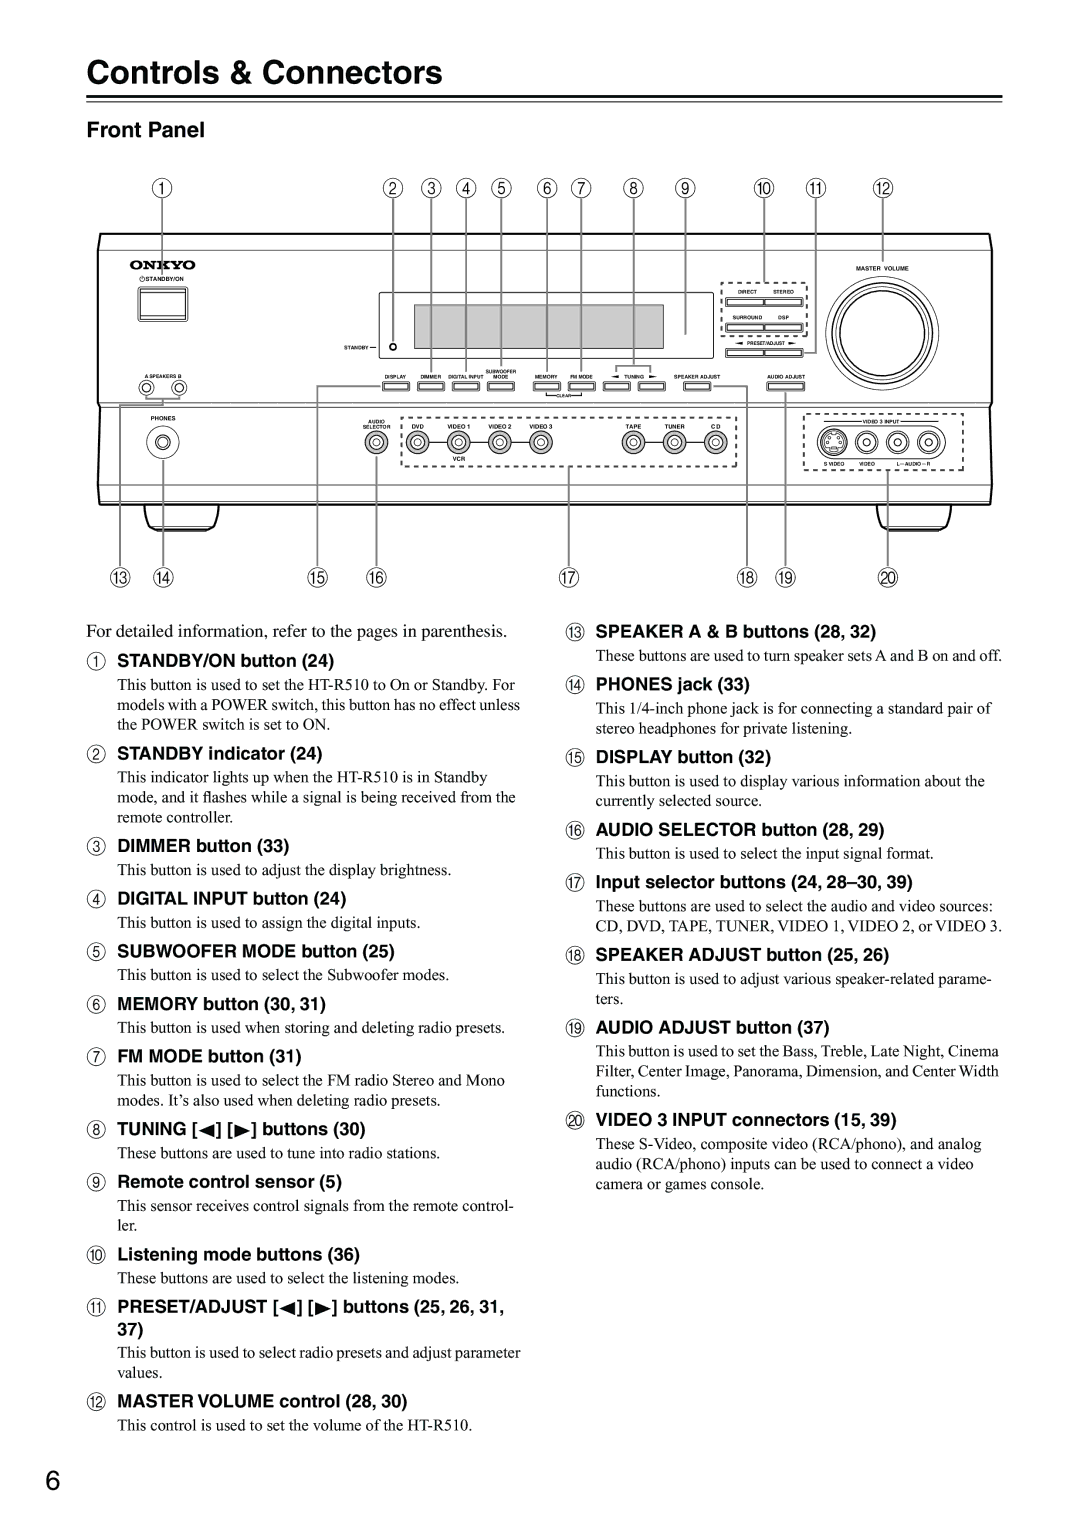
HT-R510 specifications
The Onkyo HT-R510 is a versatile home theater receiver designed to provide an enhanced audio experience for movie lovers and music enthusiasts alike. With its collection of features and technologies, this receiver offers an impressive balance of performance and user-friendly functionality.One of the standout features of the HT-R510 is its capability to deliver 5.1-channel surround sound, making it an excellent choice for creating an immersive home theater environment. The receiver is equipped with multiple audio formats, including Dolby Digital and DTS, ensuring high-quality sound reproduction that brings cinematic experiences right into the living room.
The HT-R510 boasts a robust power output, delivering up to 100 watts per channel into 8 ohms. This amount of power allows it to drive a range of speakers effectively, ensuring clear and impactful sound at all listening levels. Additionally, the receiver comes with a range of connection options, including six audio inputs, two optical inputs, and multiple composite video inputs, making it easy to integrate various audio and video components.
Another key characteristic of the HT-R510 is its sophisticated DSP (Digital Signal Processing) capabilities. This technology allows for a multitude of listening modes tailored to enhance specific types of content, such as movies, music, and gaming, providing listeners with a customized audio experience that maximizes enjoyment.
In terms of user-friendly features, the HT-R510 is equipped with an easy-to-navigate on-screen display that simplifies the setup process and adjustment of settings. The included remote control further enhances usability, allowing users to control their entire audio-visual setup from the comfort of their couch.
Furthermore, the HT-R510 supports both FM and AM radio, offering additional entertainment options. Its sleek design fits easily into any home décor, making it a stylish addition to any media setup.
Overall, the Onkyo HT-R510 is a solid choice for those seeking an affordable yet powerful home theater receiver. With its range of features, advanced audio technologies, and user-friendly design, it allows individuals to enjoy high-quality sound and an engaging multimedia experience in the comfort of their own home. Whether you’re watching movies, playing games, or listening to music, the HT-R510 is built to elevate your audio experience to new heights.

