Audio input preparation
When using a wireless microphone
Attach the
1 Attach the
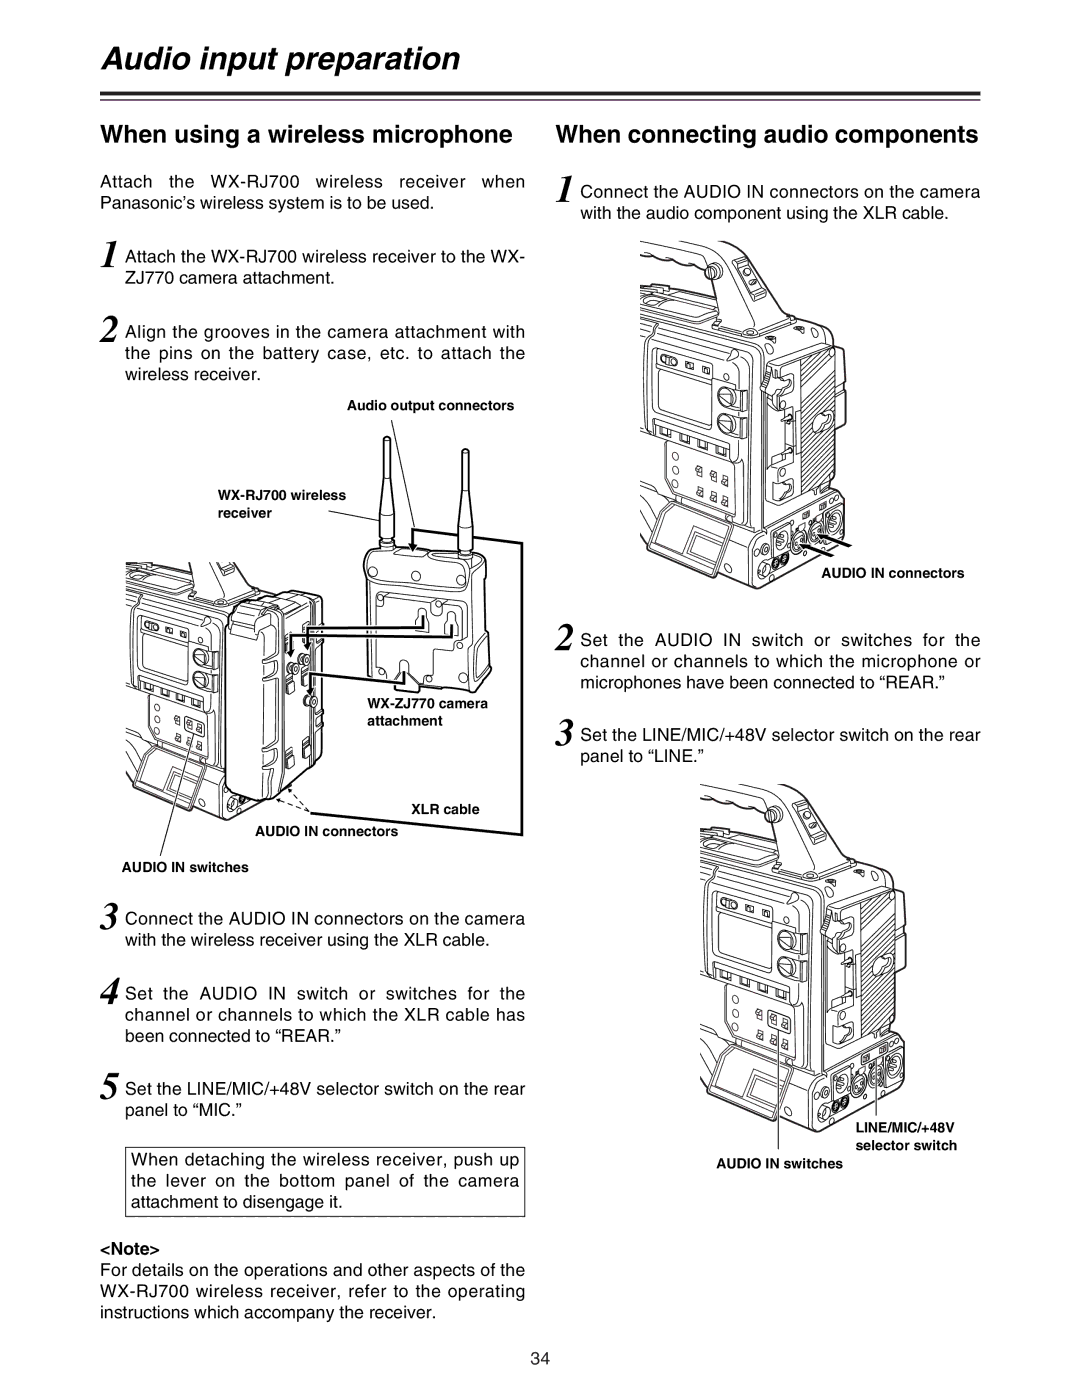
2 Align the grooves in the camera attachment with the pins on the battery case, etc. to attach the wireless receiver.
Audio output connectors
XLR cable
AUDIO IN connectors
AUDIO IN switches
3 Connect the AUDIO IN connectors on the camera with the wireless receiver using the XLR cable.
4 Set the AUDIO IN switch or switches for the channel or channels to which the XLR cable has been connected to “REAR.”
5 Set the LINE/MIC/+48V selector switch on the rear panel to “MIC.”
When detaching the wireless receiver, push up the lever on the bottom panel of the camera attachment to disengage it.
<Note>
For details on the operations and other aspects of the
When connecting audio components
1 Connect the AUDIO IN connectors on the camera with the audio component using the XLR cable.
AUDIO IN connectors
2 Set the AUDIO IN switch or switches for the channel or channels to which the microphone or microphones have been connected to “REAR.”
3 Set the LINE/MIC/+48V selector switch on the rear panel to “LINE.”
LINE/MIC/+48V selector switch
AUDIO IN switches
34
