Recording pictures (advanced)
Adjusting the Quality of the Picture (Picture Adjustment)
Preparation
• Set the mode dial except for [ ![]() ]/[
]/[ ![]() ]. (P28)
]. (P28)
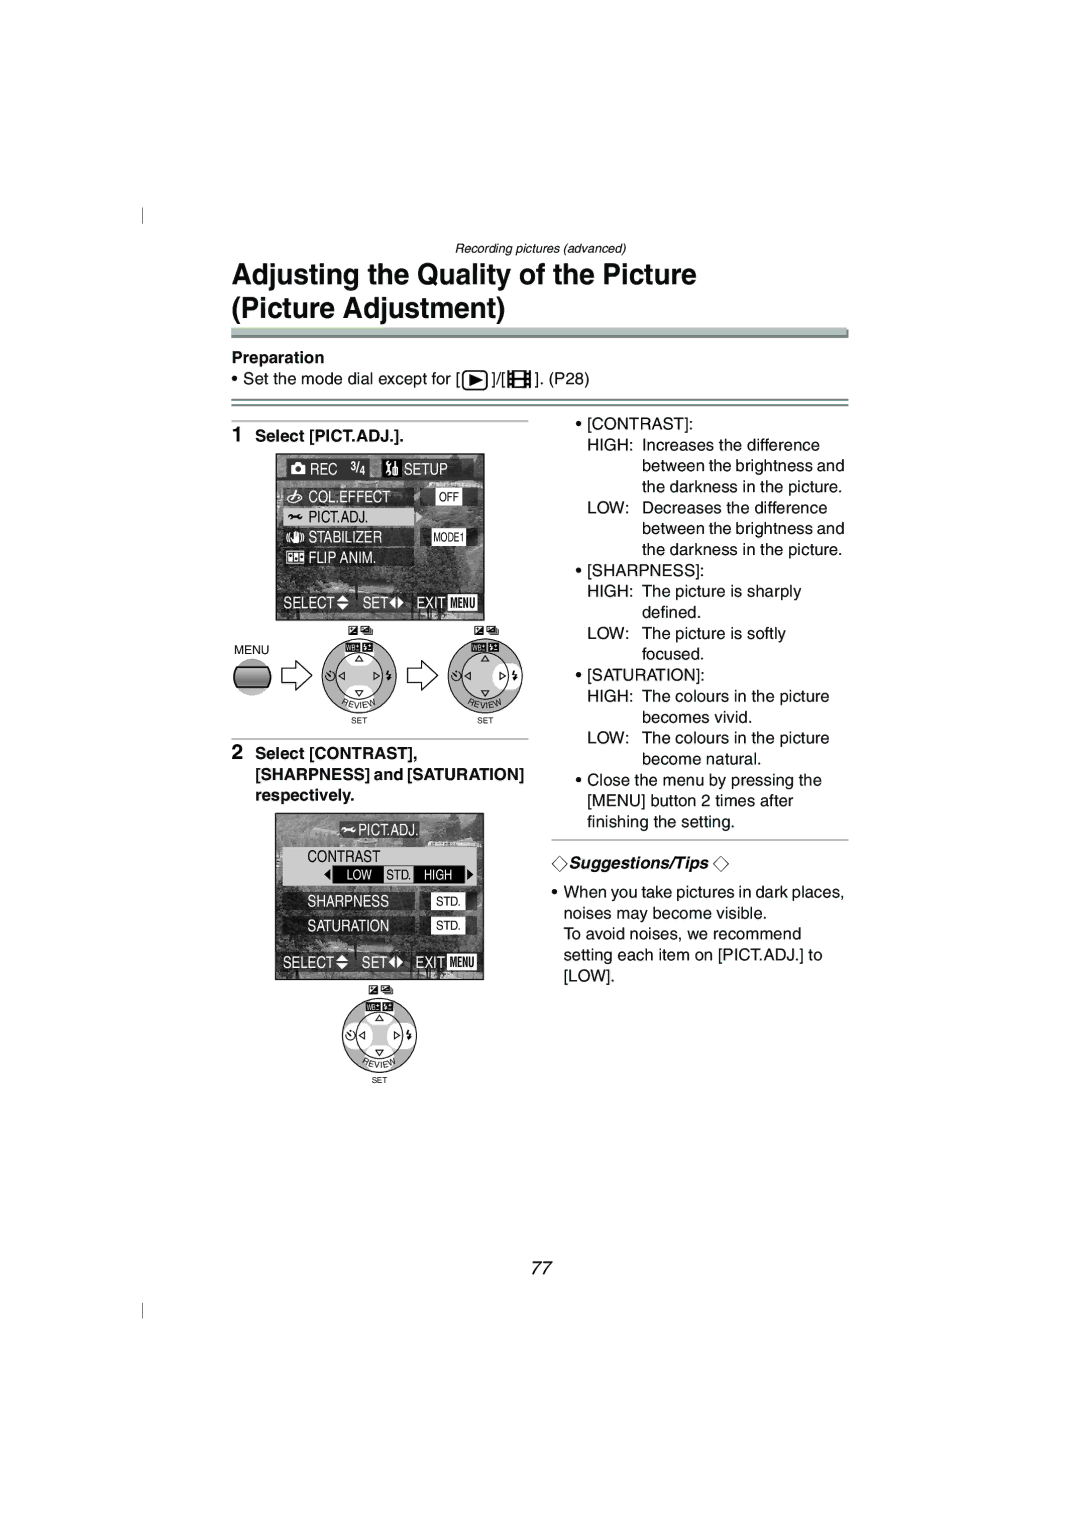
1Select [PICT.ADJ.].
REC |
| 3/4 | SETUP |
|
COL.EFFECT | OFF |
| ||
PICT.ADJ. |
|
| ||
STABILIZER | MODE1 |
| ||
FLIP ANIM. |
|
| ||
SELECT |
| SET | EXIT MENU | |
MENU | WB | WB | ||
| R | EVIEW | R | EVIEW |
|
|
| ||
|
| SET |
| SET |
2Select [CONTRAST], [SHARPNESS] and [SATURATION] respectively.
![]() PICT.ADJ.
PICT.ADJ.
CONTRAST
LOW STD. HIGH
SHARPNESS STD.
SATURATION STD.
SELECT![]() SET
SET![]()
![]() EXIT MENU
EXIT MENU
WB![]()
![]()
REVIEW
SET
•[CONTRAST]:
HIGH: Increases the difference between the brightness and the darkness in the picture.
LOW: Decreases the difference between the brightness and the darkness in the picture.
•[SHARPNESS]:
HIGH: The picture is sharply defined.
LOW: The picture is softly focused.
•[SATURATION]:
HIGH: The colours in the picture becomes vivid.
LOW: The colours in the picture become natural.
•Close the menu by pressing the [MENU] button 2 times after finishing the setting.
¬Suggestions/Tips ¬
•When you take pictures in dark places, noises may become visible.
To avoid noises, we recommend setting each item on [PICT.ADJ.] to [LOW].
77
