Setting the clock
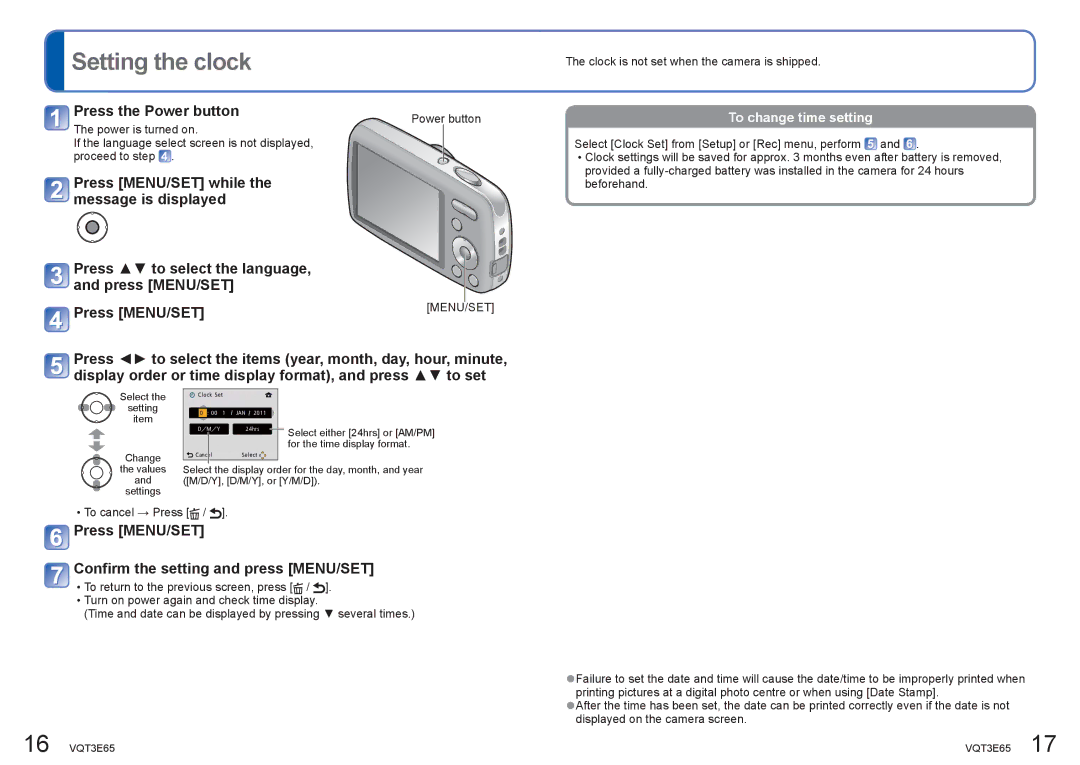
 Press the Power button
The power is turned on.
If the language select screen is not displayed, proceed to step ![]() .
.
![]() Press [MENU/SET] while the message is displayed
Press [MENU/SET] while the message is displayed
![]() Press ▲▼ to select the language, and press [MENU/SET]
Press ▲▼ to select the language, and press [MENU/SET]
![]() Press [MENU/SET]
Press [MENU/SET]
Power button
[MENU/SET]
The clock is not set when the camera is shipped.
To change time setting
Select [Clock Set] from [Setup] or [Rec] menu, perform![]() and .
and .
•Clock settings will be saved for approx. 3 months even after battery is removed, provided a
![]() Press ◄► to select the items (year, month, day, hour, minute, display order or time display format), and press ▲▼ to set
Press ◄► to select the items (year, month, day, hour, minute, display order or time display format), and press ▲▼ to set
Select the ![]() setting
setting
item
Change
the values
and
settings
Select either [24hrs] or [AM/PM] for the time display format.
Select the display order for the day, month, and year ([M/D/Y], [D/M/Y], or [Y/M/D]).
•To cancel → Press [![]() /
/ ![]() ].
].
 Press [MENU/SET]
 Confirm the setting and press [MENU/SET]
•To return to the previous screen, press [![]() /
/ ![]() ].
].
•Turn on power again and check time display.
(Time and date can be displayed by pressing ▼ several times.)
●Failure to set the date and time will cause the date/time to be improperly printed when printing pictures at a digital photo centre or when using [Date Stamp].
●After the time has been set, the date can be printed correctly even if the date is not displayed on the camera screen.
16 VQT3E65 | VQT3E65 17 |