Setting the proxy server |
| ≥The specified ports may be blocked and not be able to | ||
|
| |||
In most cases, default settings can normally be used without making |
| be used depending on the network environment. | ||
TIPS | In order to restore the default settings | |||
any changes. | After performing steps | |||
| ||||
Please use this setting when instructed to by your Internet service |
| 1) | Press [3, 4] to select “Reset to factory preset” and | |
provider. |
|
| press [OK]. | |
|
| 2) | Press [2, 1] to select “Yes” and press [OK]. | |
1Press [SETUP].
2Press [3, 4] to select “Network” and press
[OK].
3Press [3, 4] to select “Proxy Server Settings” and press [OK].
Proxy Server Settings
Reset to factory preset
Proxy Address
Proxy Port Number | 0 |
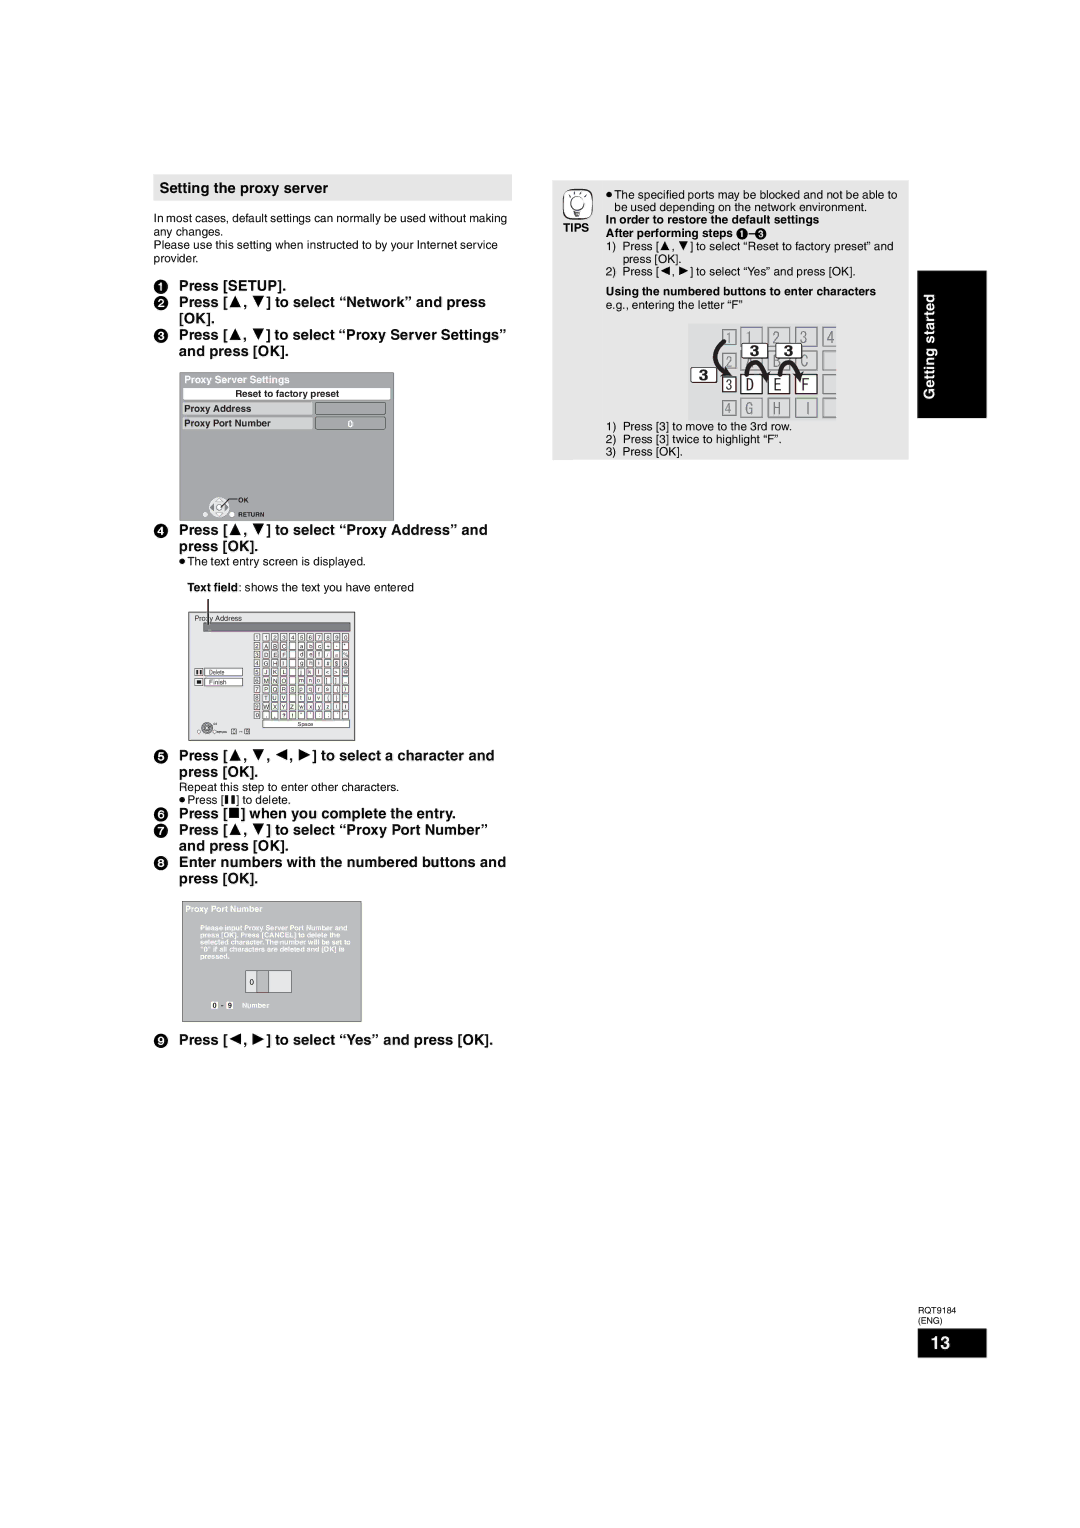
Using the numbered buttons to enter characters
e.g., entering the letter “F”


 #
# 
 $
$ 
 %
% 


 &
& '
' 
 (
( 


 )
) 
 *
* 
 +
+ 

1)Press [3] to move to the 3rd row.
2)Press [3] twice to highlight “F”.
3)Press [OK].
Getting started
![]() OK
OK
![]() RETURN
RETURN
4Press [3, 4] to select “Proxy Address” and press [OK].
≥The text entry screen is displayed.
Text field: shows the text you have entered
Proxy Address |
|
|
|
|
|
|
|
|
|
| ||
_ |
|
|
|
|
|
|
|
|
|
|
|
|
|
| 1 | 1 | 2 | 3 | 4 | 5 | 6 | 7 | 8 | 9 | 0 |
|
| 2 | A | B | C |
| a | b | c | + | - | * |
|
| 3 | D | E | F |
| d | e | f | / | = | % |
|
| 4 | G | H | I |
| g | h | i | # | $ | & |
Delete |
| 5 | J | K | L |
| j | k | l | < | > | @ |
Finish |
| 6 | M | N O |
| m | n | o | [ | ] | _ | |
|
| 7 | P Q R S p q r s ( ) | |||||||||
|
| 8 | T | U | V |
| t | u | v | { | } | ~ |
|
| 9 | W X Y Z w x y z \ | I | ||||||||
|
| 0 | . | , | ? | ! | “ | ’ | : | ; | ` | A |
OK |
|
|
|
|
|
| Space |
|
|
|
| |
RETURN | 0 |
|
|
|
|
|
|
|
|
|
| |
5Press [3, 4, 2, 1] to select a character and
press [OK].
Repeat this step to enter other characters.
≥Press [;] to delete.
6Press [∫] when you complete the entry.
7Press [3, 4] to select “Proxy Port Number” and press [OK].
8Enter numbers with the numbered buttons and press [OK].
Proxy Port Number
Please input Proxy Server Port Number and press [OK]. Press [CANCEL] to delete the selected character. The number will be set to "0" if all characters are deleted and [OK] is pressed.
0
0 - 9 Number
9Press [2, 1] to select “Yes” and press [OK].
RQT9184
(ENG)
13