Advanced recording
Flexible Recording
(Recording that fits the remaining disc space)
[HDD] [RAM] [-R] [-RW‹V›] [+R] [+RW]
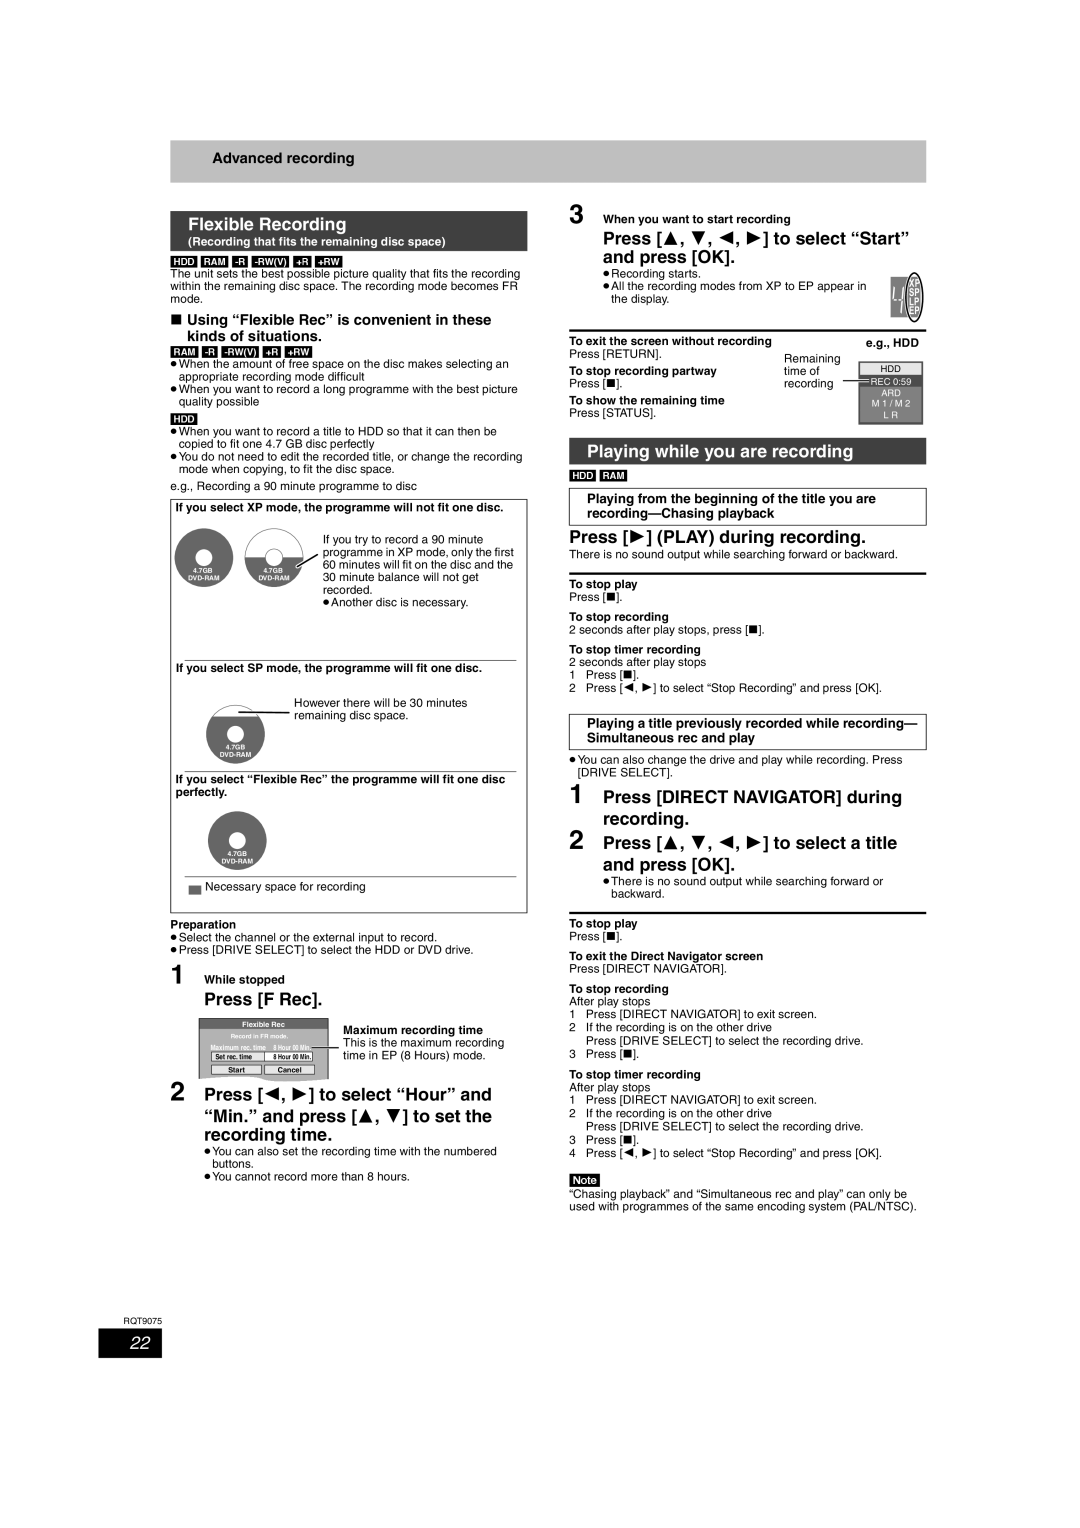
The unit sets the best possible picture quality that fits the recording within the remaining disc space. The recording mode becomes FR mode.
∫Using “Flexible Rec” is convenient in these
kinds of situations.
[RAM] [-R] [-RW‹V›] [+R] [+RW]
≥When the amount of free space on the disc makes selecting an appropriate recording mode difficult
≥When you want to record a long programme with the best picture quality possible
[HDD]
≥When you want to record a title to HDD so that it can then be copied to fit one 4.7 GB disc perfectly
≥You do not need to edit the recorded title, or change the recording mode when copying, to fit the disc space.
e.g., Recording a 90 minute programme to disc
If you select XP mode, the programme will not fit one disc.
|
| If you try to record a 90 minute | |
|
| programme in XP mode, only the first | |
4.7GB | 4.7GB | 60 minutes will fit on the disc and the | |
30 minute balance will not get | |||
|
| recorded. | |
|
| ≥Another disc is necessary. |
If you select SP mode, the programme will fit one disc.
However there will be 30 minutes remaining disc space.
4.7GB
If you select “Flexible Rec” the programme will fit one disc perfectly.
4.7GB
![]() Necessary space for recording
Necessary space for recording
Preparation
≥Select the channel or the external input to record.
≥Press [DRIVE SELECT] to select the HDD or DVD drive.
1 While stopped
Press [F Rec]. |
|
| |||||||
|
|
|
|
|
|
|
|
| |
| Flexible Rec |
| Maximum recording time | ||||||
| Record in FR mode. |
| |||||||
|
| This is the maximum recording | |||||||
Maximum rec. time | 8 Hour 00 Min. |
|
|
|
| ||||
|
| time in EP (8 Hours) mode. | |||||||
| Set rec. time |
| 8 Hour 00 Min. |
|
|
| |||
|
|
|
|
|
|
|
|
|
|
| Start |
|
| Cancel |
|
|
| ||
2 Press [2, 1] to select “Hour” and
“Min.” and press [3, 4] to set the recording time.
≥You can also set the recording time with the numbered buttons.
≥You cannot record more than 8 hours.
3 When you want to start recording
Press [3, 4, 2, 1] to select “Start” and press [OK].
≥Recording starts.
≥All the recording modes from XP to EP appear in |
| XP | |||
| SP | ||||
the display. |
|
|
| ||
|
|
| LP | ||
|
|
|
| EP | |
|
|
|
|
| |
|
|
|
|
|
|
To exit the screen without recording |
| e.g., HDD | |||
Press [RETURN]. | Remaining |
|
|
|
|
To stop recording partway | time of |
| HDD |
| |
Press [∫]. | recording |
| REC 0:59 |
| |
To show the remaining time |
|
| ARD |
| |
|
| M 1 / M 2 |
| ||
Press [STATUS]. |
|
| L R |
| |
|
|
|
|
|
|
Playing while you are recording
[HDD] [RAM]
Playing from the beginning of the title you are
Press [1] (PLAY) during recording.
There is no sound output while searching forward or backward.
To stop play
Press [∫].
To stop recording
2 seconds after play stops, press [∫].
To stop timer recording 2 seconds after play stops
1Press [∫].
2Press [2, 1] to select “Stop Recording” and press [OK].
Playing a title previously recorded while recording— Simultaneous rec and play
≥You can also change the drive and play while recording. Press [DRIVE SELECT].
1 Press [DIRECT NAVIGATOR] during recording.
2 Press [3, 4, 2, 1] to select a title and press [OK].
≥There is no sound output while searching forward or backward.
To stop play
Press [∫].
To exit the Direct Navigator screen
Press [DIRECT NAVIGATOR].
To stop recording
After play stops
1Press [DIRECT NAVIGATOR] to exit screen.
2If the recording is on the other drive
Press [DRIVE SELECT] to select the recording drive.
3Press [∫].
To stop timer recording
After play stops
1Press [DIRECT NAVIGATOR] to exit screen.
2If the recording is on the other drive
Press [DRIVE SELECT] to select the recording drive.
3Press [∫].
4Press [2, 1] to select “Stop Recording” and press [OK].
[Note]
“Chasing playback” and “Simultaneous rec and play” can only be used with programmes of the same encoding system (PAL/NTSC).
RQT9075
22
