Before using
%In order to increase the brightness of
the entire LCD monitor
1Press the [POWER LCD] button.
POWER LCD
$The [POWER LCD] lamp lights up.
$If the [POWER LCD] button is pressed, the entire LCD monitor will become approx. twice as bright as the normal.
$Press this button again, and the lamp will go off and the brightness will revert back to the original brightness.
$This will not affect the images to be recorded.
$If you turn on the camera when the AC adaptor is used, the [POWER LCD] function will automatically be activated.
%Changing the picture quality on the
LCD monitor
1Set [SETUP] >> [LCD AI] >> [DYNAMIC] or
[NORMAL].
[DYNAMIC]: The image on the LCD monitor becomes clear and vivid. Optimum contrast and brightness are set depending on the scenes recorded. Clear and brilliant images are presented. (The effect will vary depending on the images recorded.)
[NORMAL]: Switches to the standard picture quality.
$The effect will vary depending on the scene recorded.
$The picture quality on the viewfinder will not be affected.
$This function is automatically set to [DYNAMIC] when the brightness of the LCD monitor is increased (when the [POWER LCD] lamp lights up) and cannot be set to [NORMAL] independently.
$This will not affect the images to be recorded. $When the LCD monitor is rotated by 180°
towards the lens, the picture quality of the LCD monitor is temporarily adjusted as if the
[LCD AI] is set to [NORMAL].
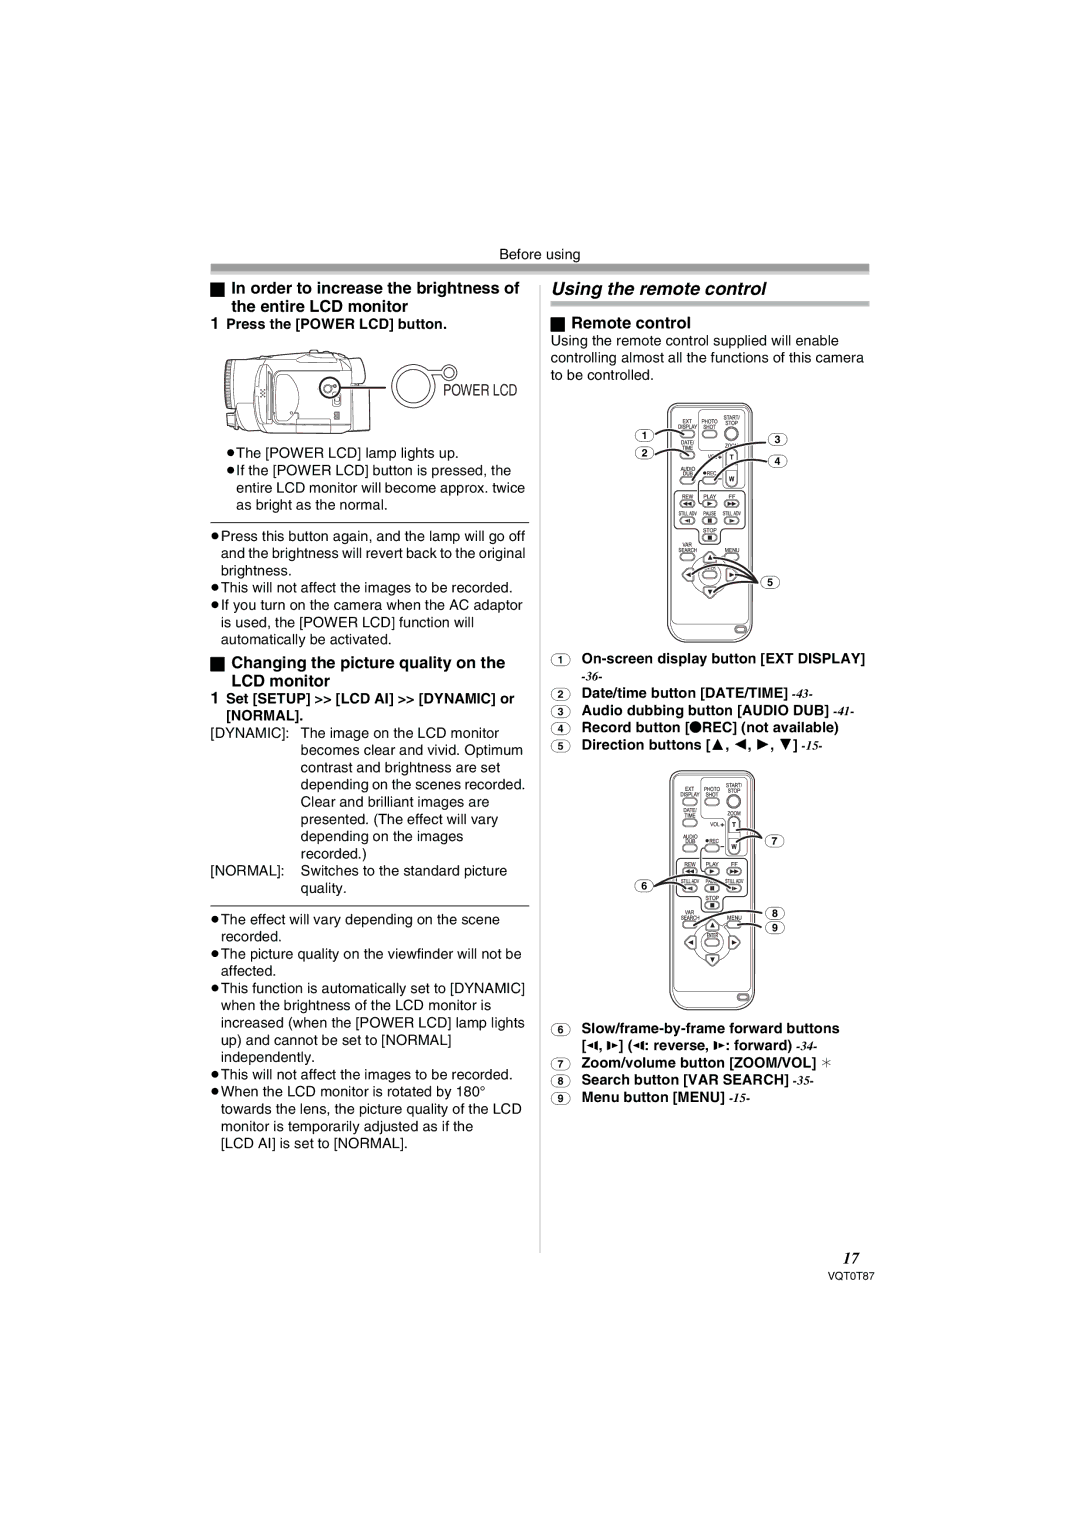
Using the remote control
%Remote control
Using the remote control supplied will enable controlling almost all the functions of this camera to be controlled.
(1) | (3) |
|
(2)
(4)
(5)
(1)
(2)Date/time button [DATE/TIME]
(3)Audio dubbing button [AUDIO DUB]
(4)Record button [/REC] (not available)
(5)Direction buttons [+,
![]()
![]()
![]()
![]()
![]()
![]()
![]()
![]() (7)
(7)
(6)
(8)
(9)
(6)
(7)Zoom/volume button [ZOOM/VOL] 2
(8)Search button [VAR SEARCH]
(9)Menu button [MENU]
17
VQT0T87