Before using
Free style remote control with mic
This controller can be used from different high and low angles. It is also handy when a tripod is used. When you do not use the controller, attach the clip to the grip belt.
(1)
(2)
(3)
(4)
(5)
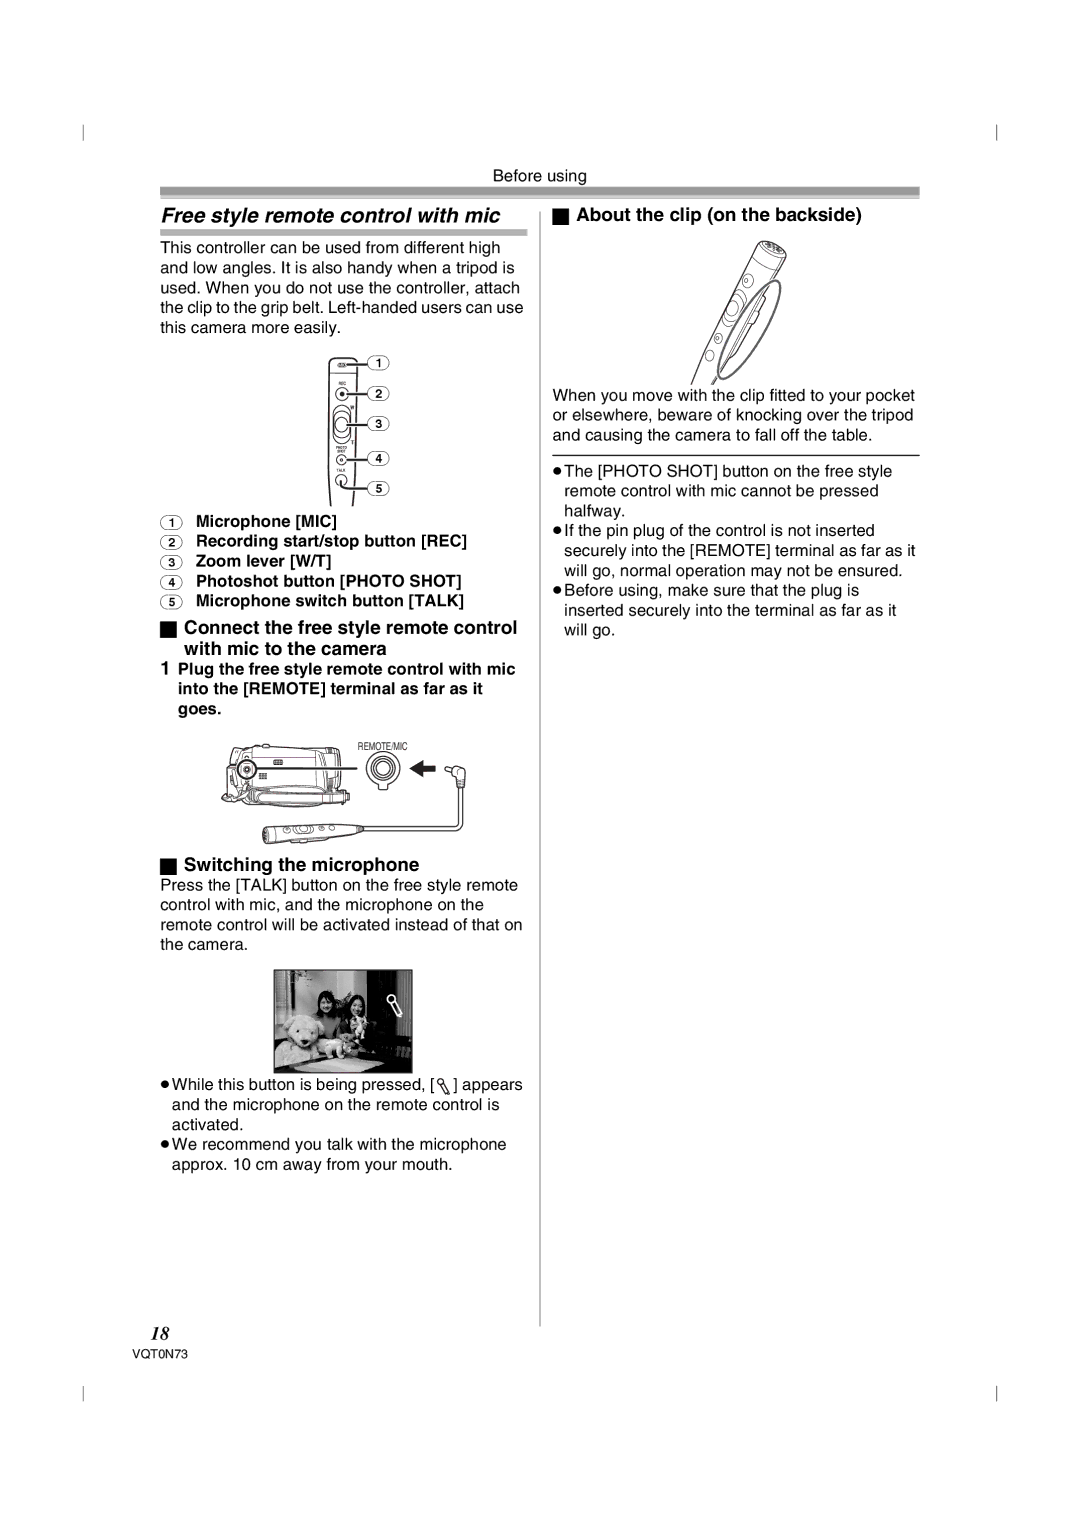
(1)Microphone [MIC]
(2)Recording start/stop button [REC]
(3)Zoom lever [W/T]
(4)Photoshot button [PHOTO SHOT]
(5)Microphone switch button [TALK]
ªConnect the free style remote control with mic to the camera
1Plug the free style remote control with mic into the [REMOTE] terminal as far as it goes.
REMOTE/MIC
ªSwitching the microphone
Press the [TALK] button on the free style remote control with mic, and the microphone on the remote control will be activated instead of that on the camera.
≥While this button is being pressed, [![]() ] appears and the microphone on the remote control is activated.
] appears and the microphone on the remote control is activated.
≥We recommend you talk with the microphone approx. 10 cm away from your mouth.
ªAbout the clip (on the backside)
When you move with the clip fitted to your pocket or elsewhere, beware of knocking over the tripod and causing the camera to fall off the table.
≥The [PHOTO SHOT] button on the free style remote control with mic cannot be pressed halfway.
≥If the pin plug of the control is not inserted securely into the [REMOTE] terminal as far as it
will go, normal operation may not be ensured. ≥Before using, make sure that the plug is
inserted securely into the terminal as far as it will go.
18
VQT0N73
