Setting up
Lens shift and positioning
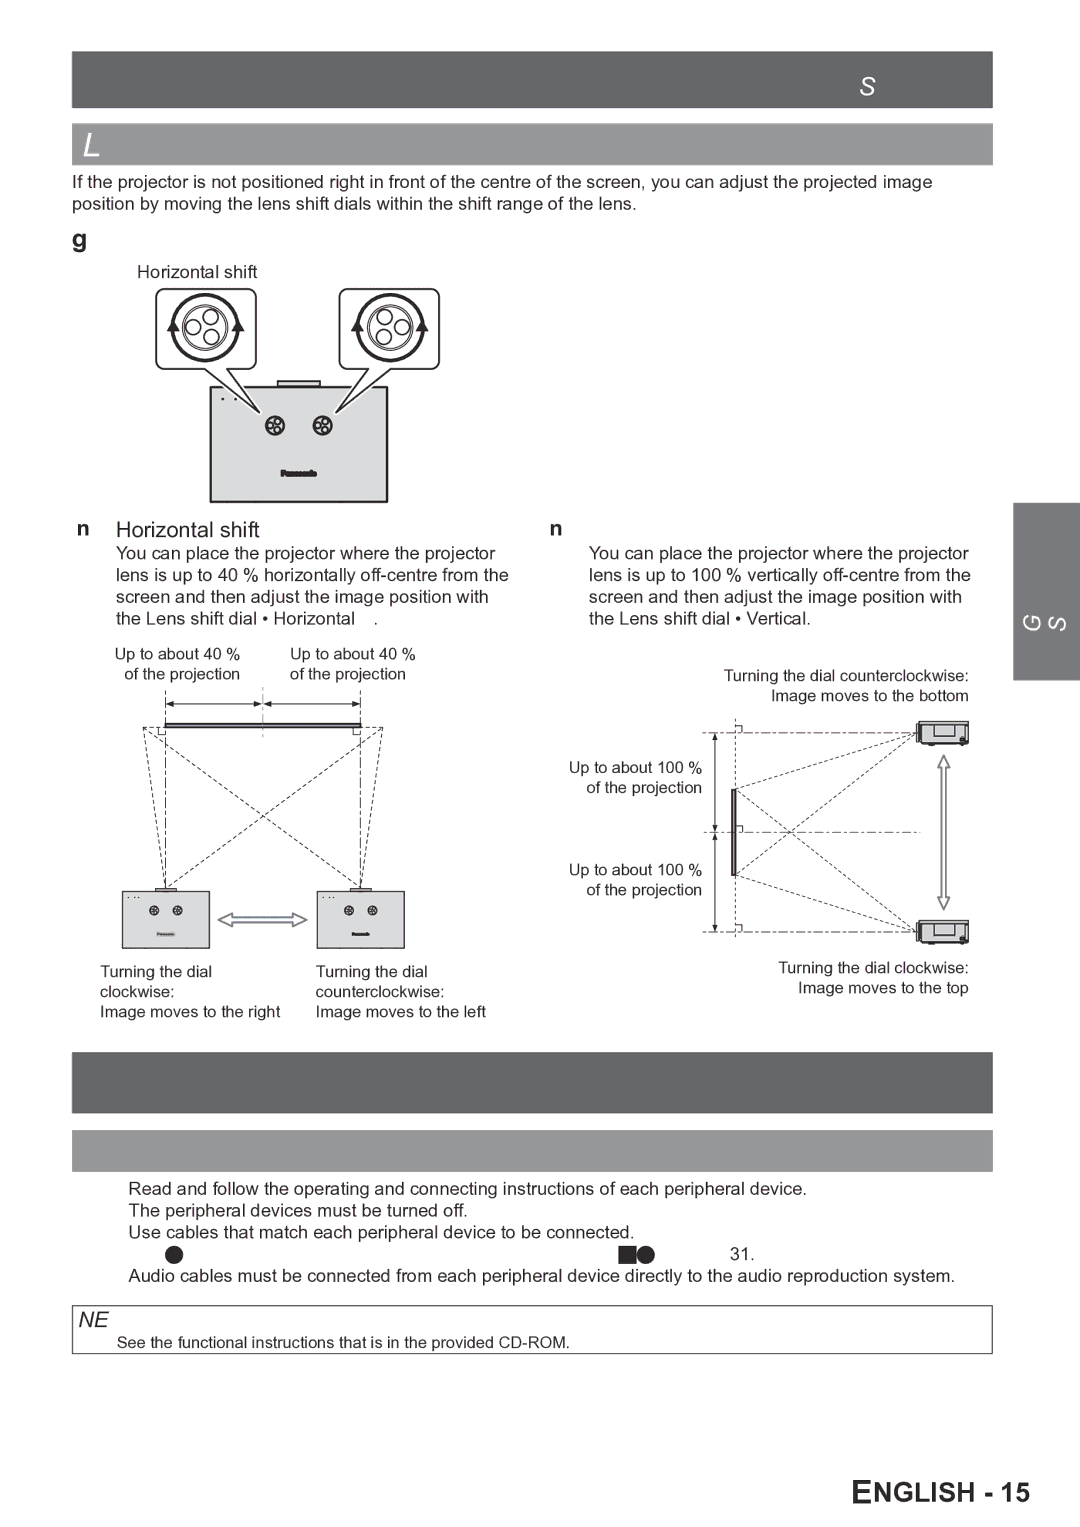
If the projector is not positioned right in front of the centre of the screen, you can adjust the projected image position by moving the lens shift dials within the shift range of the lens.
JJ Adjusting the lens shift dials
Horizontal shift | Vertical shift | |||
|
|
|
|
|
|
|
|
|
|
QQ Horizontal shift
You can place the projector where the projector lens is up to 40 % horizontally
Up to about 40 % | Up to about 40 % | ||
of the projection | of the projection | ||
|
|
|
|
Turning the dial | Turning the dial |
clockwise: | counterclockwise: |
Image moves to the right | Image moves to the left |
QQ Vertical shift
You can place the projector where the projector lens is up to 100 % vertically
Turning the dial counterclockwise:
Image moves to the bottom
Up to about 100 % of the projection
Up to about 100 % of the projection
Turning the dial clockwise:
Image moves to the top
Getting Started
Connections
Before connecting to the projector
Read and follow the operating and connecting instructions of each peripheral device. The peripheral devices must be turned off.
Use cables that match each peripheral device to be connected.
Confirm the type of video signals. See “List of compatible signals” on page 31.
Audio cables must be connected from each peripheral device directly to the audio reproduction system.
NOTE:
•• See the functional instructions that is in the provided