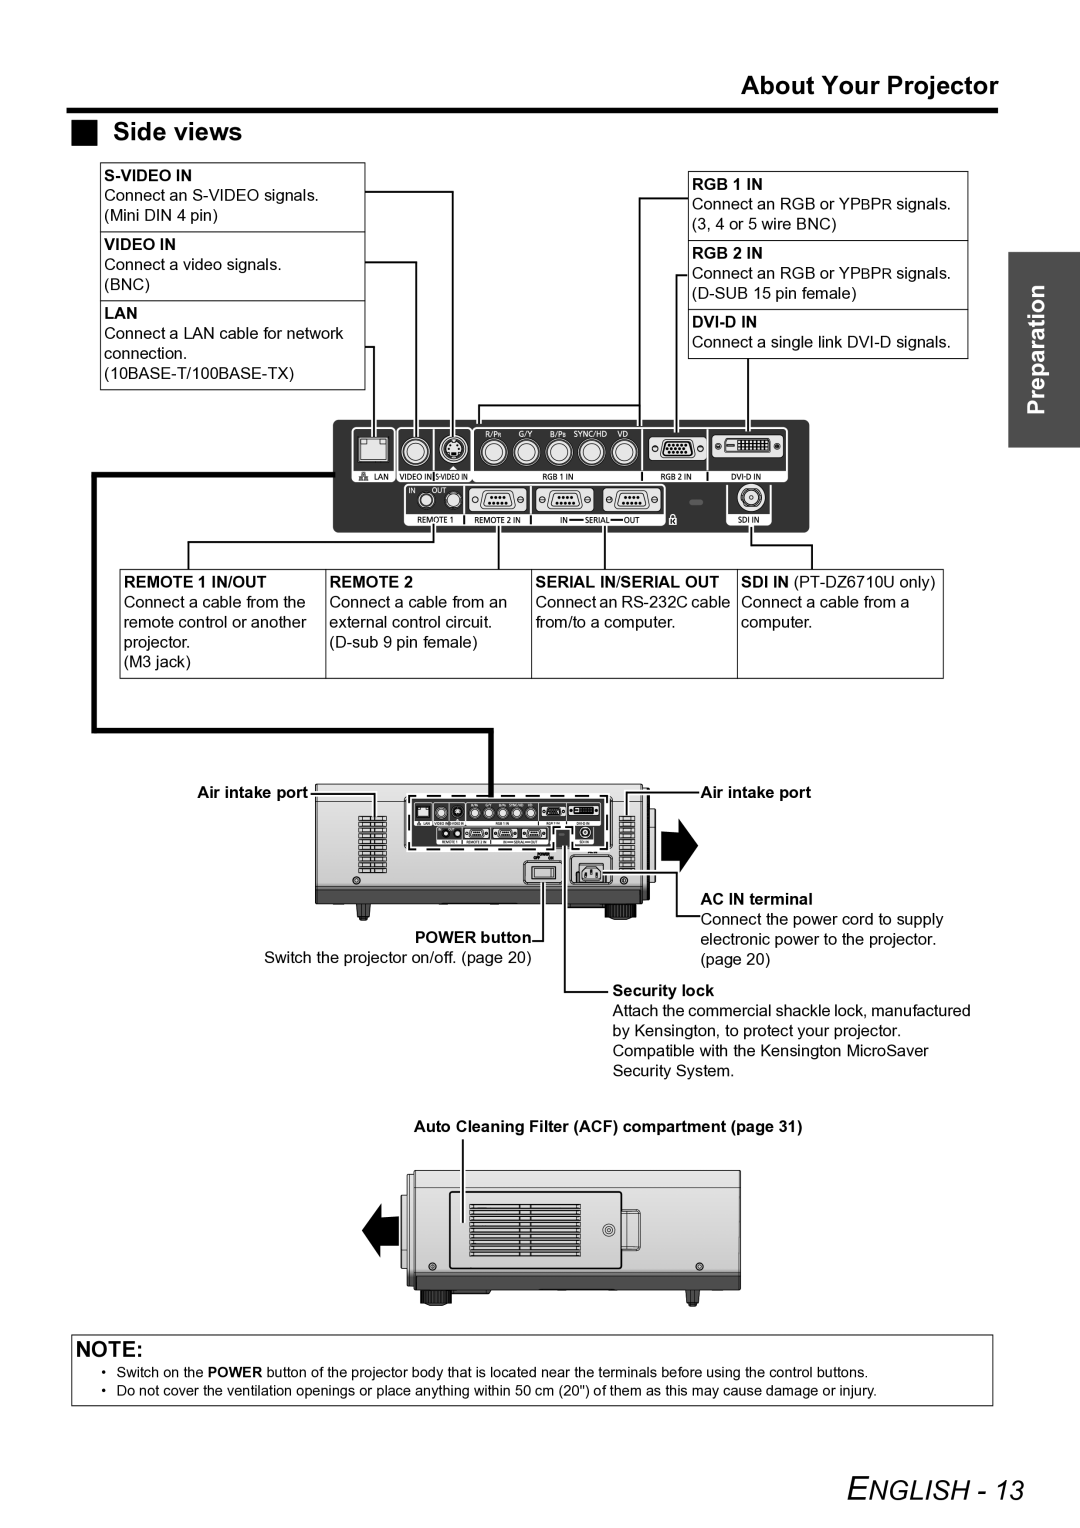
Side views
Connect an
VIDEO IN
Connect a video signals. (BNC)
LAN
Connect a LAN cable for network connection.
About Your Projector
RGB 1 IN |
| |
Connect an RGB or YPBPR signals. |
| |
(3, 4 or 5 wire BNC) |
| |
RGB 2 IN |
| |
Connect an RGB or YPBPR signals. | Preparation | |
| ||
| ||
Connect a single link |
|
REMOTE 1 IN/OUT Connect a cable from the remote control or another projector.
(M3 jack)
REMOTE 2
Connect a cable from an external control circuit.
SERIAL IN/SERIAL OUT Connect an
SDI IN
Air intake port ![]()
POWER button![]()
Switch the projector on/off. (page 20)
![]() Air intake port
Air intake port
AC IN terminal
![]() Connect the power cord to supply electronic power to the projector. (page 20)
Connect the power cord to supply electronic power to the projector. (page 20)
 Security lock
Attach the commercial shackle lock, manufactured by Kensington, to protect your projector. Compatible with the Kensington MicroSaver Security System.
Auto Cleaning Filter (ACF) compartment (page 31)
NOTE:
•Switch on the POWER button of the projector body that is located near the terminals before using the control buttons.
•Do not cover the ventilation openings or place anything within 50 cm (20") of them as this may cause damage or injury.