Replacement
Replacement procedure
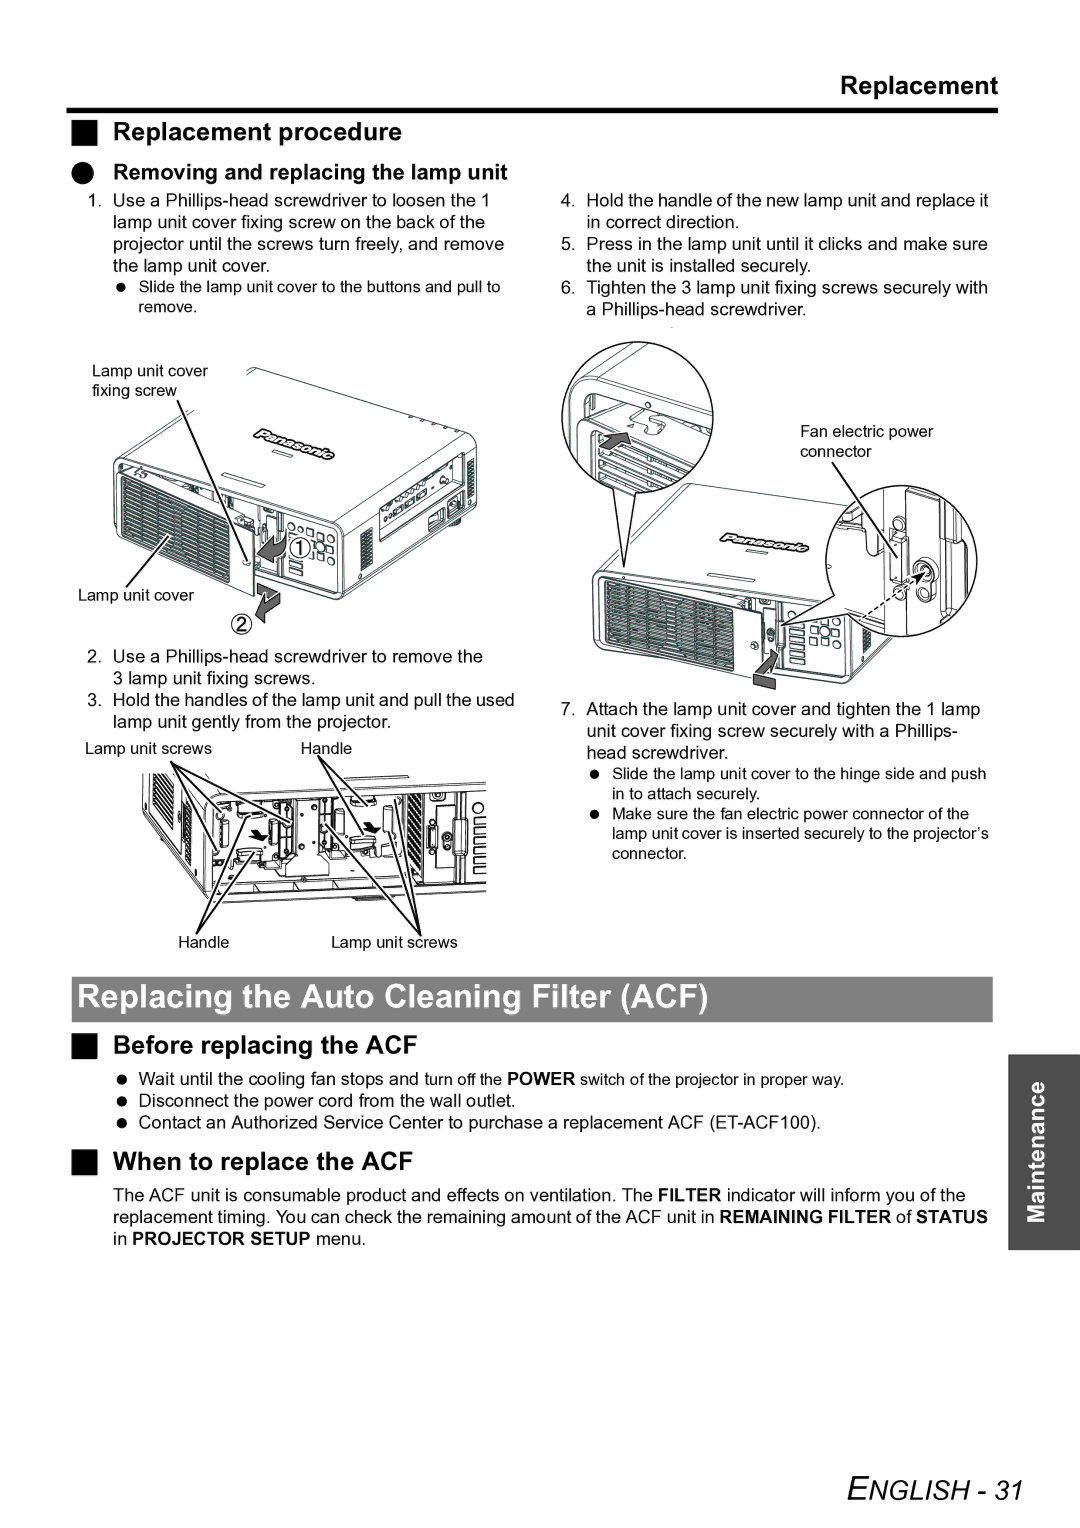
Removing and replacing the lamp unit
1.Use a
Slide the lamp unit cover to the buttons and pull to remove.
4.Hold the handle of the new lamp unit and replace it in correct direction.
5.Press in the lamp unit until it clicks and make sure the unit is installed securely.
6.Tighten the 3 lamp unit fixing screws securely with a
Lamp unit cover fixing screw
Lamp unit cover
2.Use a
3.Hold the handles of the lamp unit and pull the used lamp unit gently from the projector.
Lamp unit screws | Handle |
Fan electric power connector
7.Attach the lamp unit cover and tighten the 1 lamp unit cover fixing screw securely with a Phillips- head screwdriver.
Slide the lamp unit cover to the hinge side and push in to attach securely.
Make sure the fan electric power connector of the lamp unit cover is inserted securely to the projector’s connector.
Handle | Lamp unit screws |
Replacing the Auto Cleaning Filter (ACF)
Before replacing the ACF
Wait until the cooling fan stops and turn off the POWER switch of the projector in proper way. Disconnect the power cord from the wall outlet.
Contact an Authorized Service Center to purchase a replacement ACF
When to replace the ACF
The ACF unit is consumable product and effects on ventilation. The FILTER indicator will inform you of the replacement timing. You can check the remaining amount of the ACF unit in REMAINING FILTER of STATUS in PROJECTOR SETUP menu.
Maintenance