
PT-LC50U specifications
The Panasonic PT-LC50U is a versatile and robust LCD projector designed to meet the needs of both educational and professional environments. Renowned for its high-quality imaging and reliability, it has become a popular choice for presentations, lectures, and multimedia applications.One of the standout features of the PT-LC50U is its advanced LCD technology, which delivers bright and clear images with vibrant colors. With a brightness of up to 3,000 ANSI lumens, this projector can produce high-quality visuals in various ambient light conditions. Whether in a dimly lit auditorium or a brightly lit conference room, the PT-LC50U ensures that images remain sharp and easily visible.
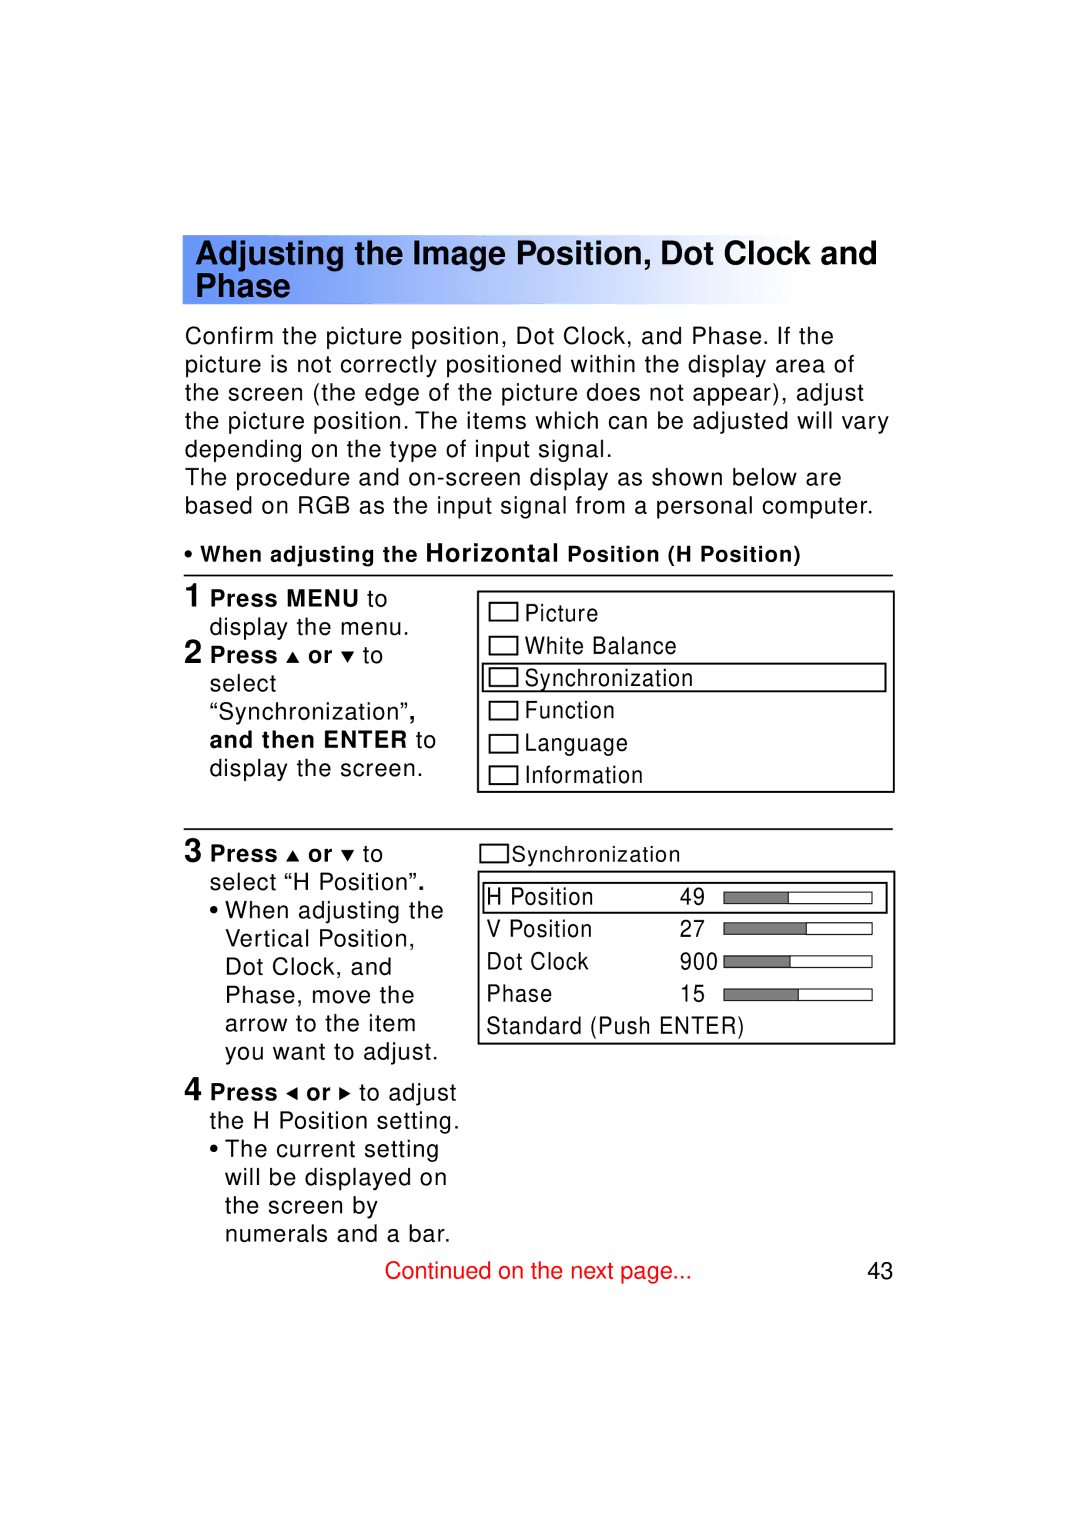
The projector boasts a native resolution of 1024 x 768 pixels, allowing it to render detailed images suitable for various content types, from text-heavy presentations to dynamic videos. This level of resolution is particularly beneficial for displaying academic materials, slideshows, and graphic content, making it an ideal choice for educators and professionals alike.
In terms of connectivity, the Panasonic PT-LC50U is equipped with multiple input options, including VGA, composite video, and S-Video, offering versatility in connecting a wide range of devices. This multi-input capability enables users to switch seamlessly between laptops, video players, and other devices without the hassle of reconfiguring the setup.
The projector also incorporates a range of user-friendly features designed to enhance usability and maintenance. The built-in lens shift function allows for easy image adjustments without physically moving the projector, ensuring that visuals are perfectly aligned with the screen. Additionally, the PT-LC50U is designed with a long-lasting lamp life of up to 5,000 hours in eco mode, which significantly reduces the need for frequent replacements and lowers overall operational costs.
The PT-LC50U is also equipped with various image enhancement technologies that improve the overall viewing experience. Features such as digital keystone correction help to adjust the image shape if the projector is not perfectly aligned with the screen, while the dynamic iris technology adjusts the light output based on the content being displayed, enhancing contrast and improving black levels.
Overall, the Panasonic PT-LC50U stands out in the crowded projector market due to its combination of performance, flexibility, and ease of use. Its robust feature set and dependable technology make it an ideal solution for anyone seeking a reliable projector for educational or business purposes.