Adjusting the position
When an RGB signal is being input, press the AUTO SETUP button first to initiate automatic positioning. If the optimum setting is not obtained when “AUTO SETUP” is carried out, adjust by the following procedure.
Press the F or G button on the projector or remote control unit to select an item, and then press the I or H button to change the setting. For items with bar scales, press the ENTER button or the I or H button to display the adjustment screen, and then press the I or H button to make the adjustment.
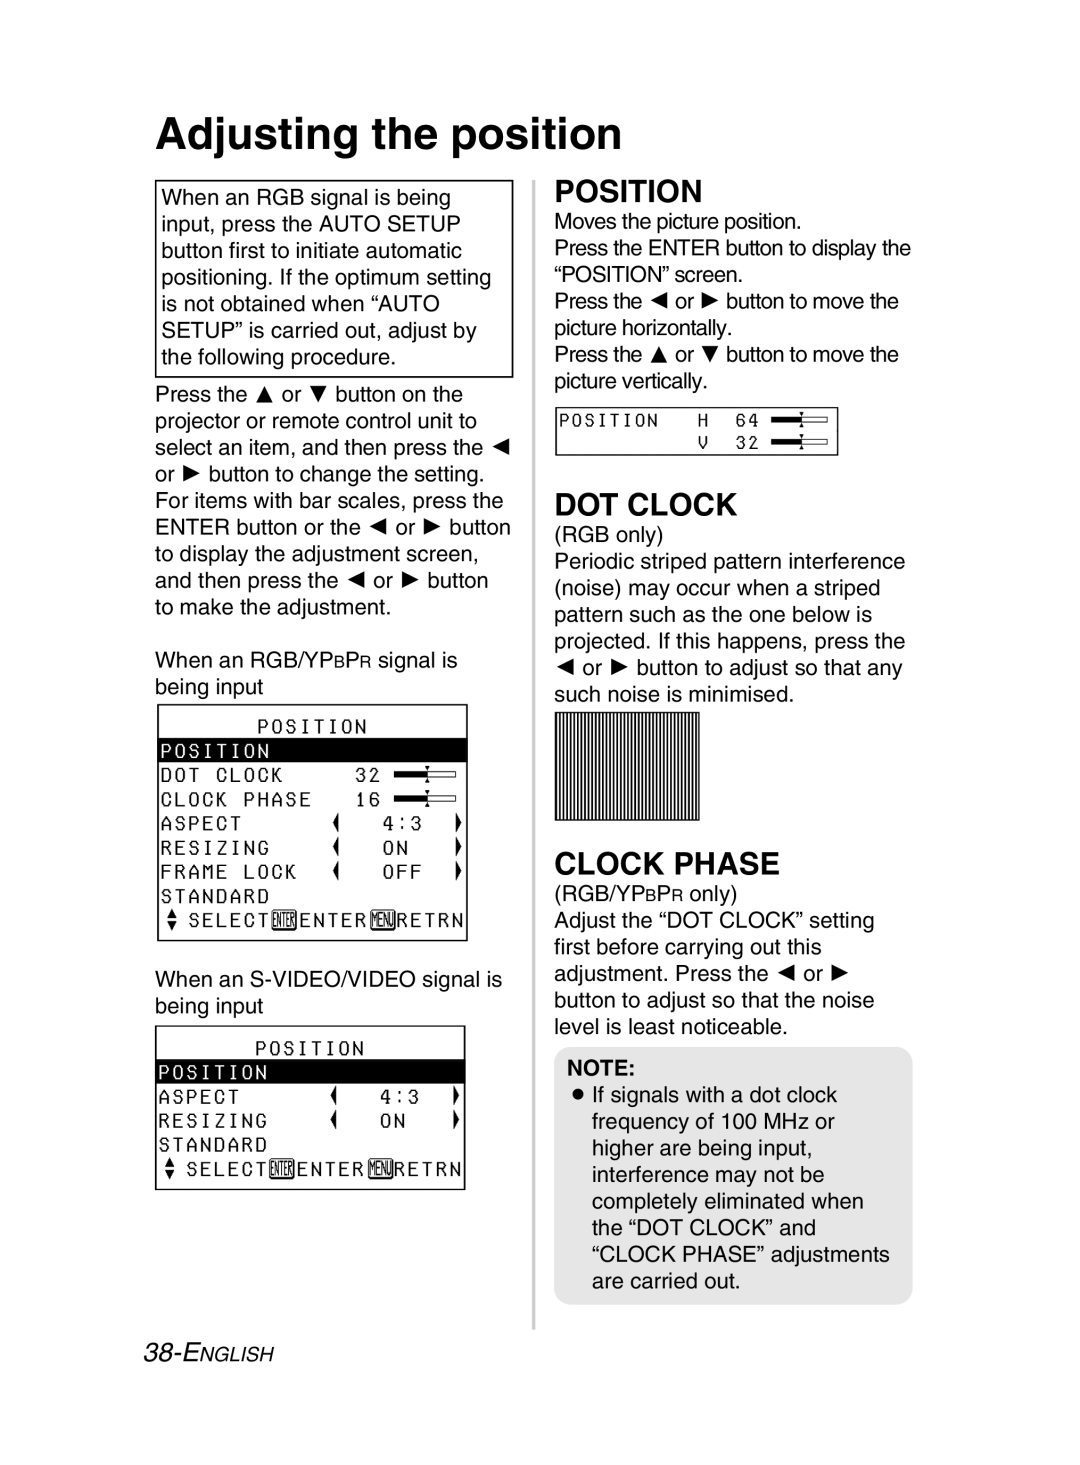
When an RGB/YPBPR signal is being input
POSITION
POSITION |
|
DOT CLOCK | 32 |
CLOCK PHASE | 16 |
ASPECT | 4:3 |
RESIZING | ON |
FRAME LOCK | OFF |
STANDARD
 SELECT
 ENTER
ENTER  RETRN
RETRN
When an S-VIDEO/VIDEO signal is being input
POSITION
POSITION
ASPECT ![]() 4:3
4:3
RESIZING ![]() ON STANDARD
ON STANDARD
 SELECT
 ENTER
ENTER  RETRN
RETRN
POSITION
Moves the picture position.
Press the ENTER button to display the “POSITION” screen.
Press the I or H button to move the picture horizontally.
Press the F or G button to move the picture vertically.
POSITION H 64 ![]()
V32 ![]()
DOT CLOCK
(RGB only)
Periodic striped pattern interference (noise) may occur when a striped pattern such as the one below is projected. If this happens, press the
Ior H button to adjust so that any such noise is minimised.
CLOCK PHASE
(RGB/YPBPR only)
Adjust the “DOT CLOCK” setting first before carrying out this adjustment. Press the I or H button to adjust so that the noise level is least noticeable.
NOTE:
BIf signals with a dot clock frequency of 100 MHz or higher are being input, interference may not be completely eliminated when the “DOT CLOCK” and “CLOCK PHASE” adjustments are carried out.