Simple Setup
step4 Digital transmitter connection [PT865]
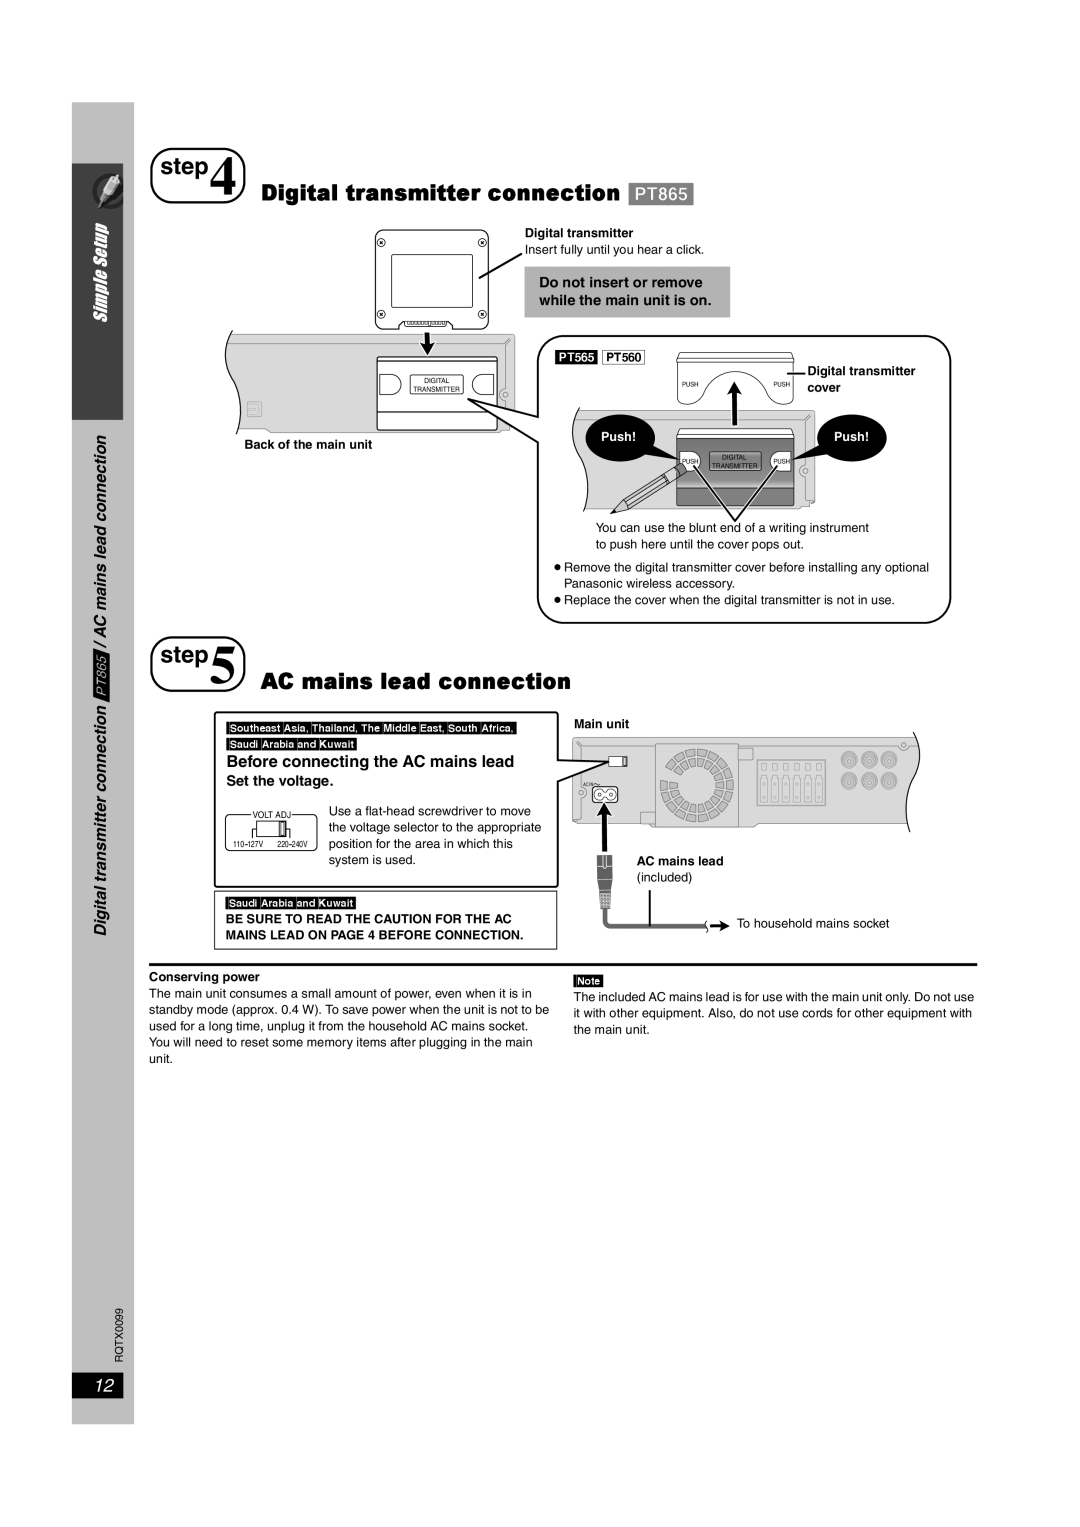
Digital transmitter
Insert fully until you hear a click.
Do not insert or remove while the main unit is on.
[PT565] [PT560]
Digital transmitter
DIGITAL | PUSH | PUSH | cover | |
TRANSMITTER | ||||
|
|
connection
Back of the main unit
Push! ![]() Push!
Push!
DIGITAL
PUSHPUSH
TRANSMITTER
[PT865] / AC mains lead
You can use the blunt end of a writing instrument to push here until the cover pops out.
≥Remove the digital transmitter cover before installing any optional Panasonic wireless accessory.
≥Replace the cover when the digital transmitter is not in use.
step5 AC mains lead connection
Digital transmitter connection
[Southeast]Asia,[Thailand,[The[Middle[East,[South[Africa,]
[Saudi[Arabia[and[Kuwait]
Before connecting the AC mains lead
Set the voltage.
| VOLT ADJ |
| Use a | |||
|
|
|
|
|
| the voltage selector to the appropriate |
|
|
|
|
|
| |
110 127V 220 240V | position for the area in which this | |||||
|
|
|
|
|
| system is used. |
[Saudi[Arabia[and[Kuwait]
BE SURE TO READ THE CAUTION FOR THE AC MAINS LEAD ON PAGE 4 BEFORE CONNECTION.
Main unit
AC IN
AC mains lead
(included)
![]() To household mains socket
To household mains socket
RQTX0099
Conserving power | [Note] | |
The main unit consumes a small amount of power, even when it is in | ||
The included AC mains lead is for use with the main unit only. Do not use | ||
standby mode (approx. 0.4 W). To save power when the unit is not to be | ||
it with other equipment. Also, do not use cords for other equipment with | ||
used for a long time, unplug it from the household AC mains socket. | ||
the main unit. | ||
You will need to reset some memory items after plugging in the main | ||
| ||
unit. |
|
12