Setup 6 Setting the date and time, changing the display language
Setting the date and time
Before recording, check that the date and time have been set.
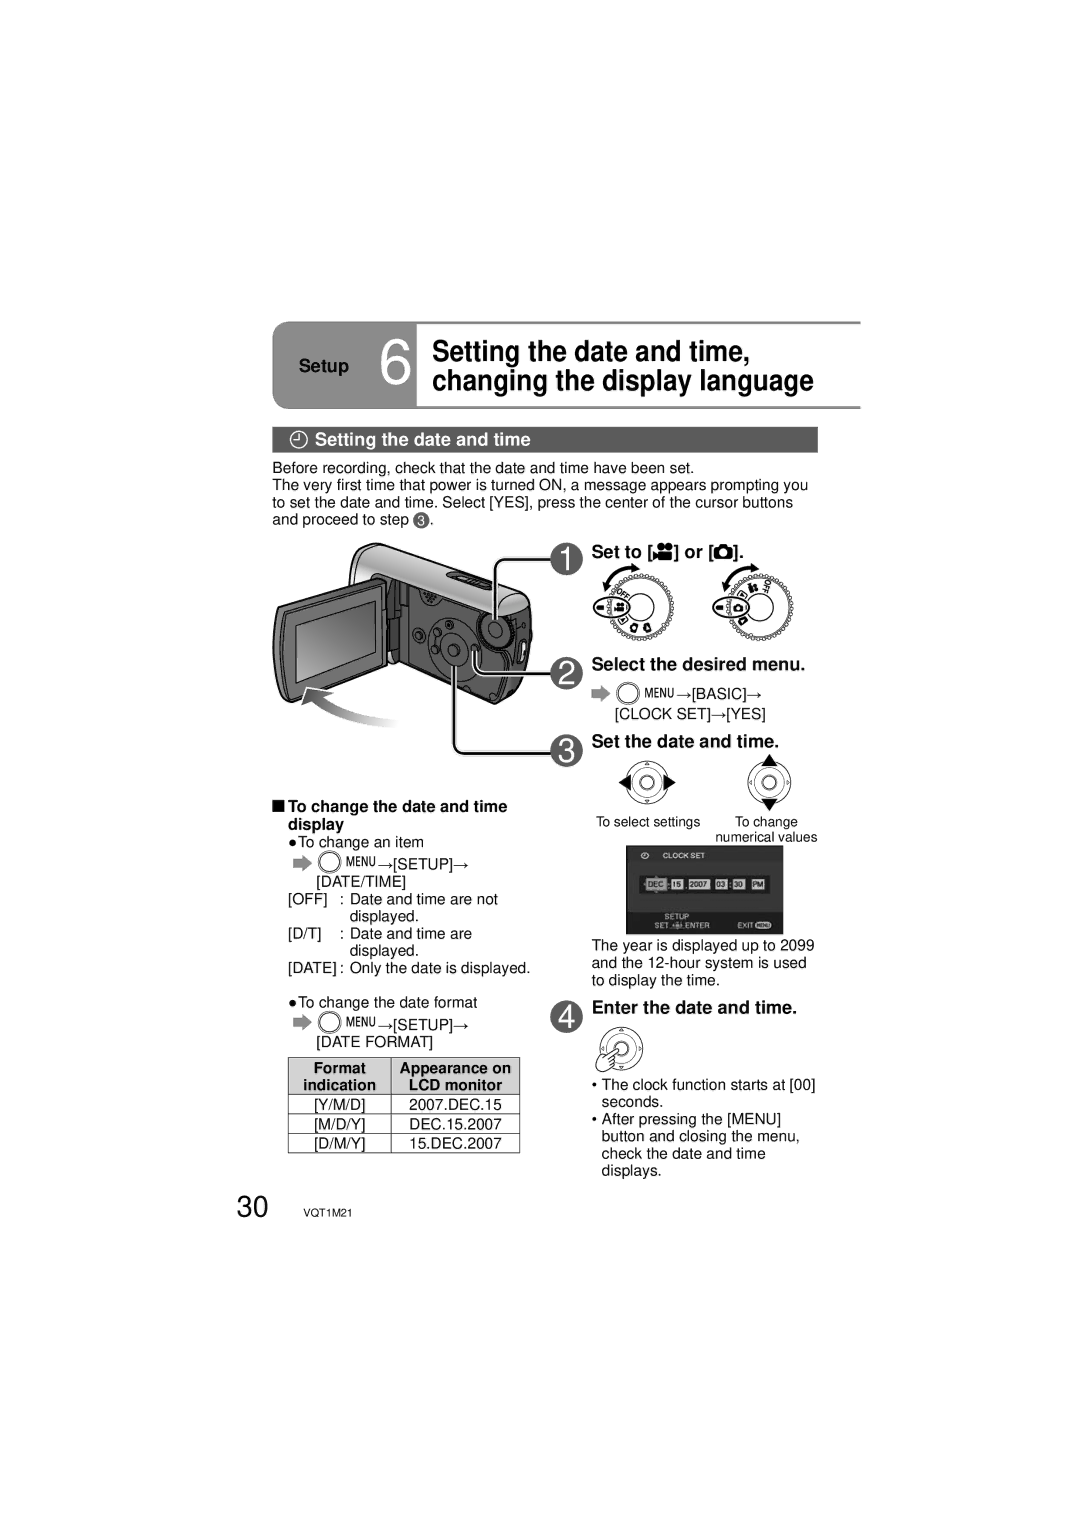
The very first time that power is turned ON, a message appears prompting you to set the date and time. Select [YES], press the center of the cursor buttons and proceed to step 3 .
 1
1
2
3
 To change the date and time display
●To change an item


 →[SETUP]→ [DATE/TIME]
[OFF] : Date and time are not displayed.
[D/T] : Date and time are displayed.
[DATE] : Only the date is displayed.
●To change the date format | 4 | ||
| →[SETUP]→ | ||
[DATE FORMAT] |
| ||
|
|
|
|
Format |
| Appearance on |
|
indication |
| LCD monitor |
|
[Y/M/D] |
| 2007.DEC.15 |
|
[M/D/Y] |
| DEC.15.2007 |
|
[D/M/Y] |
| 15.DEC.2007 |
|
Set to [
 ] or [
 ].
].
Select the desired menu.
![]()
![]()
![]() →[BASIC]→ [CLOCK SET]→[YES]
→[BASIC]→ [CLOCK SET]→[YES]
Set the date and time.
To select settings | To change |
| numerical values |
The year is displayed up to 2099 and the
Enter the date and time.
•The clock function starts at [00] seconds.
•After pressing the [MENU] button and closing the menu, check the date and time displays.
30 VQT1M21
