Charging the Battery
Be sure to turn the power switch on the camera off when charging the battery.
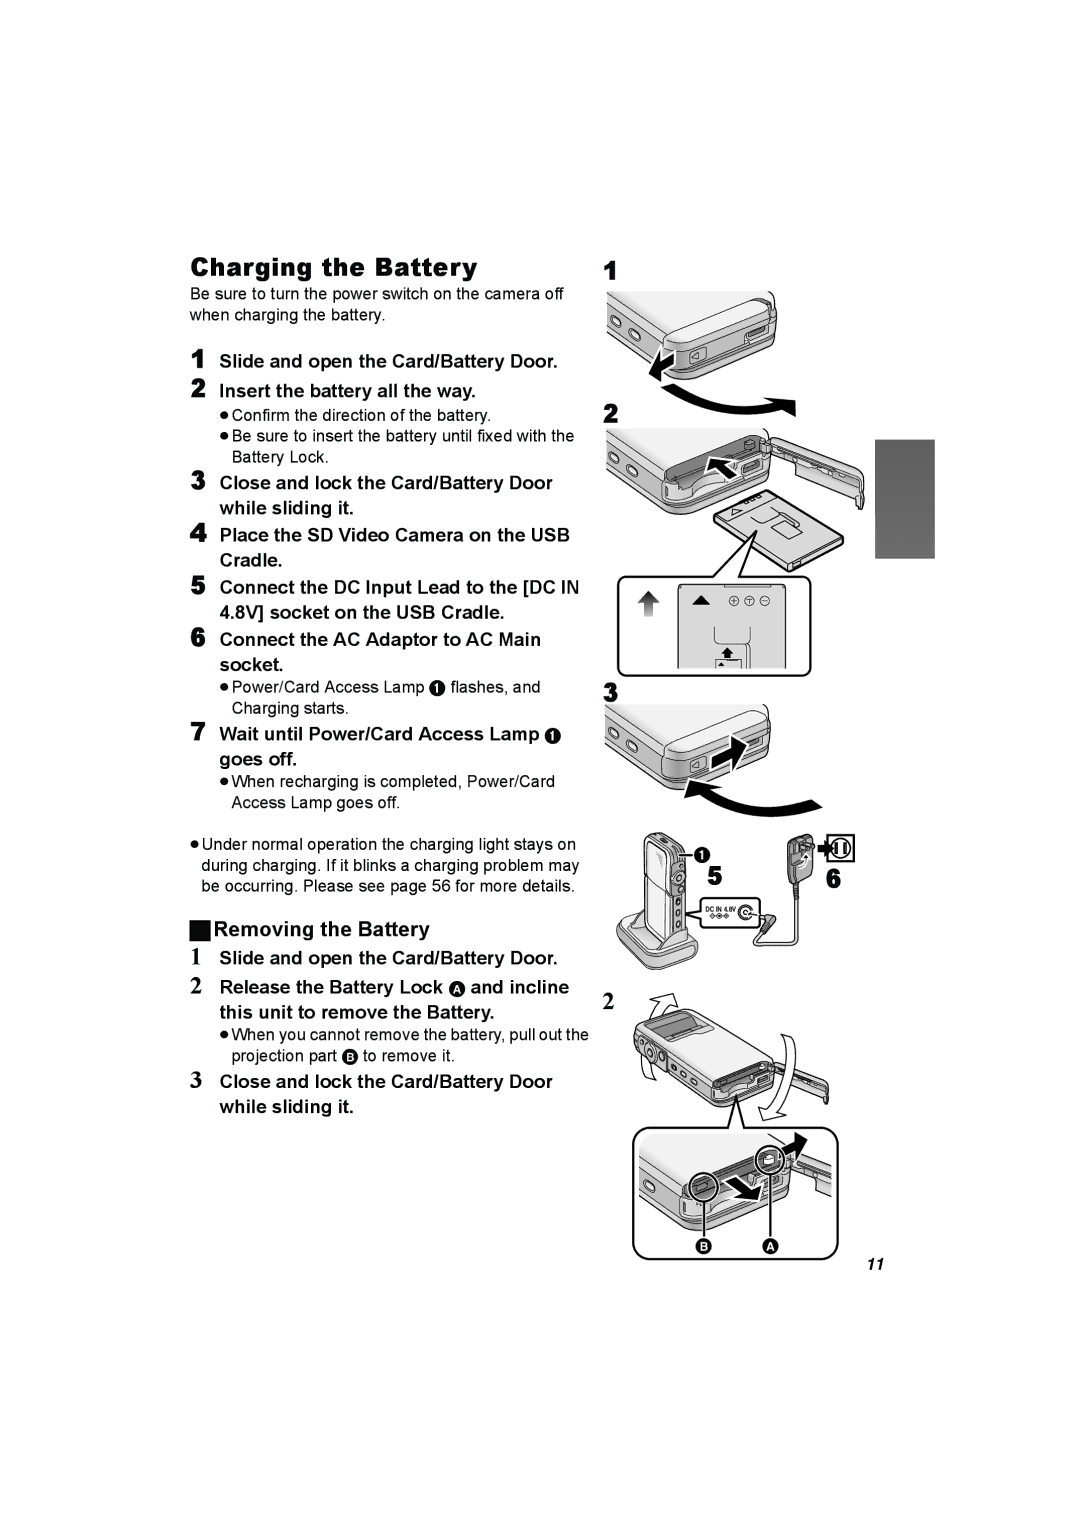
1Slide and open the Card/Battery Door.
2Insert the battery all the way.
≥Confirm the direction of the battery.
≥Be sure to insert the battery until fixed with the Battery Lock.
3 Close and lock the Card/Battery Door while sliding it.
4 Place the SD Video Camera on the USB Cradle.
5 Connect the DC Input Lead to the [DC IN 4.8V] socket on the USB Cradle.
6 Connect the AC Adaptor to AC Main socket.
≥Power/Card Access Lamp 1 flashes, and Charging starts.
7 Wait until Power/Card Access Lamp 1 goes off.
≥When recharging is completed, Power/Card Access Lamp goes off.
≥Under normal operation the charging light stays on during charging. If it blinks a charging problem may be occurring. Please see page 56 for more details.
ªRemoving the Battery
1Slide and open the Card/Battery Door.
2Release the Battery Lock A and incline this unit to remove the Battery.
≥When you cannot remove the battery, pull out the projection part B to remove it.
3Close and lock the Card/Battery Door while sliding it.
1
2
3
15 | 6 |
DC IN 4.8V |
2
B A
11
