Useful Functions
Selective Area Transmission
By using the selective area window, you can specify the necessary information alone from the computer screen, and display it on the projection screen.
1
2
3
Click [![]() ].
].
The launcher menu will appear.
Click [Selective Area Transmission] in the launcher menu.
The range selection screen is displayed.
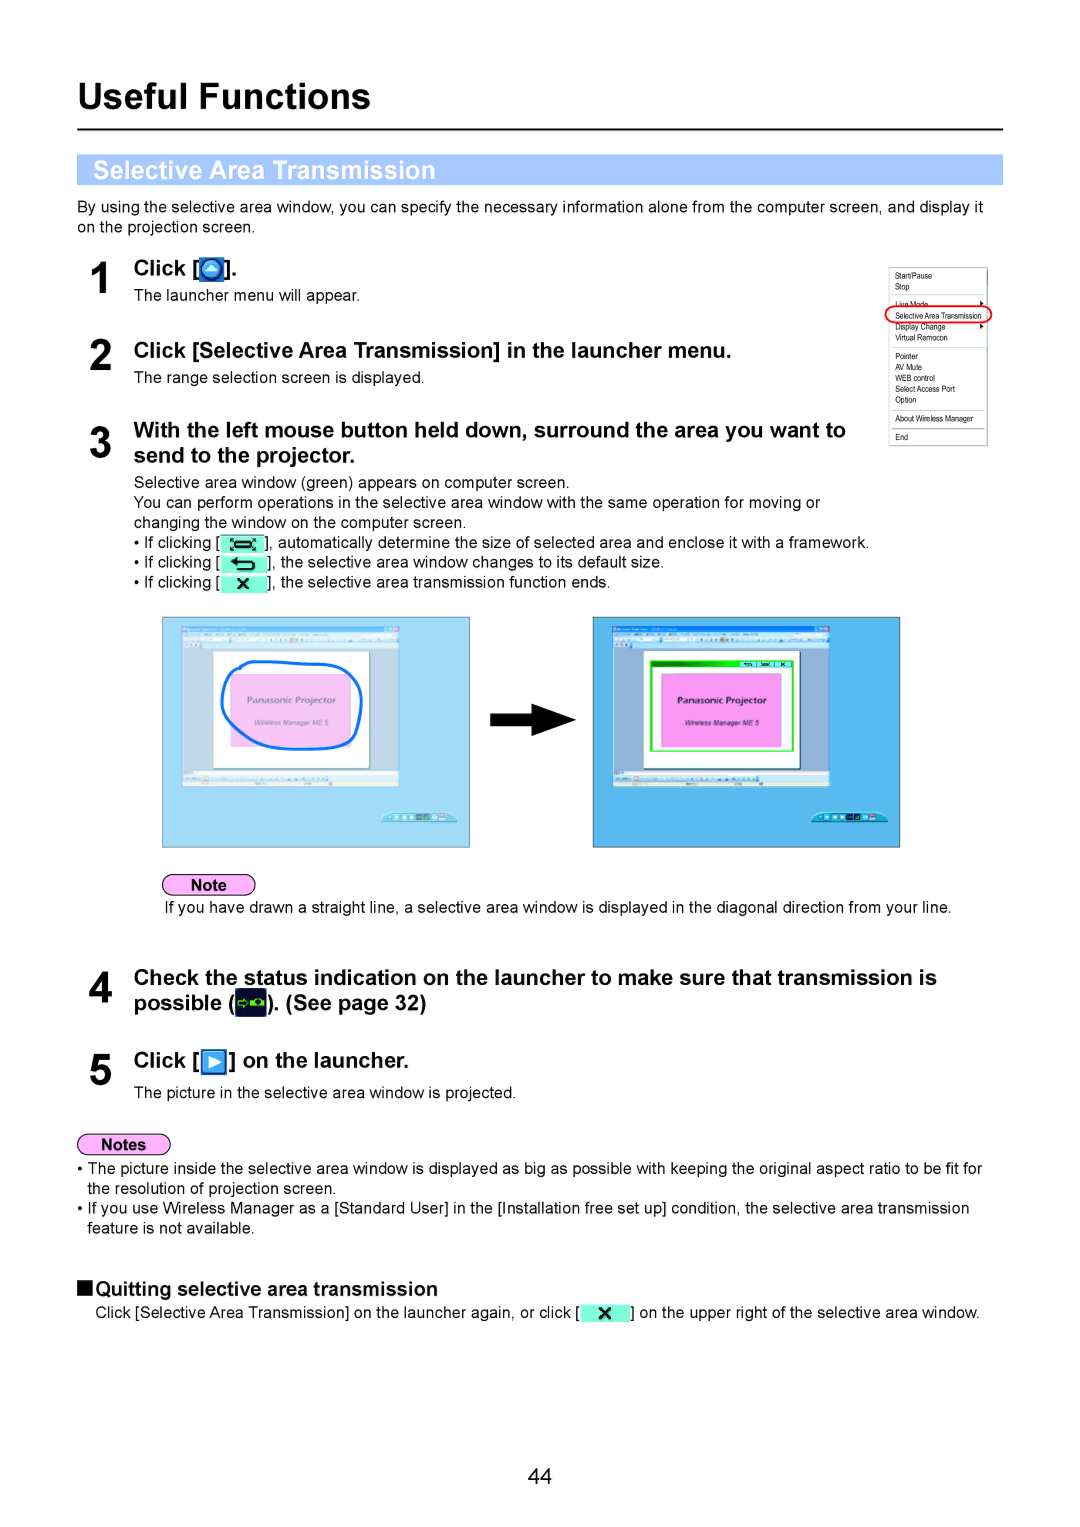
With the left mouse button held down, surround the area you want to send to the projector.
Selective area window (green) appears on computer screen.
You can perform operations in the selective area window with the same operation for moving or changing the window on the computer screen.
•If clicking [![]() ], automatically determine the size of selected area and enclose it with a framework.
], automatically determine the size of selected area and enclose it with a framework.
•If clicking [![]() ], the selective area window changes to its default size.
], the selective area window changes to its default size.
•If clicking [![]() ], the selective area transmission function ends.
], the selective area transmission function ends.
Start/Pause
Stop
Live Mode
Selective Area Transmission
Display Change
Virtual Remocon
Pointer
AV Mute
WEB control
Select Access Port
Option
About Wireless Manager
End
If you have drawn a straight line, a selective area window is displayed in the diagonal direction from your line.
4
5
Check the status indication on the launcher to make sure that transmission is possible (![]() ). (See page 32)
). (See page 32)
Click [ ] on the launcher.
The picture in the selective area window is projected.
•The picture inside the selective area window is displayed as big as possible with keeping the original aspect ratio to be fit for the resolution of projection screen.
•If you use Wireless Manager as a [Standard User] in the [Installation free set up] condition, the selective area transmission feature is not available.
 Quitting selective area transmission
Click [Selective Area Transmission] on the launcher again, or click [![]() ] on the upper right of the selective area window.
] on the upper right of the selective area window.
44